6 DIY Mini Golf Course Backyard Projects You Can Finish in a Weekend
Transform your backyard into a family entertainment paradise without breaking the bank or spending months on construction. These 6 DIY mini golf course backyard projects you can finish in a weekend offer the perfect blend of creativity, functionality, and achievable goals that will have your family putting around custom-designed obstacles before Monday morning arrives.
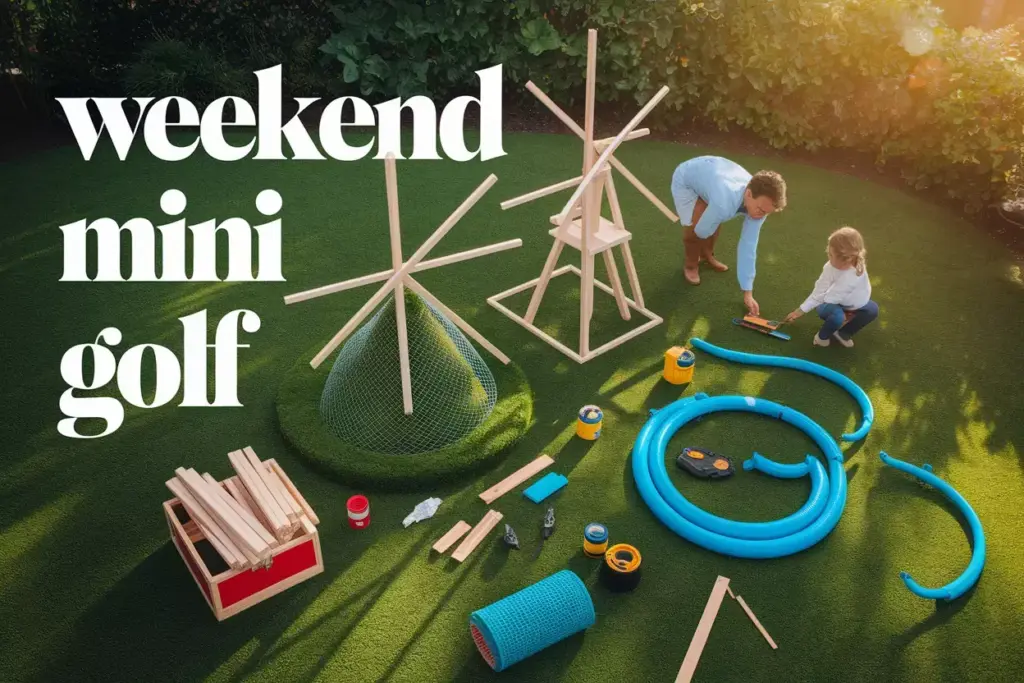
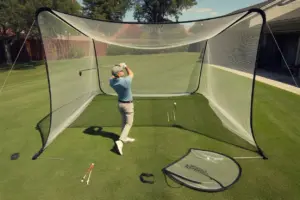
Creating a backyard mini golf course has become one of the most popular weekend DIY projects for families seeking outdoor entertainment options. With rising costs of recreational activities and the desire for safe, at-home fun, these projects deliver maximum enjoyment with minimal time investment. Each project requires basic tools, affordable materials, and straightforward construction techniques that even beginner DIY enthusiasts can master.
Key Takeaways
- Quick completion time: All six projects can be finished within 48 hours using basic tools and readily available materials
- Budget-friendly approach: Most projects cost under $200 and use recycled or inexpensive materials from hardware stores
- Family-friendly construction: Simple designs allow children to participate safely in the building process
- Customizable features: Each project can be modified to match your backyard space and family preferences
- Year-round entertainment: Weather-resistant materials ensure long-lasting enjoyment across all seasons
Planning Your Weekend Mini Golf Adventure
Before diving into these 6 DIY mini golf course backyard projects you can finish in a weekend, proper planning ensures smooth execution and professional results. Start by measuring your available space and sketching a rough layout that incorporates natural landscape features like slopes, trees, or existing hardscaping.
Essential tools needed:
- Circular saw or hand saw
- Drill with various bits
- Level and measuring tape
- Paintbrushes and rollers
- Shovel for ground preparation
- Safety equipment (goggles, gloves)
Common materials across projects:
- Pressure-treated lumber (2x4s and plywood)
- Artificial turf or outdoor carpet
- Exterior paint and primer
- Galvanized screws and bolts
- PVC pipe and fittings
- Landscape fabric and gravel
“The key to successful weekend DIY projects is having all materials and tools ready before starting. Preparation time on Friday evening saves hours of frustration on Saturday morning.” – Home Improvement Expert
Project Categories for Maximum Weekend Success
These six projects fall into two main categories that optimize your weekend construction schedule and skill development.
Quick-Build Obstacles (Saturday Projects)
The first category focuses on simple obstacles that require minimal ground preparation and can be completed in 4-6 hours. These projects build confidence and provide immediate gratification while establishing the foundation for your mini golf course layout.
Benefits of starting with quick-build projects:
- Immediate visual progress maintains motivation
- Simple construction techniques build DIY confidence
- Mistakes are easily corrected without major material loss
- Children can participate safely in most construction steps
Advanced Weekend Builds (Sunday Projects)
The second category tackles more complex obstacles that incorporate multiple materials and require advanced planning. These projects typically take 6-8 hours but create stunning focal points that elevate your entire mini golf course.
Advanced project characteristics:
- Multiple construction phases with drying/setting time
- Integration of water features or mechanical elements
- Custom painting and decorative finishing work
- Professional-grade results that impress neighbors
The Complete Guide to 6 DIY Mini Golf Course Backyard Projects You Can Finish in a Weekend
1. The Classic Windmill Challenge

Construction time: 5-6 hours | Difficulty: Intermediate | Cost: $75-$100
The windmill obstacle represents the quintessential mini golf experience and serves as an excellent centerpiece for your backyard course. This project combines basic carpentry with simple mechanical movement to create an engaging challenge that tests timing and precision.
Materials needed:
- 1 sheet of ¾” exterior plywood
- 2×4 lumber (8 feet)
- Wooden dowel (1-inch diameter, 3 feet long)
- Ball bearings or small wheels
- Exterior paint (red, white, brown)
- Artificial turf strips
Construction steps:
Start by cutting the windmill base from plywood, creating a 24-inch square platform with a circular hole for the golf ball pathway. The windmill structure requires careful measurement to ensure the rotating blades clear the ball path by exactly 2 inches – enough space for skilled shots while maintaining challenge.
Cut four windmill blades from remaining plywood, each measuring 8 inches long and 4 inches wide. Sand all edges smooth to prevent injury during play. The rotating mechanism uses a simple dowel axle supported by ball bearings, allowing smooth rotation from gentle wind or manual spinning.
Paint the windmill in traditional colors: red roof, white walls, and brown base. Apply two coats for weather resistance and vibrant appearance. Install artificial turf on the approach and exit paths, ensuring smooth ball roll without catches or bumps.
Pro tip: Add a small weight to one blade to ensure consistent rotation speed and predictable timing for players.
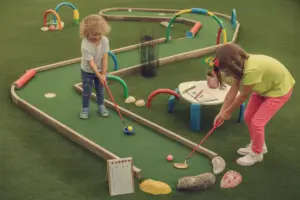
2. The Spiral Mountain Adventure
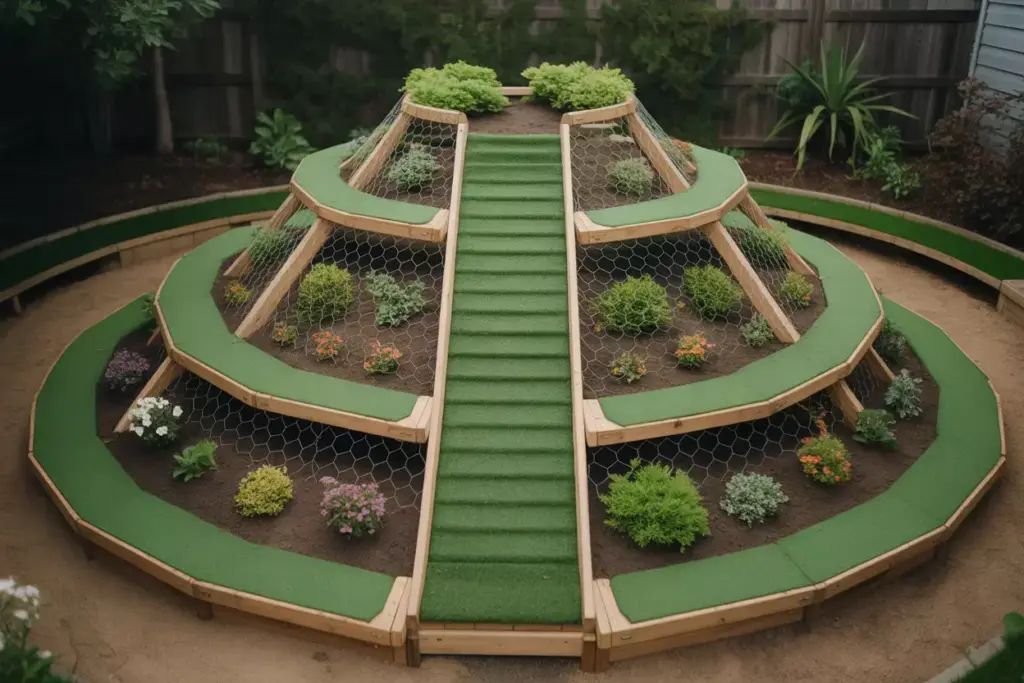
Construction time: 4-5 hours | Difficulty: Beginner | Cost: $60-$80
Create an exciting elevation change that challenges players to navigate a spiraling path around a central mountain structure. This project maximizes visual impact while requiring minimal advanced construction skills.
Materials needed:
- Chicken wire or hardware cloth
- Landscape fabric
- Potting soil and small plants
- 2×6 lumber for base frame
- Artificial turf runner (3 feet wide, 12 feet long)
- Landscape adhesive
Build the mountain framework using chicken wire shaped into a cone approximately 3 feet tall and 4 feet in diameter at the base. Secure the wire to a wooden base frame for stability. Cover with landscape fabric and fill with soil, creating planting pockets for small shrubs or flowers.
The spiral path winds around the mountain at a gentle 10-degree incline, supported by hidden brackets attached to the wire frame. Use landscape adhesive to secure artificial turf along the entire path, ensuring seamless joints that won’t catch golf balls.
Design variations:
- Add LED strip lighting under the turf for evening play
- Include small decorative bridges at two points on the spiral
- Plant aromatic herbs like lavender or mint for sensory appeal
- Install a small flag or weather vane at the mountain peak
3. The Water Hazard Bridge Crossing
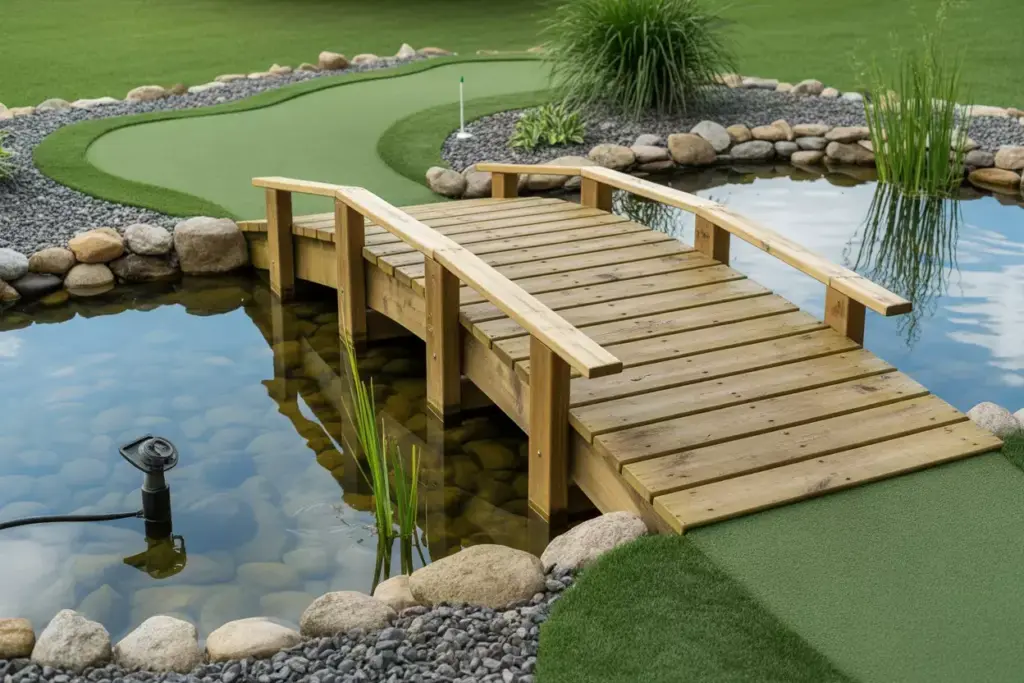
Construction time: 6-7 hours | Difficulty: Advanced | Cost: $120-$150
Transform a simple putting challenge into an exciting water feature that adds both visual appeal and increased difficulty. This project requires basic plumbing skills but delivers professional-grade results.
Materials needed:
- Plastic pond liner or pre-formed pond
- Small submersible pump
- Flexible tubing and fittings
- Pressure-treated lumber for bridge
- Decorative stones and aquatic plants
- GFCI electrical outlet access
Excavate a shallow depression approximately 4 feet long, 2 feet wide, and 8 inches deep. Install the pond liner with proper underlayment to prevent punctures. The water circulation system uses a small pump to create gentle movement, preventing stagnation and adding soothing sounds.
Construct the bridge from pressure-treated lumber, ensuring it spans the water feature with 6 inches of clearance on each side. The bridge surface should be slightly textured to prevent slipping but smooth enough for ball roll. Install handrails for safety and aesthetic appeal.
Safety considerations:
- All electrical connections must use GFCI protection
- Bridge railings should be 36 inches high minimum
- Non-slip surface treatment on bridge deck
- Shallow water depth (under 6 inches) for safety
4. The Loop-the-Loop Tube Run
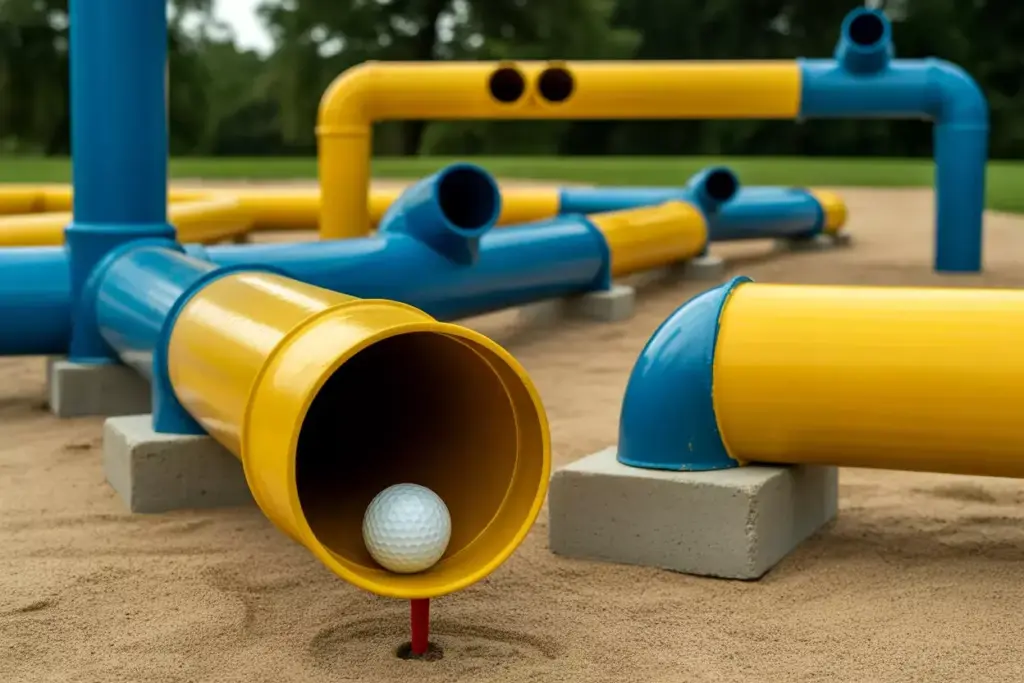
Construction time: 3-4 hours | Difficulty: Beginner | Cost: $45-$65
Create an exciting enclosed tunnel system that challenges players to judge force and direction while navigating through curved pathways. This project uses readily available PVC materials and requires minimal cutting or assembly.
Materials needed:
- 6-inch diameter PVC pipe (10 feet total)
- PVC elbows and connectors
- Spray paint (bright colors)
- Concrete blocks for support
- Sand for base leveling
Design the tube system with gentle curves that maintain ball momentum without causing jams. The entrance should be wide and clearly marked, while the exit provides a surprise element by emerging from an unexpected direction.
Cut viewing windows in the top of the tubes using a jigsaw, allowing players to track ball progress and adding visual interest. Sand all cut edges smooth and paint the entire system in bright, attractive colors that complement your backyard aesthetic.
Enhancement options:
- Add battery-powered LED strips inside tubes for nighttime play
- Include multiple exit options for variable difficulty
- Create sound effects using small bells or chimes
- Install clear acrylic windows for better ball tracking
5. The Castle Fortress Challenge
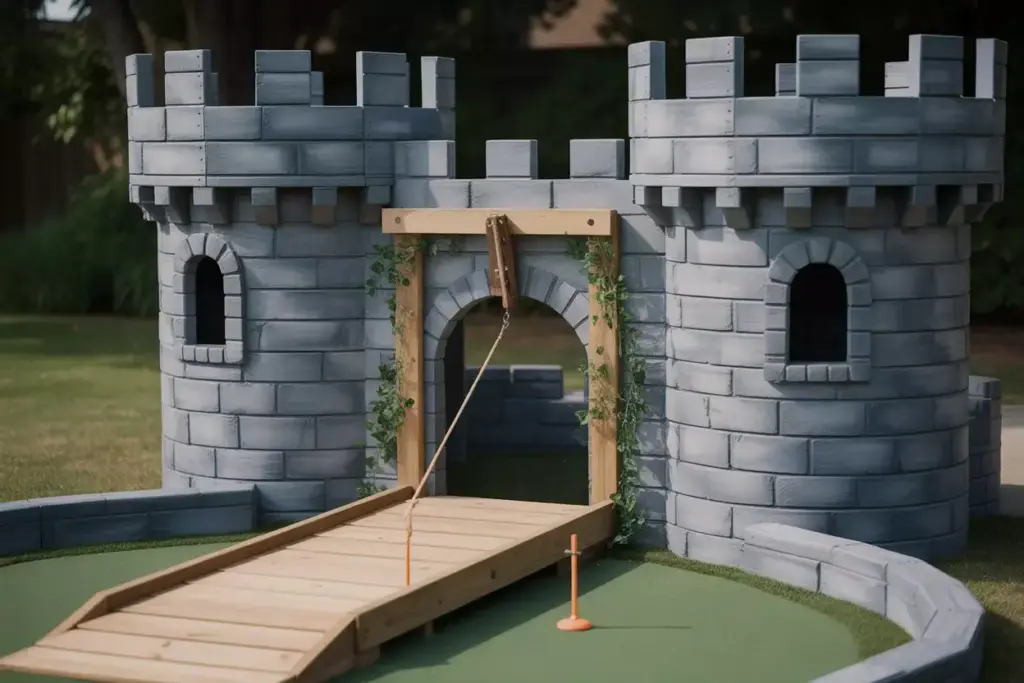
Construction time: 7-8 hours | Difficulty: Advanced | Cost: $100-$140
Build an impressive medieval-themed obstacle that combines multiple challenges including drawbridge timing, tower navigation, and precision putting. This project serves as a stunning centerpiece while providing complex gameplay.
Materials needed:
- Exterior plywood sheets
- 2×4 framing lumber
- Hinges and pulleys for drawbridge
- Stone-texture spray paint
- Artificial ivy or decorative elements
- Small motor for automated drawbridge (optional)
Construct the castle walls using a frame-and-panel system that provides stability while minimizing weight. The main structure should measure approximately 4 feet wide, 3 feet deep, and 4 feet tall at the highest tower. Cut crenellations along the top edges for authentic castle appearance.
The drawbridge mechanism uses simple hinges and a counterweight system that creates timed opening and closing cycles. Players must time their shots to coincide with bridge position, adding skill and excitement to each attempt.
Decorative details:
- Paint stone texture using sponge techniques and multiple gray tones
- Add artificial ivy or moss for aged appearance
- Install small flags or banners on towers
- Include LED spotlights for dramatic evening illumination
6. The Putting Green Finale
Construction time: 5-6 hours | Difficulty: Intermediate | Cost: $90-$120
Complete your mini golf course with a professional-quality putting green that incorporates multiple hole positions and challenging contours. This project requires attention to detail but provides the most authentic golf experience.
Materials needed:
- High-quality artificial turf (putting green grade)
- Sand and rubber infill
- Landscape edging materials
- Multiple cup installations
- Compactable base material
- Turf adhesive and seaming tape
Prepare the base by excavating 4 inches deep and installing a compactable gravel base. The surface must be perfectly level with gentle contours that create interesting ball movement without frustrating difficulty.
Install the artificial turf using professional techniques including proper seaming, adequate infill, and secure edge attachment. Multiple hole positions allow for varied gameplay and accommodate different skill levels.
Professional finishing touches:
- Install proper drainage to prevent water accumulation
- Add sand infill for authentic ball roll characteristics
- Include tee markers for different difficulty levels
- Create maintenance schedule for optimal playing conditions
Essential Weekend Timeline for Project Success
Friday Evening Preparation (2-3 hours):
- Gather all tools and materials
- Prepare work area and lay out projects
- Review construction plans and safety procedures
- Set up adequate lighting for early morning start
Saturday Construction Schedule:
- 8:00 AM – 12:00 PM: Complete projects 1-3 (quick builds)
- 12:00 PM – 1:00 PM: Lunch break and progress assessment
- 1:00 PM – 5:00 PM: Begin advanced projects 4-6
- 5:00 PM – 6:00 PM: Cleanup and preparation for Sunday
Sunday Completion Schedule:
- 9:00 AM – 12:00 PM: Finish advanced construction
- 12:00 PM – 2:00 PM: Painting and detail work
- 2:00 PM – 4:00 PM: Installation and course layout
- 4:00 PM – 5:00 PM: Final testing and adjustments
Maintenance and Longevity Tips
Protecting your investment in these 6 DIY mini golf course backyard projects you can finish in a weekend requires minimal but consistent maintenance throughout the year.
Monthly maintenance tasks:
- Clean artificial turf with leaf blower or vacuum
- Check all moving parts for smooth operation
- Touch up paint on high-wear areas
- Trim vegetation around obstacles
- Test water feature pumps and electrical connections
Seasonal preparation:
- Spring: Deep clean all surfaces and check winter damage
- Summer: Monitor for UV damage and apply protective coatings
- Fall: Remove leaves and debris, prepare for winter storage
- Winter: Protect sensitive components and drain water features
Long-term durability factors:
- Use marine-grade hardware in high-moisture areas
- Apply UV-resistant finishes to painted surfaces
- Install drainage around obstacles prone to water collection
- Store removable components during extreme weather
Cost-Saving Strategies and Material Alternatives
Building these projects on a budget requires creative sourcing and smart material substitutions that maintain quality while reducing expenses.
Money-saving approaches:
- Reclaimed materials: Use pallets, old fencing, or construction scraps
- Bulk purchasing: Coordinate with neighbors for material sharing
- Seasonal sales: Buy materials during off-season clearance events
- Tool borrowing: Arrange tool sharing with friends and neighbors
Alternative material options:
| Standard Material | Budget Alternative | Cost Savings |
|---|---|---|
| Artificial turf | Outdoor carpet remnants | 40-60% |
| Pressure-treated lumber | Cedar fence pickets | 30-50% |
| Professional paint | Exterior primer + colorant | 25-35% |
| PVC fittings | Flexible drainage pipe | 20-40% |
| Decorative stones | Local river rock | 50-70% |
Safety Considerations for Family-Friendly Construction
Ensuring safe construction and play requires attention to potential hazards and implementation of appropriate safety measures throughout the building process.
Construction safety priorities:
- Always wear safety glasses when cutting or drilling
- Use hearing protection with power tools
- Ensure adequate ventilation when painting
- Keep children away from active construction zones
- Maintain organized work area to prevent trips and falls
Ongoing play safety features:
- Round all sharp edges and corners
- Secure all loose components that could shift during play
- Maintain clear sight lines between obstacles
- Install adequate lighting for evening play
- Post simple rules and safety guidelines
Child-specific safety measures:
- Use non-toxic materials and finishes throughout
- Ensure all obstacles are stable and tip-resistant
- Eliminate pinch points in moving mechanisms
- Provide safe observation areas for younger children
- Include emergency contact information in play area
Conclusion
These 6 DIY mini golf course backyard projects you can finish in a weekend offer families an affordable path to creating lasting memories while adding significant value to outdoor living spaces. Each project balances achievable construction goals with engaging gameplay, ensuring success for builders of all skill levels.
The combination of quick-build obstacles and advanced weekend projects provides flexibility in scheduling and budget allocation. Families can start with simpler projects to build confidence and skills, then tackle more complex builds as experience grows. The modular nature of mini golf course design allows for future expansion and modification based on changing family needs and interests.
Immediate next steps:
- Assess your space: Measure available area and identify optimal locations for each obstacle
- Set your budget: Determine total investment and prioritize projects based on available funds
- Gather materials: Create shopping lists and source materials from local suppliers
- Schedule construction: Block out weekend time and arrange for helper assistance
- Plan the layout: Sketch your course design and establish logical playing sequence
The investment in time and materials for these projects pays dividends through years of family entertainment, increased property value, and the satisfaction of creating something unique and personal. Start planning your weekend mini golf adventure today, and transform your backyard into the neighborhood’s premier family entertainment destination.