7 Essential Things to Look For on Any Golf Course Map Before You Tee Off
Picture this: You’re standing on the first tee of an unfamiliar golf course, driver in hand, staring down a fairway that seems to disappear into the unknown. Without proper preparation, that opening shot could send your ball—and your scorecard—into disaster. The difference between a successful round and a frustrating day often comes down to one crucial step that many golfers skip: thoroughly studying the course map before taking that first swing.
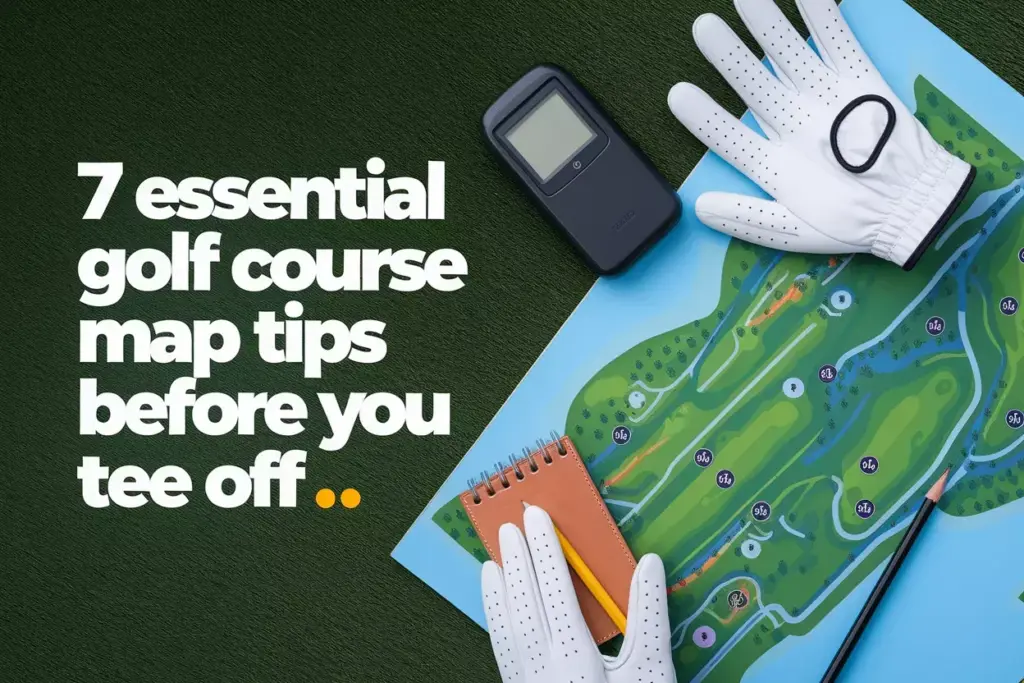
Understanding the 7 Essential Things to Look For on Any Golf Course Map Before You Tee Off can transform your approach to any course, whether you’re playing your home track for the hundredth time or tackling a championship layout for the first. Smart golfers know that course management begins long before stepping onto the tee box, and the course map serves as your strategic blueprint for navigating 18 holes of challenges, opportunities, and potential pitfalls.
Key Takeaways
- Yardage and distance markers help you select the right clubs and plan your approach shots for optimal scoring opportunities
- Hazard locations and out-of-bounds areas prevent costly penalty strokes by showing you where trouble lurks on each hole
- Green complexes and pin positions reveal the best angles of attack and safe landing areas for approach shots
- Elevation changes and terrain features impact club selection and shot strategy more than most golfers realize
- Course facilities and amenities ensure you know where to find restrooms, food, and practice areas throughout your round
1. Yardage Markers and Distance Information
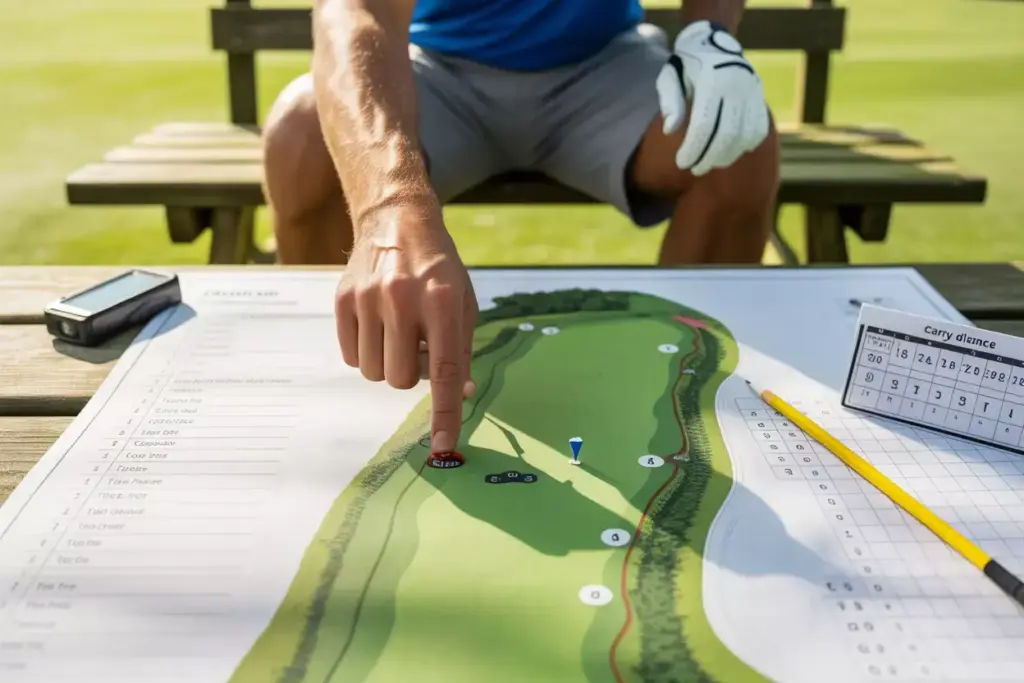
The foundation of any successful golf strategy starts with accurate distance information. Modern golf course maps provide detailed yardage data that extends far beyond the basic tee-to-pin measurements displayed on most scorecards.
Understanding Multiple Tee Options
Most courses offer three to five different tee positions for each hole, typically color-coded as:
- Black/Gold tees: Championship length (6,800-7,500+ yards total)
- Blue tees: Men’s regular play (6,200-6,800 yards total)
- White tees: Senior/shorter length (5,800-6,200 yards total)
- Red tees: Forward/ladies tees (5,000-5,800 yards total)
- Green/Silver tees: Beginner-friendly (4,500-5,500 yards total)
Pro Tip: Choose tees based on your average driving distance, not your ego. A good rule of thumb is selecting tees where the total yardage equals 36 times your average 5-iron distance [1].
Key Distance Measurements to Note
When examining course maps, focus on these critical yardage markers:
- Tee to hazard carry distances – Shows how far you need to hit to clear water, bunkers, or ravines
- Layup yardages – Identifies safe landing areas short of trouble
- Approach shot distances – Reveals typical yardages left for second shots on par 4s and third shots on par 5s
- Green depth measurements – Helps with pin-seeking approach shots
Strategic Yardage Planning
Smart golfers use distance information for backward planning. Start with your target (the pin) and work backward to determine:
- Ideal approach shot distance based on your most confident clubs
- Optimal driving distance to leave that approach yardage
- Whether to play aggressively or conservatively based on your skill level
“Course management is about playing within your capabilities while maximizing scoring opportunities. The yardage book is your roadmap to lower scores.” – Golf Course Architect Pete Dye
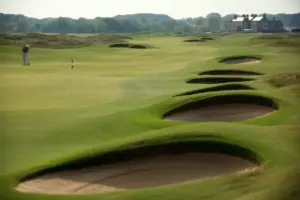
2. Hazard Locations and Penalty Areas
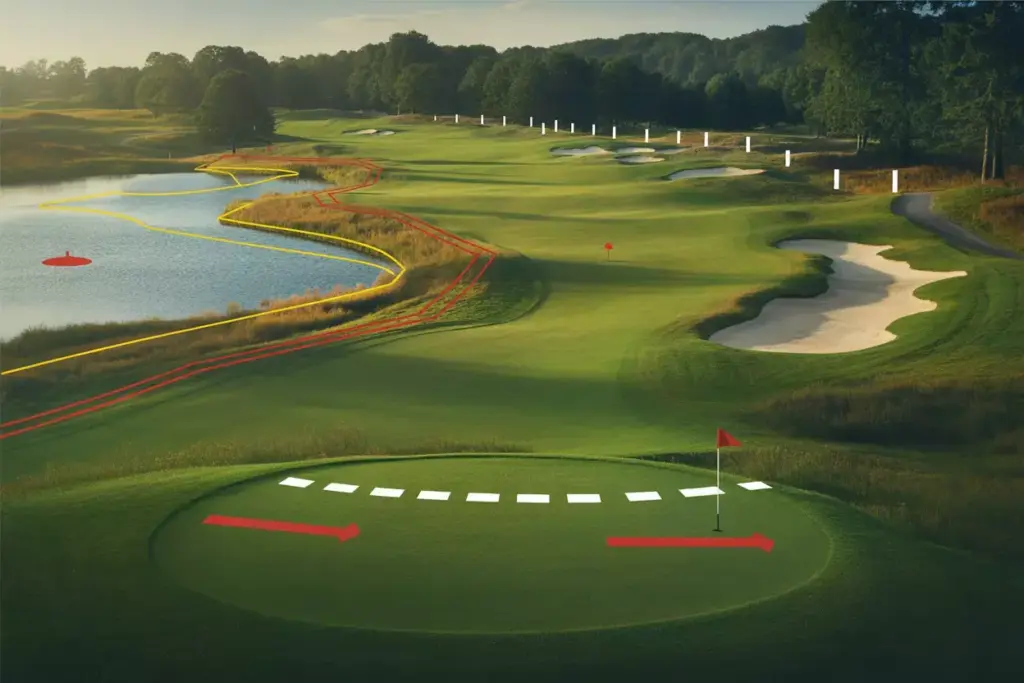
Understanding where trouble lurks represents one of the most crucial aspects of the 7 Essential Things to Look For on Any Golf Course Map Before You Tee Off. Modern course maps use standardized symbols and color coding to help golfers identify and avoid costly penalty situations.
Water Hazards and Penalty Areas
Water features pose the most obvious threats on golf courses, but their strategic impact varies significantly based on placement and hole design:
| Hazard Type | Map Symbol | Penalty | Strategic Consideration |
|---|---|---|---|
| Lateral Water Hazard | Red lines/stakes | 1-stroke penalty | Drop within two club lengths |
| Regular Water Hazard | Yellow lines/stakes | 1-stroke penalty | Drop behind hazard on line |
| Penalty Areas | Red/Yellow shading | 1-stroke penalty | Multiple relief options |
Bunker Complexes and Sand Traps
Sand bunkers serve both strategic and aesthetic purposes in golf course design. Course maps typically show:
- Fairway bunkers: Positioned to catch errant drives or create strategic decisions
- Greenside bunkers: Protect pin positions and require precise approach shots
- Waste areas: Large sandy regions that may or may not allow grounding your club
Out-of-Bounds Markers
White stakes or fences indicate out-of-bounds areas, which carry the harshest penalty in golf: stroke and distance. Common OB locations include:
- Property boundaries adjacent to roads or houses
- Driving ranges or practice facilities
- Other holes on the course
- Environmental protection areas
Reading Hazard Strategy
Effective hazard management involves:
- Identifying carry distances to clear trouble areas
- Locating safe bailout areas for conservative play
- Understanding risk-reward ratios for aggressive shots
- Planning multiple shot options based on conditions and confidence level
3. Green Complexes and Pin Position Areas
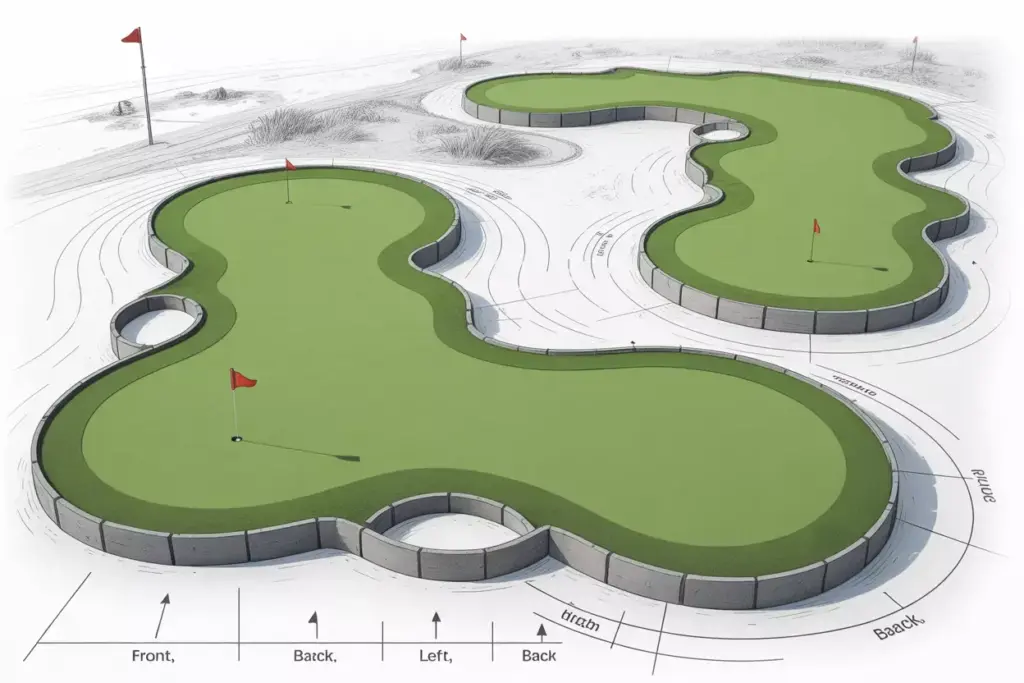
The green complex represents the ultimate target for every hole, and understanding its characteristics can dramatically improve your approach shot strategy and putting performance. Course maps reveal crucial details about green size, shape, slope, and surrounding features that influence club selection and shot placement.
Green Size and Shape Variations
Golf course greens vary dramatically in size and configuration:
- Small greens (2,500-4,000 sq ft): Require precise approach shots and premium on accuracy
- Medium greens (4,000-6,500 sq ft): Offer moderate target areas with varied pin positions
- Large greens (6,500+ sq ft): Provide bigger targets but create longer putts and complex reads
Understanding Pin Position Zones
Most course maps divide greens into pin position areas or quadrants:
- Front pins: Require higher, softer approach shots; often protected by bunkers
- Back pins: Allow for running approach shots; may have slope challenges
- Left/Right pins: Create angle considerations and strategic positioning needs
- Center pins: Offer the safest targets with multiple approach angles
Green Slope and Drainage Patterns
Elevation changes around greens significantly impact:
- Ball roll and bounce on approach shots
- Putting speed and break once on the green surface
- Chip and pitch shot options from around the green
- Recovery shot difficulty from greenside rough or hazards
Approach Shot Strategy Planning
Effective green complex analysis helps determine:
- Optimal approach angles for different pin positions
- Safe miss areas that avoid hazards and difficult recovery shots
- Club selection adjustments for elevation changes and green firmness
- Putting strategy based on green slope and size
“The green is where you make your score. Understanding its personality before you arrive gives you a huge advantage in club selection and shot planning.” – PGA Tour Professional Jason Day
4. Elevation Changes and Terrain Features
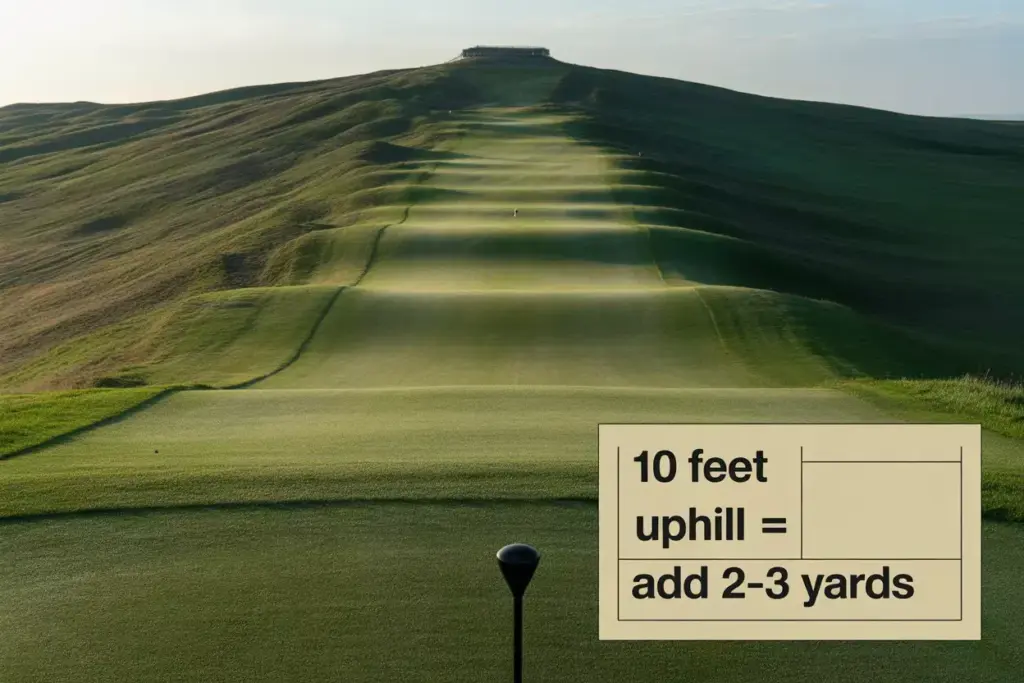
Topographical information represents one of the most underutilized aspects of course maps, yet elevation changes can dramatically affect club selection, ball flight, and shot strategy. Understanding the terrain helps golfers make better decisions and avoid common mistakes caused by elevation misjudgments.
Reading Elevation Indicators
Modern course maps use several methods to show elevation changes:
- Contour lines: Show gradual elevation changes across the landscape
- Elevation numbers: Provide specific height measurements at key points
- Directional arrows: Indicate uphill/downhill slopes on fairways and greens
- Color gradients: Use shading to represent elevation differences
Impact on Club Selection
Elevation changes require significant adjustments to club selection:
| Elevation Change | Distance Adjustment | Club Modification |
|---|---|---|
| 10 feet uphill | Add 2-3 yards | Take one club more |
| 10 feet downhill | Subtract 2-3 yards | Take one club less |
| 30+ feet uphill | Add 8-12 yards | Take 1-2 clubs more |
| 30+ feet downhill | Subtract 8-12 yards | Take 1-2 clubs less |
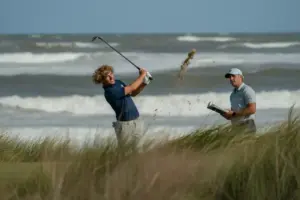
Wind and Weather Considerations
Elevated tees and greens create additional challenges:
- Increased wind exposure on elevated areas
- Temperature variations affecting ball flight
- Drainage patterns influencing course conditions
- Visibility challenges in certain weather conditions
Strategic Elevation Planning
Smart golfers use elevation information to:
- Adjust yardages for uphill and downhill shots
- Plan layup positions considering elevation changes
- Select appropriate ball flight (high vs. low) for conditions
- Anticipate green reception based on approach shot angle
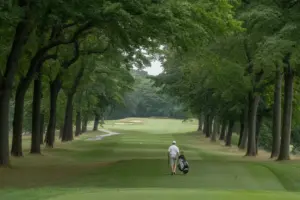
5. Cart Paths and Course Navigation
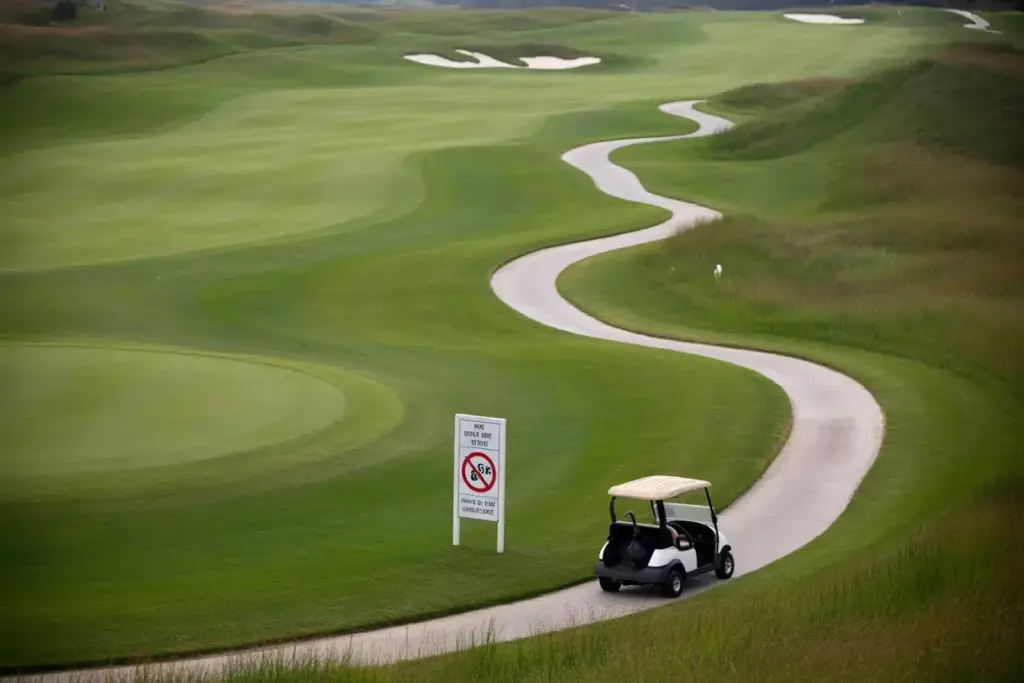
Efficient course navigation might seem like a minor consideration, but understanding cart path layouts, walking routes, and course flow can significantly impact your pace of play, energy management, and overall enjoyment of the round.
Cart Path Systems and Rules
Most golf courses employ one of several cart path systems:
- Cart path only: Carts must stay on designated paths at all times
- 90-degree rule: Drive to your ball, then return to path at 90-degree angle
- Fairway driving allowed: Carts permitted on fairways under normal conditions
- Seasonal restrictions: Rules change based on weather and course conditions
Strategic Path Planning
Understanding cart path layouts helps with:
- Equipment preparation: Carrying multiple clubs for longer walks to balls
- Time management: Planning efficient routes between shots
- Energy conservation: Minimizing unnecessary walking on longer courses
- Group coordination: Keeping pace with playing partners
Walking Route Optimization
For golfers who prefer walking, course maps reveal:
- Shortest routes between greens and next tees
- Elevation challenges that might affect walking difficulty
- Rest areas and facilities strategically placed around the course
- Scenic routes for enhanced course enjoyment
6. Course Facilities and Amenities
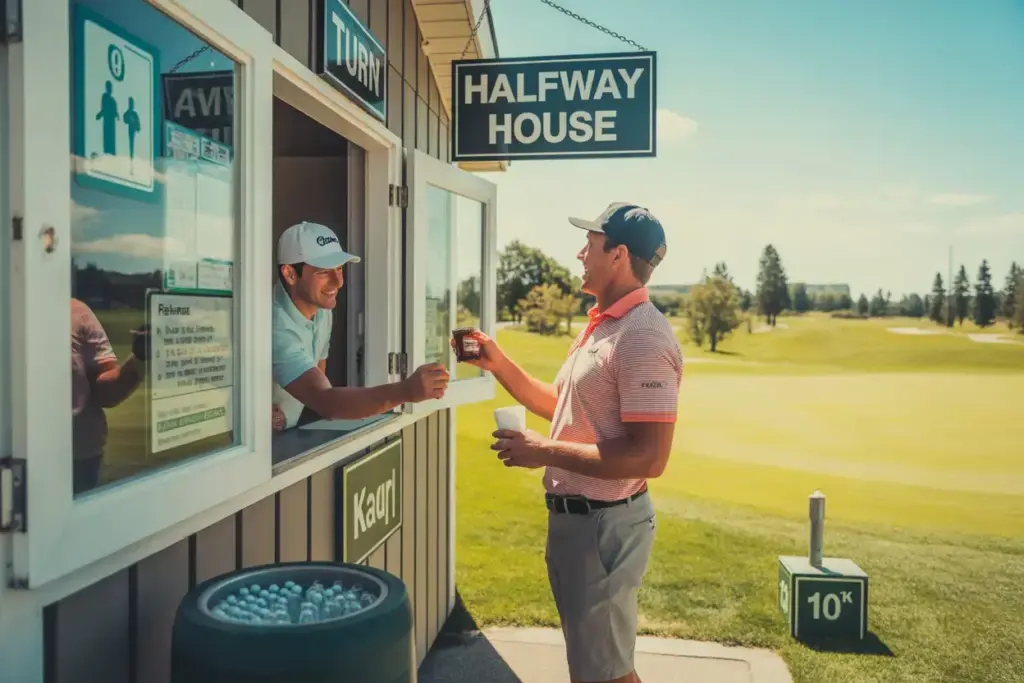
Understanding facility locations ensures you can maintain comfort, energy, and focus throughout your round. Course maps typically indicate essential amenities that can make or break your golf experience.
Essential Facility Locations
Key facilities to locate on course maps include:
Restroom Facilities
- Clubhouse restrooms (holes 1, 9, 18)
- On-course restrooms (typically holes 6, 12, 15)
- Portable facilities on remote holes
Food and Beverage Options
- Halfway house or turn facility (between 9th green and 10th tee)
- Beverage cart meeting points
- Vending machines or snack stations
Practice Facilities
- Driving range location and access points
- Putting green proximity to first tee
- Short game practice areas
- Warm-up facility recommendations
Maintenance and Service Areas
Course maps also show:
- Equipment repair stations for cart issues or club problems
- Ball washers and towels at each tee box
- Yardage markers and course information boards
- Emergency contact points for medical or safety issues
7. Weather and Seasonal Considerations
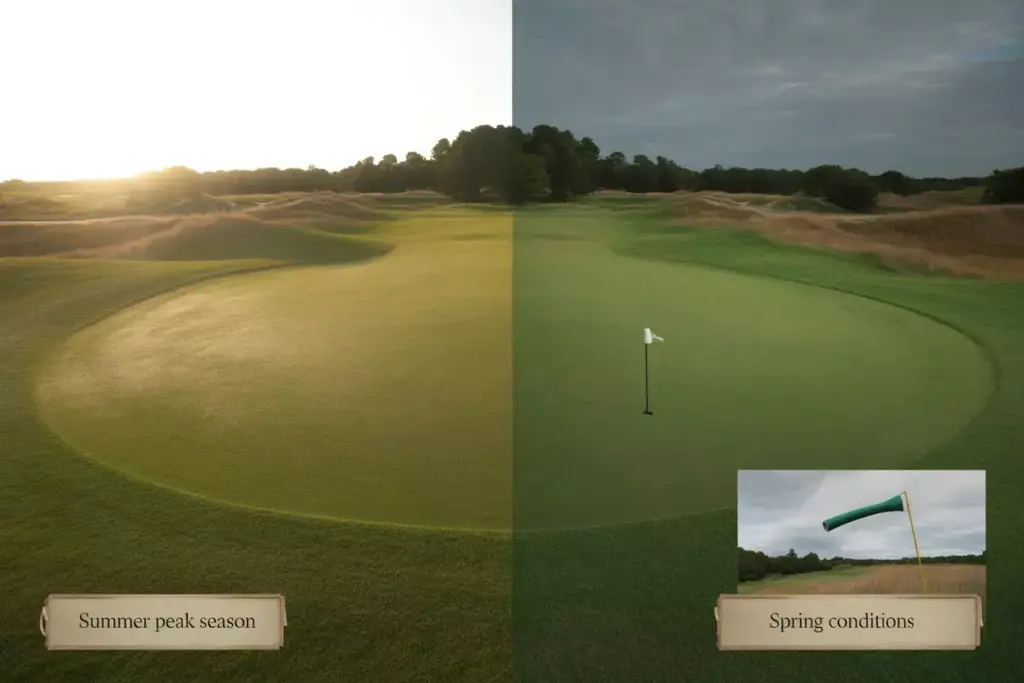
The final element among the 7 Essential Things to Look For on Any Golf Course Map Before You Tee Off involves understanding how seasonal changes and weather patterns affect course conditions, strategy, and playability.
Seasonal Course Variations
Golf courses change dramatically throughout the year:
Spring Conditions
- Softer ground conditions requiring less roll calculation
- Potential cart path restrictions due to wet conditions
- Variable green speeds as grass emerges from dormancy
- Possible temporary greens or tees under renovation
Summer Peak Season
- Firmer, faster conditions requiring roll considerations
- Potential drought stress affecting ball lies
- Peak green speeds and course difficulty
- Maximum yardage potential due to firm conditions
Fall Transition
- Changing green speeds as growth slows
- Leaf accumulation affecting ball search and play
- Variable weather requiring flexible clothing options
- Potential aeration recovery areas
Winter Play (where applicable)
- Temporary greens and modified hole layouts
- Preferred lies or winter rules in effect
- Reduced course yardage due to soft conditions
- Limited facility access and services
Weather-Specific Map Reading
Course maps help identify:
- Drainage patterns that affect play after rain
- Wind-exposed areas requiring club selection adjustments
- Sun/shade patterns that influence green reading
- Shelter locations for weather protection
Advanced Map Reading Strategies
Beyond the basic 7 Essential Things to Look For on Any Golf Course Map Before You Tee Off, experienced golfers develop sophisticated map reading skills that provide competitive advantages and enhanced course management.
Course Architecture Understanding
Golf course architects design holes with specific strategic concepts:
- Risk-reward opportunities: Holes offering aggressive lines for shorter approaches
- Strategic positioning: Tee shots that set up optimal approach angles
- Defense mechanisms: Features that penalize poor execution or course management
- Recovery options: Bailout areas and miss-friendly zones for conservative play
Scoring Zone Identification
Smart golfers identify scoring opportunities through map analysis:
- Birdie holes: Shorter par 4s and reachable par 5s
- Bogey avoidance holes: Difficult holes where par represents success
- Risk management holes: Where conservative play prevents big numbers
- Momentum holes: Strategic points in the round for aggressive or conservative approaches
Pin Position Strategy
Advanced players use course maps to develop pin-specific strategies:
- Front pin approaches: High, soft shots that stop quickly
- Back pin strategies: Running shots or high draws that release to back positions
- Tucked pin management: Conservative approaches to center of green when pins are tight to hazards
- Sucker pin recognition: Identifying when to ignore difficult pin positions
Technology Integration and Modern Course Maps
Digital course mapping has revolutionized how golfers access and utilize course information, providing real-time data and interactive features that enhance strategic planning and course management.
GPS and Rangefinder Integration
Modern technology enhances traditional course maps through:
- Real-time yardages to pins, hazards, and targets
- Elevation-adjusted distances for accurate club selection
- Shot tracking and statistics for post-round analysis
- Course condition updates reflecting current pin positions and hazards
Mobile App Features
Golf course apps provide enhanced mapping capabilities:
- Interactive hole flyovers showing 3D course visualization
- Personalized yardage books based on individual club distances
- Weather integration affecting distance and strategy calculations
- Social features for sharing course experiences and tips
Data-Driven Course Management
Statistical analysis helps golfers make better strategic decisions:
- Historical scoring data for each hole and pin position
- Personal performance tracking identifying strengths and weaknesses
- Optimal strategy recommendations based on skill level and conditions
- Pace of play monitoring ensuring efficient course navigation
Common Course Map Reading Mistakes
Even experienced golfers make critical errors when interpreting course maps, leading to poor strategic decisions and higher scores.
Distance Misjudgments
Yardage errors represent the most common mapping mistakes:
- Ignoring elevation changes in distance calculations
- Misreading tee markers or using wrong tee yardages
- Failing to account for pin position variations
- Overlooking wind and weather impacts on effective distances
Hazard Underestimation
Risk assessment failures often result from:
- Underestimating carry distances to clear hazards
- Ignoring lateral hazard penalty options
- Misunderstanding out-of-bounds boundaries
- Overconfidence in recovery shot abilities
Green Complex Misreading
Approach shot errors frequently stem from:
- Misjudging green size and pin accessibility
- Ignoring slope and drainage around greens
- Failing to identify safe miss areas
- Underestimating putting difficulty on large greens
Conclusion
Mastering the 7 Essential Things to Look For on Any Golf Course Map Before You Tee Off provides the foundation for improved course management, lower scores, and greater enjoyment of the game. From understanding yardage markers and hazard locations to recognizing elevation changes and facility locations, comprehensive map reading transforms your approach to every round.
The most successful golfers treat course maps as strategic blueprints rather than simple reference materials. They invest time before their rounds studying hole layouts, identifying scoring opportunities, and developing game plans that match their skills with course demands.
Take Action Today:
- Arrive 15-20 minutes early for your next round to thoroughly study the course map
- Download the course app or request a detailed yardage book from the pro shop
- Practice map reading skills on your home course to develop pattern recognition
- Keep notes about course conditions and strategies for future rounds
- Share insights with playing partners to enhance group course management
Remember that golf course maps are living documents that change with pin positions, weather conditions, and seasonal variations. The golfers who consistently shoot lower scores are those who adapt their map reading skills to current conditions while maintaining a strategic approach to every hole.
By implementing these mapping strategies, golfers at every skill level can make more informed decisions, avoid costly mistakes, and unlock their scoring potential on any course they encounter. The investment in map reading skills pays dividends in stroke savings, reduced frustration, and increased confidence throughout every round.
References
[1] United States Golf Association. “Tee It Forward Guidelines.” USGA.org, 2025.