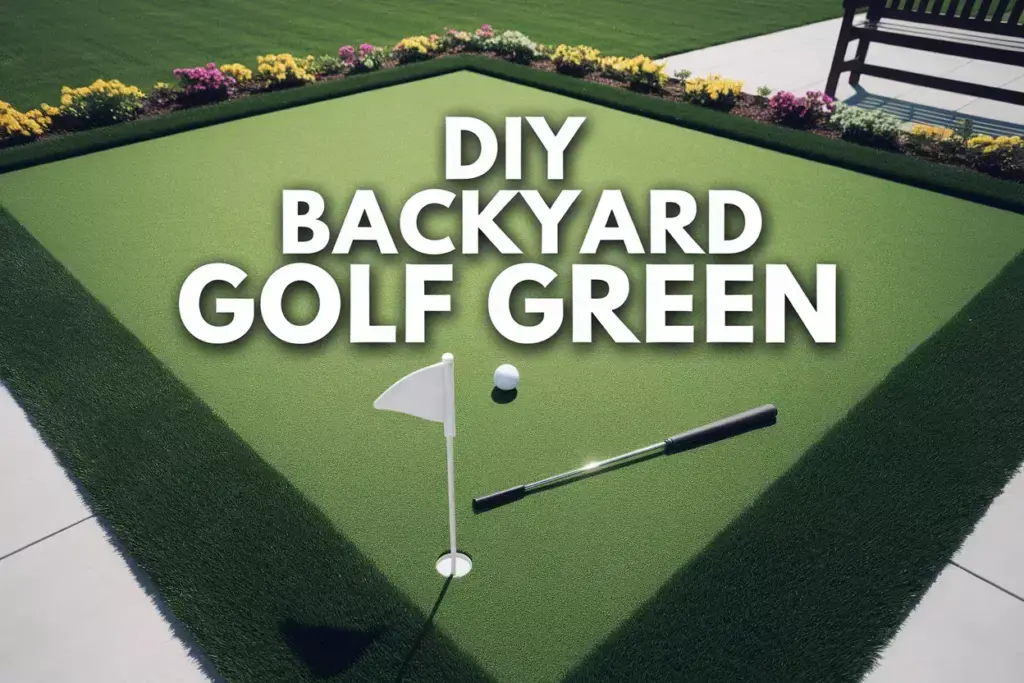
How to Build a Backyard Golf Green: A 6-Step DIY Guide for Beginners
Imagine stepping out your back door and onto your very own professional-quality putting green, where you can practice your short game any time of day without leaving home. Building a backyard golf green has become one of the most popular home improvement projects among golf enthusiasts, and with good reason. This comprehensive guide on how to build a backyard golf green: a 6-step DIY guide for beginners will transform your outdoor space into a golfer’s paradise while adding significant value to your property.
Whether you’re a weekend warrior looking to improve your putting skills or a serious golfer wanting convenient practice space, creating your own backyard putting green is more achievable than you might think. With the right materials, proper planning, and step-by-step guidance, you can construct a professional-grade putting surface that rivals those found at exclusive country clubs.
Key Takeaways
- Planning and preparation are crucial – proper site selection, drainage considerations, and accurate measurements determine your project’s success
- Quality materials matter – investing in professional-grade synthetic turf, infill materials, and proper base preparation ensures longevity and performance
- Drainage is essential – poor drainage will ruin your putting green, making proper grading and drainage installation non-negotiable
- Professional tools aren’t required – most installation can be completed with basic DIY tools and rental equipment
- Maintenance is minimal – artificial putting greens require significantly less upkeep than natural grass alternatives
Understanding the Basics: How to Build a Backyard Golf Green Successfully
Before diving into the construction process, understanding the fundamental components of a quality putting green is essential. Artificial putting greens consist of several layers working together to create an authentic playing surface that mimics professional golf courses.
The foundation starts with proper base preparation, typically involving excavation, grading, and installation of a stable aggregate base. Above this sits a shock-absorbing layer, followed by the synthetic turf specifically designed for golf applications. Finally, specialized infill materials provide ball roll characteristics and surface stability.
Essential Components of a Quality Putting Green
Base Layer Materials:
- Crushed stone or decomposed granite (2-4 inches)
- Class II road base or similar aggregate
- Geotextile fabric for weed prevention
- Proper drainage systems
Surface Materials:
- High-quality synthetic putting green turf
- Silica sand infill
- Rubber granules (optional for cushioning)
- Adhesive and seaming materials
Tools and Equipment:
- Excavation tools (shovel, mattock, mini excavator)
- Compaction equipment (plate compactor)
- Measuring and leveling tools
- Turf installation tools (utility knife, seaming iron)
The key to success lies in understanding that each layer serves a specific purpose. The base provides stability and drainage, while the surface materials create the playing characteristics that make your green enjoyable and realistic.
Step-by-Step Construction: How to Build a Backyard Golf Green That Lasts
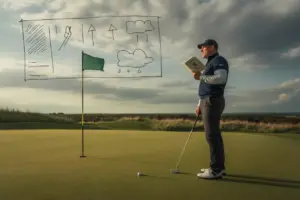
1. Site Selection and Design Planning
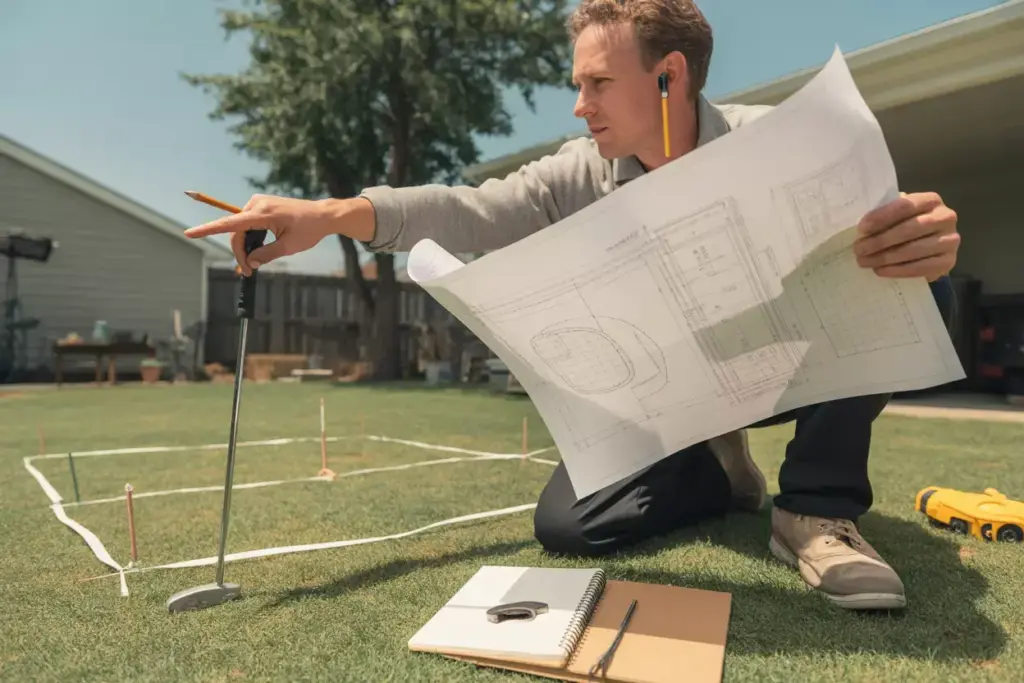
Choosing the perfect location for your putting green requires careful consideration of multiple factors. The ideal site should receive adequate sunlight, have good natural drainage, and be easily accessible from your home. Avoid low-lying areas where water naturally collects, as these will create ongoing drainage problems.
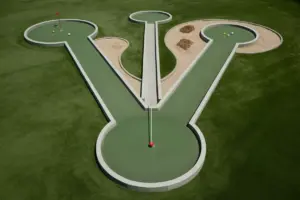
Design considerations include determining the size and shape of your green. Beginners should start with a modest size (200-400 square feet) to keep costs manageable while gaining construction experience. Consider incorporating multiple pin positions and varying slopes to create interesting practice scenarios.
Professional tip: 🏌️ Create a scaled drawing of your design, including measurements and noting any obstacles like trees, utilities, or property lines that might affect construction.
2. Excavation and Site Preparation
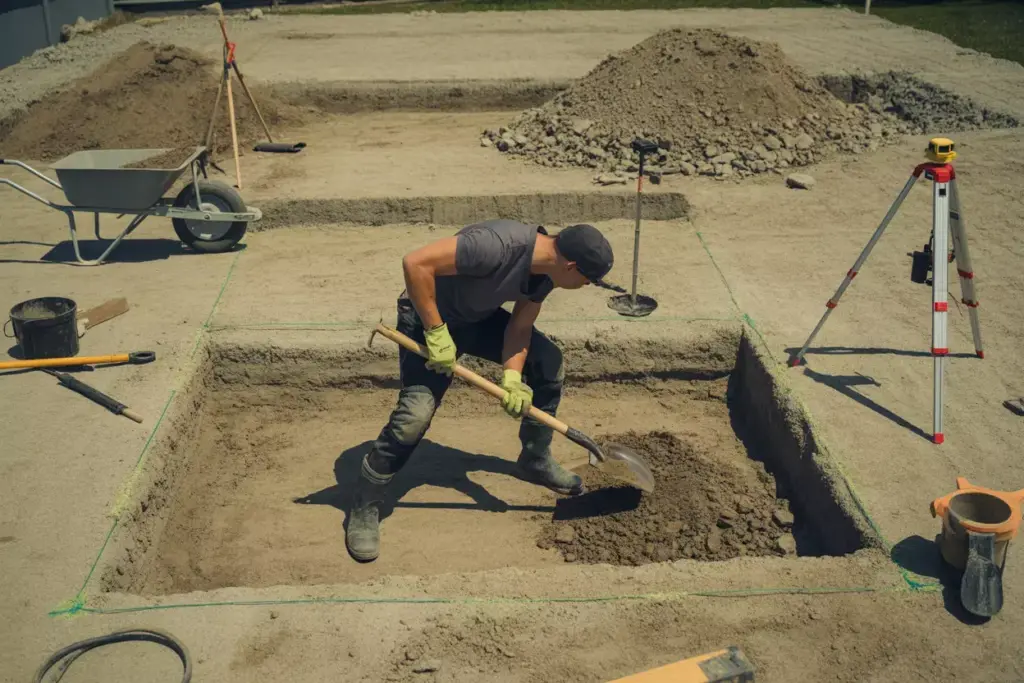
Proper excavation forms the foundation of your entire project. Mark your green’s boundaries using spray paint or stakes and string. Excavate to a depth of 4-6 inches below your desired finished grade, ensuring you maintain proper slopes for drainage.
Grading requirements call for a minimum slope of 1-2% (1-2 inches per 100 feet) to ensure water moves away from the putting surface. Use a transit level or laser level for accuracy, as proper grading prevents water pooling and surface irregularities.
Soil disposal should be planned in advance. Excavated soil can often be used elsewhere in your landscape or may need to be hauled away. Many contractors will remove soil for a fee, or you might find neighbors interested in free fill dirt.
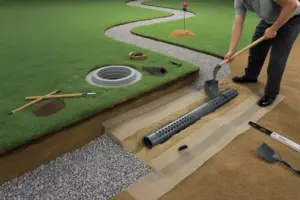
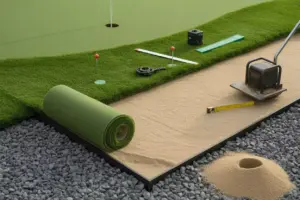
3. Base Installation and Compaction
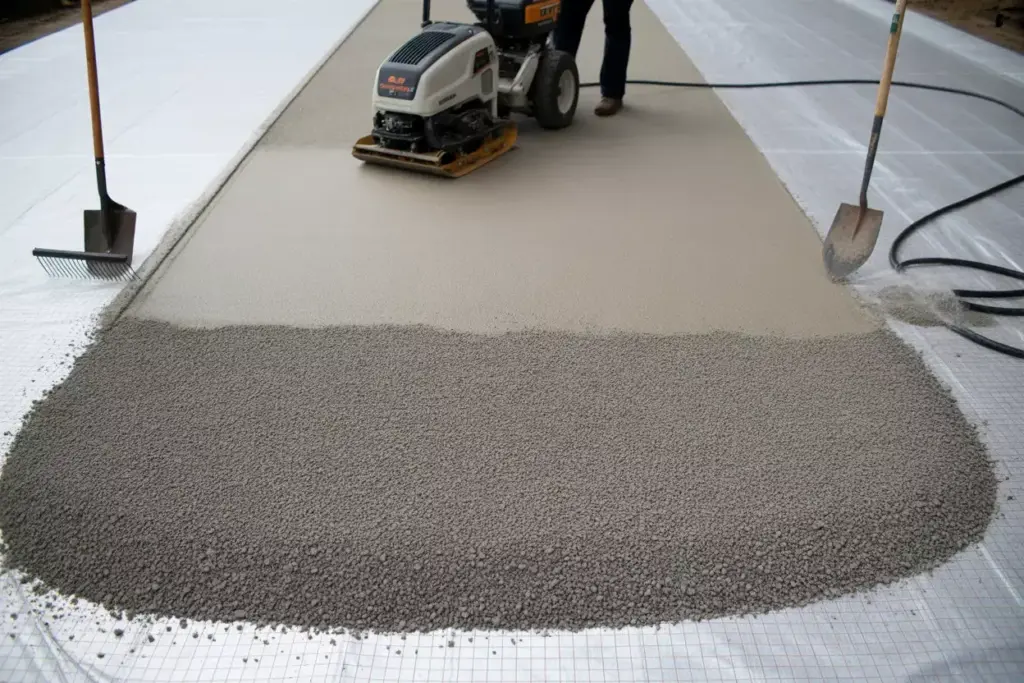
Aggregate base preparation begins with installing geotextile fabric over the excavated area to prevent weed growth and provide separation between soil and aggregate. Install your chosen base material (crushed stone or decomposed granite) in 2-inch lifts, compacting each layer thoroughly.
Compaction is critical for long-term stability. Rent a plate compactor and make multiple passes over each lift, adding water as needed to achieve optimal compaction. The base should be firm enough that you can walk on it without leaving footprints.
Drainage installation may require adding French drains or catch basins in areas prone to water collection. Install drainage systems before final base compaction, ensuring all pipes slope toward appropriate outlets.
4. Turf Installation and Seaming
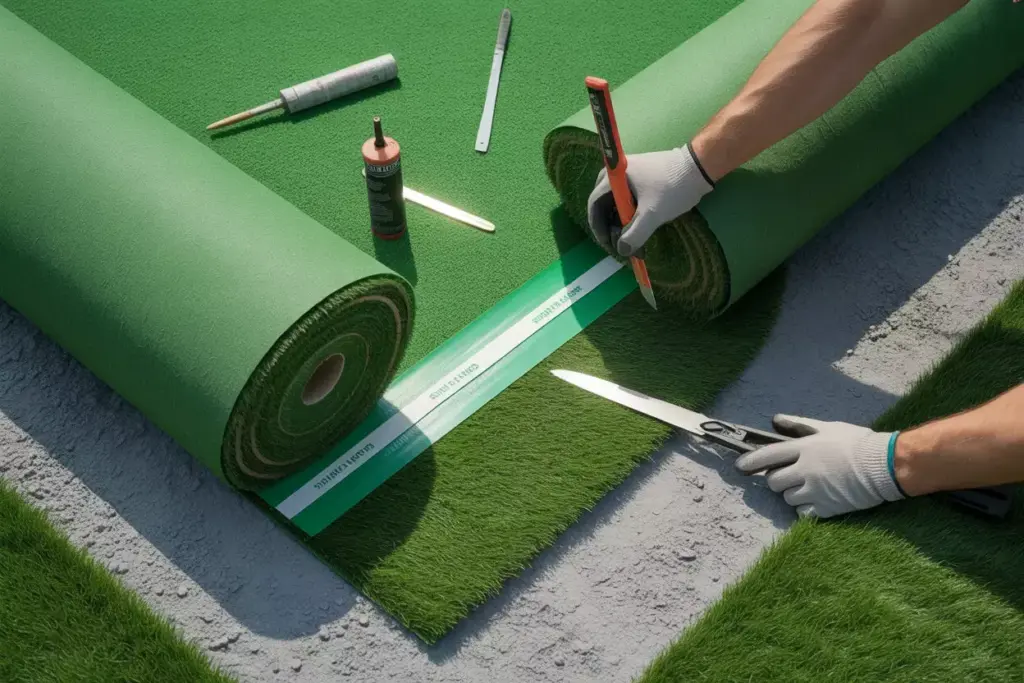
Synthetic turf installation requires precision and patience. Roll out your putting green turf, allowing it to acclimate to ambient temperature for at least 30 minutes. Position pieces to minimize seams, and ensure the grain direction is consistent across the entire surface.
Seaming techniques for multiple pieces involve creating nearly invisible joints. Overlap edges by approximately 1/8 inch, then cut through both layers simultaneously for perfect alignment. Use manufacturer-recommended adhesives and seaming tape for permanent bonds.
Trimming and fitting around obstacles requires careful measurement and sharp utility knives. Make relief cuts as needed, but remember that you can’t add material back once it’s cut away.
5. Infill Application and Distribution
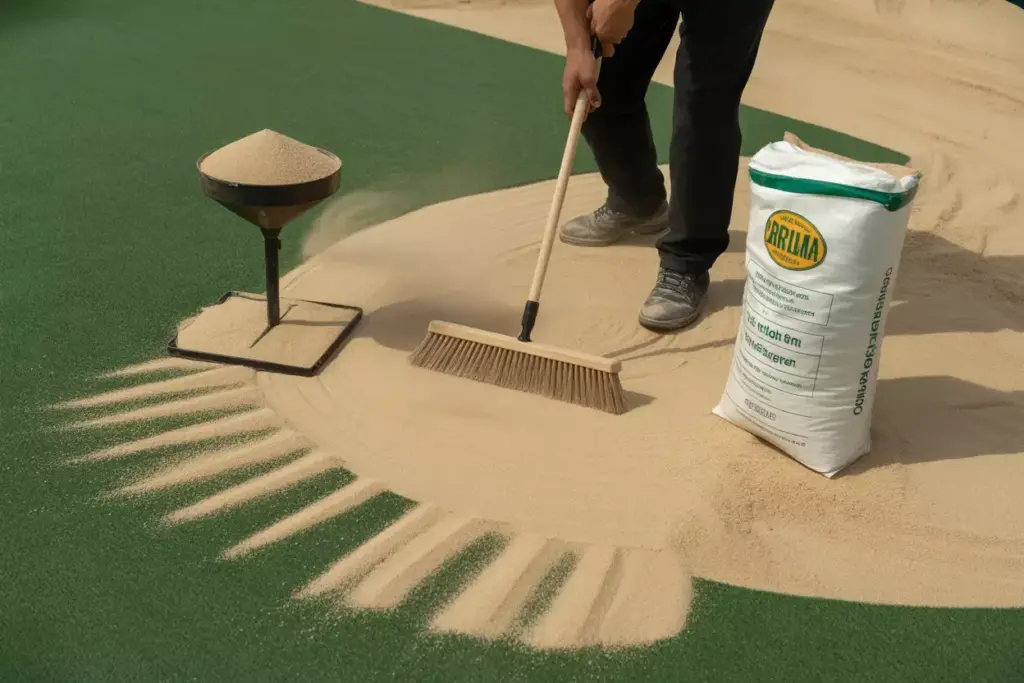
Sand infill installation provides weight, stability, and proper ball roll characteristics. Use clean, angular silica sand with appropriate particle size (typically 30-50 mesh). Apply infill gradually using a drop spreader, working the sand into the turf fibers with a stiff brush.
Proper infill depth should fill the turf backing while leaving fiber tips exposed. This typically requires 2-4 pounds of sand per square foot, depending on turf specifications. Work systematically across the entire surface, ensuring even distribution.
Brushing techniques help achieve professional results. Use a stiff-bristled push broom to work sand deep into the turf backing while standing fibers upright. This process may require several sessions as the infill settles.
6. Final Grading and Quality Testing
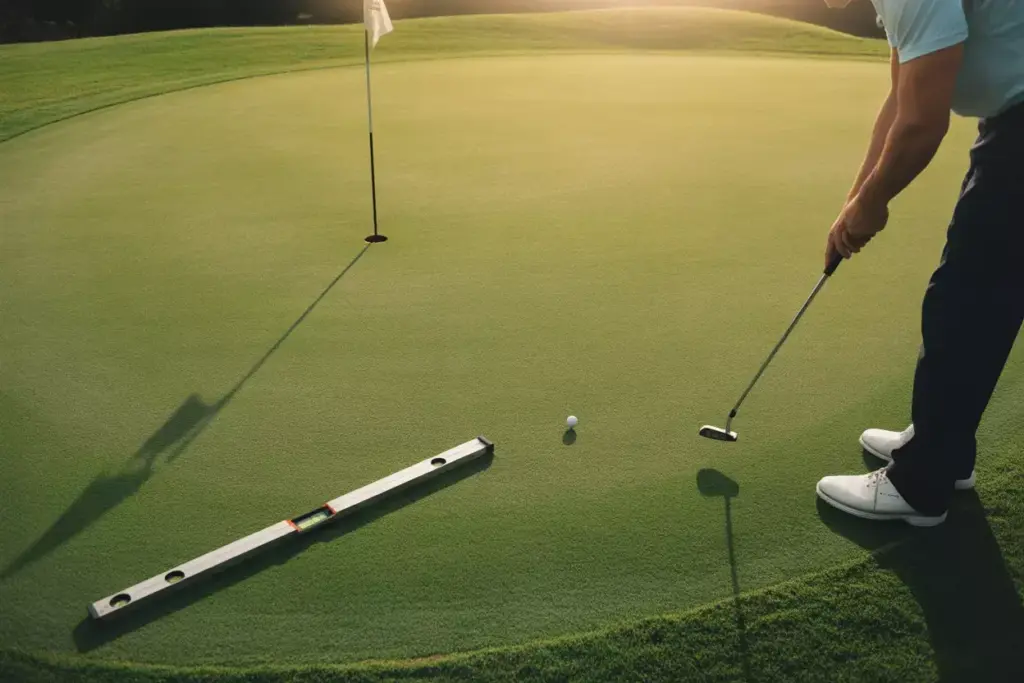
Surface fine-tuning involves checking for any irregularities and making final adjustments. Use a long straight edge to identify high or low spots, adding or removing base material as needed. The surface should be smooth and consistent with proper drainage slopes maintained.
Ball roll testing provides immediate feedback on your green’s performance. Roll golf balls from various positions, checking for consistent speed and direction. Balls should roll smoothly without unexpected bounces or direction changes.
Edge finishing completes the professional appearance. Install appropriate edging materials (plastic, metal, or stone) to contain the turf and create clean lines. Backfill around edges and ensure transitions to surrounding landscape are smooth and attractive.
Advanced Tips for Professional Results
Drainage Solutions That Work
Effective drainage extends far beyond basic slope requirements. Consider installing perimeter drains around your green’s edges to intercept surface water before it reaches the putting surface. These drains connect to your property’s overall drainage system or discharge to appropriate areas.
Subsurface drainage may be necessary in areas with clay soil or poor natural drainage. Install perforated pipes in gravel beds beneath your aggregate base, ensuring proper slopes toward outlets. This investment prevents future problems and extends your green’s lifespan significantly.
Creating Realistic Playing Characteristics
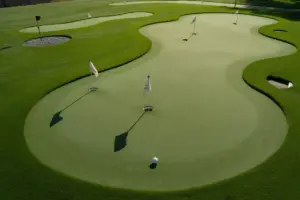
Contour and undulation separate amateur projects from professional installations. Subtle elevation changes (2-4 inches maximum) create interesting putting challenges while maintaining playability. Use additional base material to build up areas, compacting thoroughly to prevent settling.
Multiple pin positions maximize practice value and prevent wear patterns. Plan for 4-6 different hole locations, rotating regularly to maintain surface quality. Use regulation-size cups (4.25 inches) and quality flagsticks for authentic feel.
Maintenance and Longevity
Routine maintenance keeps your green performing optimally with minimal effort. Weekly brushing maintains fiber orientation and prevents matting. Monthly deep cleaning with appropriate cleaners removes organic debris and prevents bacterial growth.
Seasonal care varies by climate but generally includes:
- Spring: Deep cleaning, infill redistribution, edge maintenance
- Summer: Regular brushing, debris removal, drainage inspection
- Fall: Leaf removal, pre-winter preparation
- Winter: Snow removal (if applicable), ice prevention
Long-term preservation involves protecting your investment through proper use and care. Avoid wearing golf shoes with metal spikes, clean up organic debris promptly, and address any drainage issues immediately.
Cost Considerations and Budgeting
Material Costs Breakdown
Synthetic turf represents the largest expense, typically ranging from $8-15 per square foot for quality putting green materials. Premium products with advanced fiber technology and backing systems command higher prices but offer superior performance and longevity.
Base materials cost varies by region and availability. Expect to pay $30-50 per cubic yard for quality aggregate base materials. Calculate volume needs carefully, as insufficient base material leads to settling and surface problems.
Additional materials include:
- Geotextile fabric: $0.50-1.00 per square foot
- Sand infill: $30-50 per ton
- Adhesives and seaming materials: $100-200 per project
- Edging materials: $3-10 per linear foot
- Tools and equipment rental: $200-500 total
Labor vs. DIY Savings
Professional installation typically costs $15-25 per square foot, including materials and labor. For a 300 square foot green, professional installation might cost $4,500-7,500, while DIY construction could reduce costs to $2,500-4,000.
Time investment for DIY projects typically requires 3-5 full days for beginners, spread over 2-3 weekends to allow for material delivery and weather considerations. Factor in learning curve time and potential do-overs when planning schedules.
Return on Investment
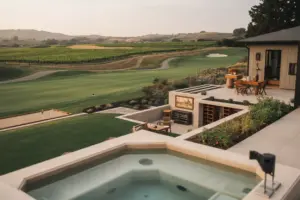
Property value enhancement from quality putting greens often exceeds installation costs. Real estate professionals report that well-designed outdoor recreational features can add 5-15% to property values, particularly in golf-oriented communities.
Usage value provides ongoing returns through convenient practice opportunities and entertainment value. Many homeowners report their putting greens become focal points for family activities and social gatherings.
Common Mistakes to Avoid
Planning and Design Errors
Inadequate drainage planning tops the list of costly mistakes. Failing to address water management during design leads to expensive remediation later. Always plan for worst-case rainfall scenarios and provide multiple drainage paths.
Size miscalculations often result from underestimating space requirements or overestimating available area. Measure carefully and account for setbacks from property lines, structures, and utilities. Consider access needs for maintenance equipment.
Ignoring utility locations can create dangerous and expensive problems. Contact your local utility marking service (811 in most areas) before any excavation. Underground utilities are more common than many homeowners realize.
Construction Mistakes
Insufficient base preparation causes long-term problems including settling, poor drainage, and surface irregularities. Don’t rush this critical step – proper base installation determines your green’s performance for years to come.
Poor compaction leads to settling and surface problems. Rent professional compaction equipment and take time to achieve proper density. Hand tamping or inadequate compaction equipment won’t provide necessary results.
Turf installation errors include incorrect grain direction, poor seaming, and inadequate adhesive application. Follow manufacturer instructions precisely and don’t attempt shortcuts that compromise quality.
Maintenance Oversights
Neglecting regular maintenance allows small problems to become major issues. Establish a maintenance routine from day one and stick to it. Prevention costs far less than remediation.
Using inappropriate cleaning products can damage synthetic fibers or backing materials. Use only manufacturer-approved cleaners and avoid harsh chemicals or petroleum-based products.
Troubleshooting Common Issues
Drainage Problems
Standing water indicates inadequate slope or blocked drainage systems. Address immediately by improving surface grading or installing additional drainage. Standing water promotes bacterial growth and damages turf backing.
Slow drainage may result from compacted base materials or inadequate drainage capacity. Consider installing French drains or improving existing drainage outlets.
Surface Performance Issues
Inconsistent ball roll often stems from uneven infill distribution or surface irregularities. Redistribute infill evenly and check for base settling or damage.
Fast or slow greens can be adjusted through infill modifications. Adding sand typically slows ball roll, while reducing infill increases speed. Make adjustments gradually and test thoroughly.
Appearance Problems
Matted or flattened areas result from insufficient brushing or heavy traffic concentration. Increase brushing frequency and consider rotating pin positions to distribute wear.
Fading or discoloration may indicate UV damage or contamination. Quality turf includes UV inhibitors, but extreme exposure or chemical contamination can cause problems. Address contamination sources and consider protective treatments.
Seasonal Considerations and Climate Adaptation
Hot Climate Considerations
Heat management becomes critical in areas with extreme temperatures. Light-colored infill materials reflect heat and reduce surface temperatures. Consider installing shade structures or planning green locations to take advantage of natural shade during peak heat hours.
Expansion and contraction affects turf dimensions in temperature extremes. Allow for thermal movement during installation and avoid over-stretching turf in hot conditions.
Cold Climate Adaptations
Freeze-thaw cycles can damage improperly installed greens. Ensure excellent drainage to prevent ice formation and base damage. Consider using flexible adhesives that accommodate thermal movement.
Snow removal requires care to avoid damaging turf fibers. Use plastic shovels or snow blowers rather than metal tools. Allow natural melting when possible to avoid mechanical damage.
Wet Climate Solutions
Enhanced drainage becomes even more critical in high-rainfall areas. Consider installing drainage systems with greater capacity and multiple outlets. Slope requirements may need to exceed minimum recommendations.
Mold and mildew prevention requires good air circulation and proper cleaning protocols. Regular brushing and appropriate antimicrobial treatments help maintain surface quality in humid conditions.
Conclusion
Building a backyard golf green represents an exciting opportunity to enhance both your golf game and property value while creating a unique outdoor entertainment space. This comprehensive guide on how to build a backyard golf green: a 6-step DIY guide for beginners provides the foundation for successful project completion, but remember that attention to detail and patience during each phase determines final results.
The key to success lies in thorough planning, quality materials, and meticulous execution of each construction step. While the initial investment may seem substantial, the long-term benefits of convenient practice opportunities, property enhancement, and family enjoyment make backyard putting greens worthwhile investments for serious golf enthusiasts.
Take action today by beginning your planning process. Start with site evaluation and design sketches, then gather material quotes from local suppliers. Consider starting with a smaller green to gain experience before tackling larger projects. Remember that professional consultation during planning phases can prevent costly mistakes and ensure optimal results.
Your dream of having a professional-quality putting green just steps from your back door is entirely achievable with proper planning, quality materials, and careful attention to construction details. The satisfaction of sinking putts on a green you built yourself makes every hour of construction effort worthwhile.