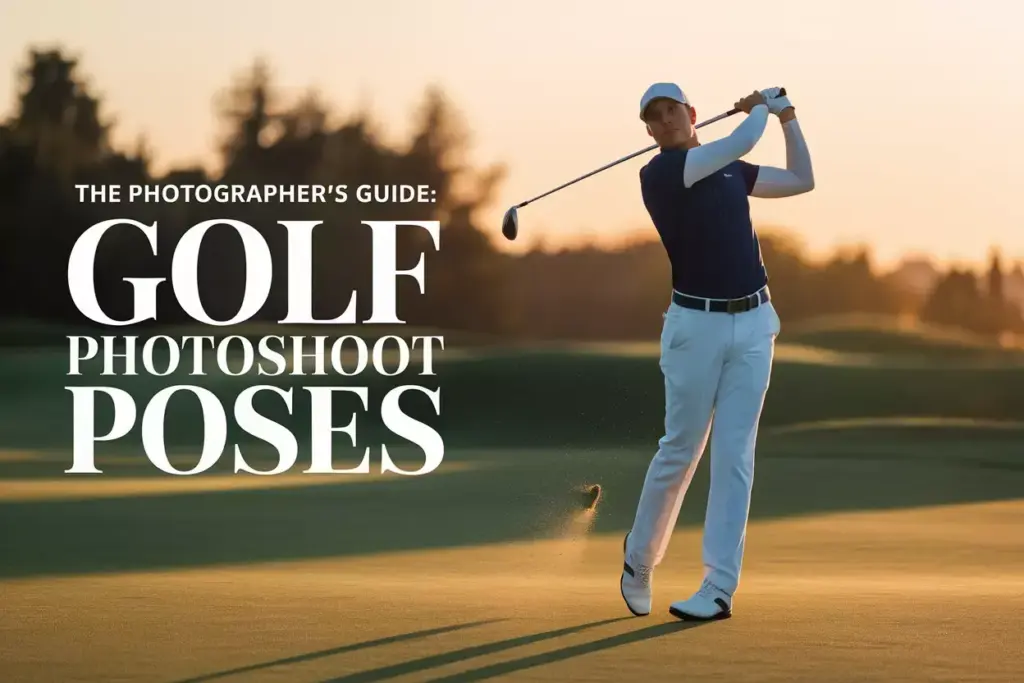
The Photographer’s Guide: 8 Flattering Golf Photoshoot Poses
Picture this: the morning sun casts a golden glow across the pristine fairway as a golfer prepares for their swing. The photographer crouches low, camera ready, knowing that the perfect shot is just moments away. Golf photography combines the elegance of the sport with the artistry of portrait photography, creating images that capture both athletic prowess and personal style. The Photographer’s Guide: 8 Flattering Golf Photoshoot Poses reveals the secrets to creating stunning golf portraits that showcase your subject’s best angles while honoring the sophisticated nature of this timeless sport.
Whether shooting for professional golfers, corporate headshots, or lifestyle portraits, mastering these essential poses will elevate your golf photography portfolio. Each pose in this comprehensive guide has been carefully selected to flatter different body types, skill levels, and photographic goals. From dynamic action shots to elegant static poses, these techniques will help photographers capture the grace and power that define exceptional golf imagery.
Key Takeaways
- Master the fundamentals of golf posing to create flattering images that showcase proper form and elegant lines
- Utilize natural lighting and course environments to enhance the sophistication and visual appeal of your golf portraits
- Adapt poses for different skill levels to ensure comfort and authenticity in every shot
- Focus on body positioning and angles that elongate the silhouette and create dynamic visual interest
- Combine technical photography skills with understanding of golf mechanics for professional-quality results
Understanding Golf Photography Fundamentals
Golf photography requires a unique blend of sports photography techniques and portrait artistry. Unlike other athletic pursuits, golf emphasizes precision, elegance, and controlled movement, making it essential for photographers to understand both the technical aspects of the sport and the aesthetic principles that create compelling images.
The key to successful golf photography lies in recognizing that every pose should reflect the inherent sophistication of the game. Golf is a sport of tradition and refinement, where proper form and technique are paramount. This translates directly to photography, where poses should emphasize clean lines, balanced composition, and graceful movement.
When planning a golf photoshoot, consider the natural rhythm of the golf swing and the various static positions that occur throughout a round. The most flattering poses often capture moments of preparation, concentration, and follow-through rather than the explosive action found in other sports.
Essential Equipment Considerations
Professional golf photography requires specific equipment considerations to capture the best possible images. A telephoto lens (70-200mm) allows photographers to maintain distance while capturing intimate details of form and expression. This focal length also provides excellent compression, making backgrounds appear closer and more dramatic.
Fast shutter speeds are crucial for freezing action during swing sequences, while wider apertures (f/2.8-f/4) create beautiful background separation that isolates the subject from potentially distracting course elements. Consider bringing reflectors or fill flash for portraits taken during harsh midday lighting conditions.
The Photographer’s Guide: 8 Flattering Golf Photoshoot Poses – Classic Swing Positions
The foundation of any golf photography session lies in mastering the classic swing positions. These poses capture the essential elements of golf technique while creating visually striking images that showcase the subject’s form and concentration.
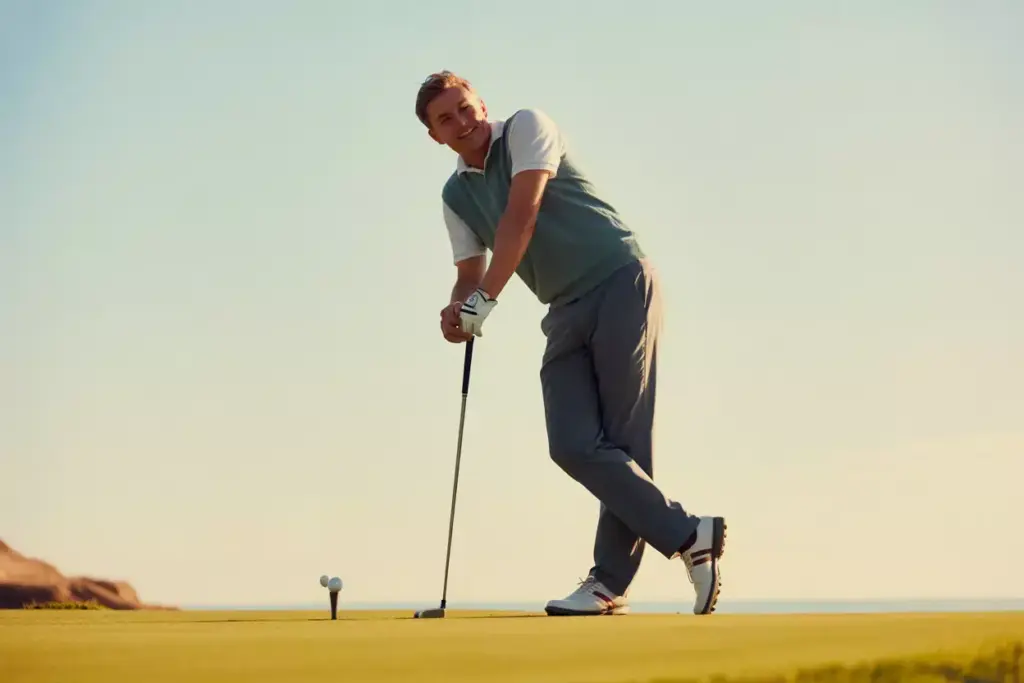
1. The Address Position
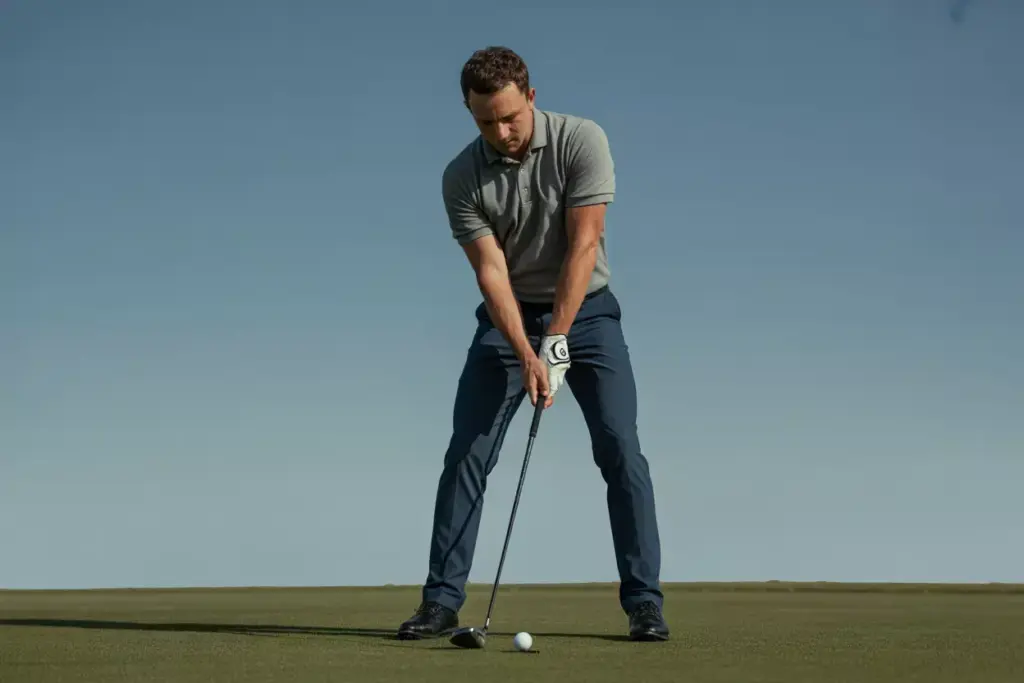
The address position represents the moment of pure concentration before the swing begins. This pose showcases the golfer’s setup, posture, and mental preparation. Position the subject with feet shoulder-width apart, knees slightly bent, and eyes focused on the ball.
For the most flattering angle, shoot from slightly below the subject’s eye level to create a sense of power and authority. The three-quarter view works exceptionally well, showing both the golfer’s profile and their connection to the ball. Ensure the spine angle is clearly visible, as this demonstrates proper golf posture.
Lighting tip: 📸 Side lighting enhances the definition of the golfer’s posture and creates dramatic shadows that add depth to the image.
2. The Backswing Peak
Capturing the top of the backswing creates one of the most dynamic and recognizable golf poses. This position showcases flexibility, control, and the coiled energy that’s about to be released. The key is timing the shot when the club reaches its highest point and the golfer’s body shows maximum rotation.
Photograph from the target line (directly behind or in front of the golfer) to show the full extension of the swing plane. This angle emphasizes the shoulder turn and the elegant line created from the club shaft through the golfer’s arms and shoulders.
Pro tip: 💡 Use burst mode to capture multiple frames during the backswing, ensuring you get the perfect moment when everything aligns.
3. The Follow-Through Finish
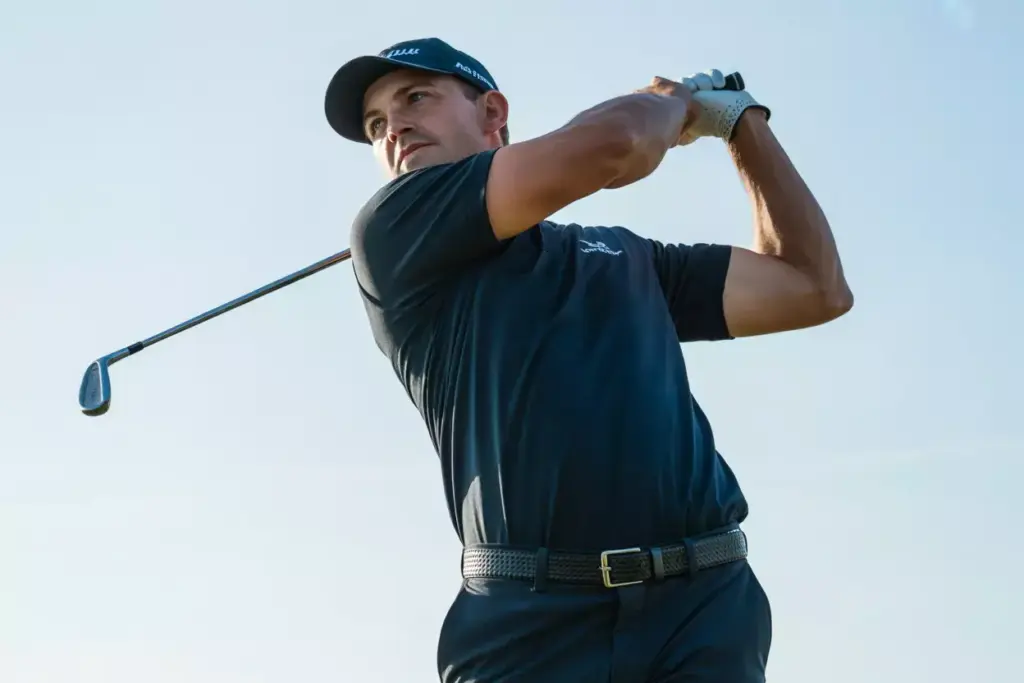
The follow-through position represents completion and success. This pose shows the golfer’s body in perfect balance after striking the ball, with weight transferred to the front foot and the club wrapped around the body. It’s a pose that suggests both power and control.
Capture this pose from a low angle to emphasize the golfer’s balanced stance and create a heroic perspective. The belt buckle should face the target, and the golfer’s chest should be open to the target line. This creates strong, confident body language that translates beautifully in photographs.
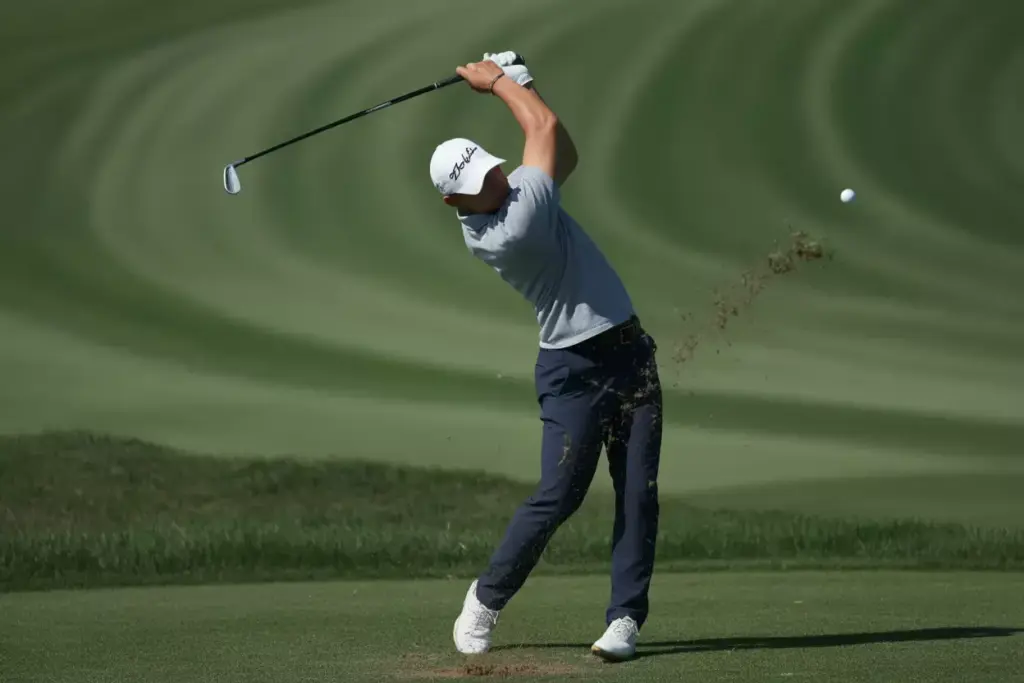
4. The Impact Position

While technically challenging to capture, the impact position creates incredibly powerful images. This split-second moment shows the club making contact with the ball, often with dramatic effects like divots flying or the ball compressing against the clubface.
Use high-speed photography techniques and position yourself safely to the side of the golfer. The key is capturing the moment when the golfer’s hands lead the clubhead through impact, showing proper technique and generating visual excitement.
The Photographer’s Guide: 8 Flattering Golf Photoshoot Poses – Portrait and Lifestyle Poses
Beyond action shots, golf photography excels in creating sophisticated portrait images that capture personality and style. These poses work particularly well for corporate headshots, lifestyle photography, and personal branding images.
5. The Confident Stance
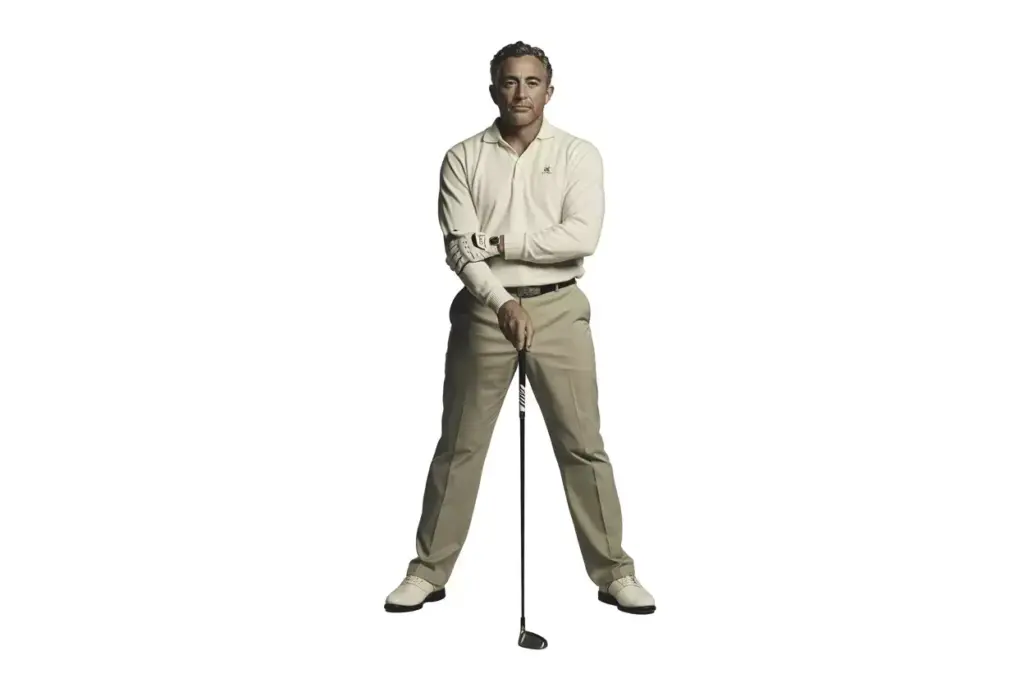
This static pose emphasizes leadership and confidence. Have the subject stand with feet shoulder-width apart, holding a club vertically beside them like a walking stick. The free hand can rest on the hip or hang naturally at the side.
Shoot from eye level or slightly below to maintain the subject’s authority while creating an approachable feel. This pose works exceptionally well for business portraits and professional headshots where golf is part of the subject’s personal brand.
Styling note: 🎯 Ensure the golf attire is crisp and well-fitted. Wrinkles and poor-fitting clothes can detract from the professional appearance.
6. The Contemplative Putt Setup
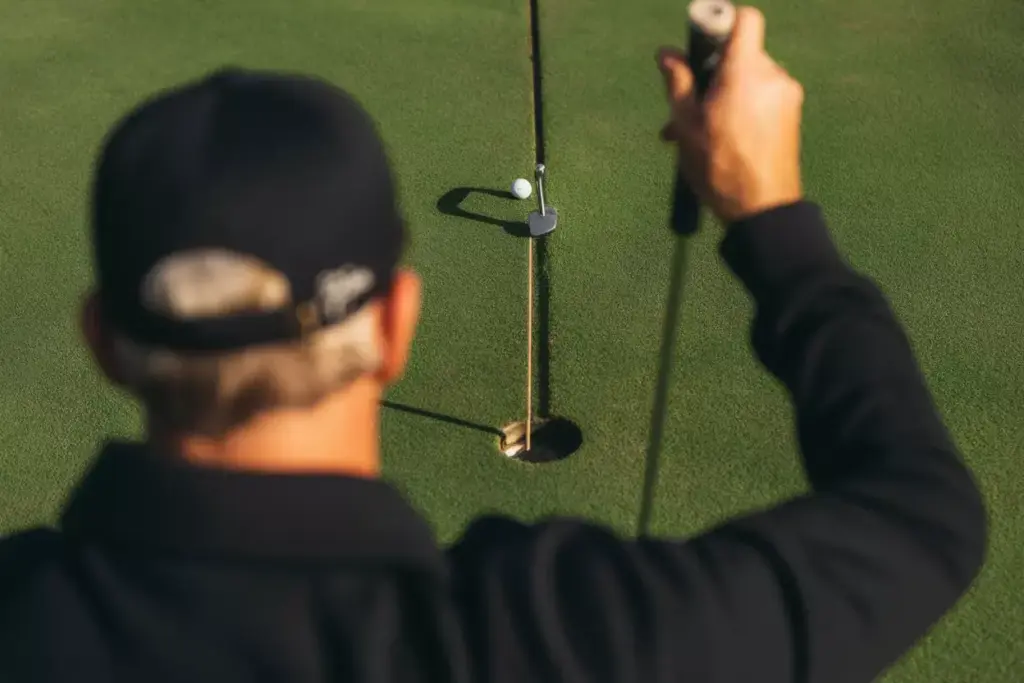
Putting poses create intimate, focused images that showcase concentration and precision. Position the subject in a proper putting stance, with eyes focused on the ball or hole. The putter should create a clean vertical line, and the golfer’s posture should demonstrate proper putting form.
Photograph from behind and slightly to the side to show the putting line while capturing the golfer’s concentration. This angle also flatters most body types by creating length through the torso and emphasizing good posture.
7. The Walking Shot
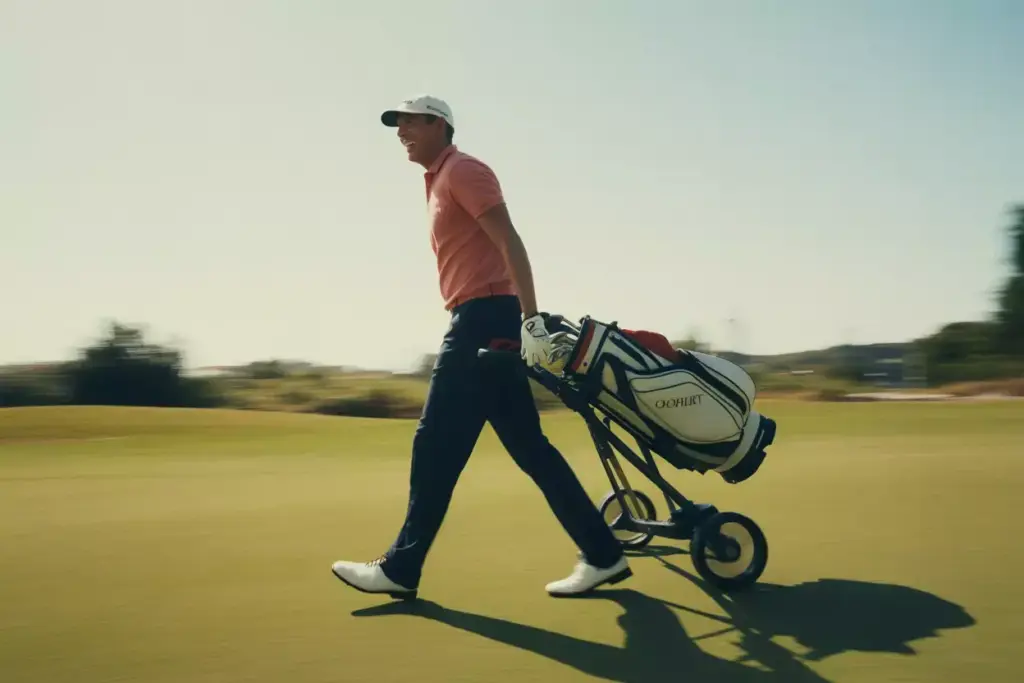
Dynamic walking poses capture the leisurely pace and social aspects of golf. Have the subject walk naturally across the frame, carrying their bag or pulling a cart. This pose suggests movement and progress while maintaining the elegant nature of the sport.
Use a slower shutter speed (1/60th to 1/125th) to create slight motion blur in the legs while keeping the upper body sharp. This technique adds energy and life to the image while maintaining focus on the subject’s expression and posture.
8. The Relaxed Club Rest
This casual pose shows the golfer at ease between shots. The subject can lean slightly on their club, with weight shifted to one foot and the other leg relaxed. This creates natural, asymmetrical body language that appears comfortable and approachable.
Capture this pose during golden hour for the most flattering light. The relaxed nature of this position works well for lifestyle photography and images that emphasize the enjoyable, social aspects of golf.
Technical Photography Tips for Golf Portraits
Creating exceptional golf portraits requires mastering specific technical considerations that differ from standard portrait photography. The outdoor environment, equipment constraints, and movement requirements demand adapted techniques.
Lighting Strategies
Natural light remains the most flattering option for golf photography. Golden hour (the first hour after sunrise and the last hour before sunset) provides warm, soft light that enhances skin tones and creates beautiful background separation.
During midday shoots, position subjects so that open shade from trees or buildings provides even lighting on their faces. Use reflectors to fill in shadows and create catchlights in the eyes. Avoid shooting in direct overhead sun, which creates unflattering shadows under the eyes and nose.
| Lighting Condition | Best Poses | Technical Settings |
|---|---|---|
| Golden Hour | All poses, especially portraits | f/2.8-4, ISO 100-400 |
| Overcast | Action shots, putting poses | f/4-5.6, ISO 400-800 |
| Midday Sun | Walking shots, distant views | f/5.6-8, ISO 100-200 |
Camera Settings and Composition
For action shots, prioritize fast shutter speeds (1/500th second or faster) to freeze movement. Use continuous autofocus (AI Servo/AF-C) to track moving subjects during swing sequences.
Portrait poses allow for more creative freedom with depth of field. Use wider apertures (f/2.8-f/4) to separate subjects from backgrounds while ensuring sufficient depth of field to keep important details sharp.
Composition techniques specific to golf photography include:
- Leading lines created by cart paths, fairway edges, or club alignment
- Rule of thirds placement with the golfer positioned at intersection points
- Negative space that emphasizes the expansive nature of golf courses
- Framing using trees, bunkers, or architectural elements
Working with Different Skill Levels
Beginner golfers may feel uncomfortable with complex poses. Start with simple, static positions and provide clear, encouraging direction. Focus on basic posture rather than perfect golf technique, as comfort and confidence create more appealing images than technically perfect but tense poses.
Experienced golfers can handle more complex positioning and may have preferences for how they want to be portrayed. Collaborate with them to capture poses that reflect their personal style and skill level.
Professional golfers often have specific requirements for brand consistency and image usage. Discuss these needs before the shoot and ensure poses align with their professional image and sponsor requirements.
Styling and Wardrobe Considerations
Golf fashion plays a crucial role in creating polished, professional images. The right clothing choices can enhance poses and create visual interest while maintaining the sport’s traditional aesthetic.
Color Coordination
Choose colors that complement the golf course environment without competing for attention. Solid colors generally photograph better than busy patterns, which can create distracting visual noise.
Classic golf colors include:
- Navy blue and white combinations
- Soft pastels (pink, light blue, mint green)
- Earth tones (khaki, cream, soft brown)
- Traditional patterns (subtle plaids, thin stripes)
Avoid bright neon colors or heavily branded clothing unless specifically requested. These elements can date images quickly and distract from the subject’s face and form.
Fit and Comfort
Well-fitted clothing enhances every pose by creating clean lines and allowing natural movement. Golf attire should be comfortable enough for the subject to move naturally while maintaining a polished appearance.
Pay attention to details like:
- Collar positioning and symmetry
- Sleeve length and cuff appearance
- Belt alignment and buckle positioning
- Shoe cleanliness and style coordination
Seasonal Considerations
Weather-appropriate styling ensures subject comfort while maintaining visual appeal. Layering options like vests, light sweaters, or windbreakers add visual interest and allow for quick adjustments based on changing conditions.
Summer shoots benefit from lighter colors and breathable fabrics, while cooler weather allows for richer colors and textured materials that add visual depth to images.
Post-Processing Techniques for Golf Photography
Digital enhancement can elevate golf photography from good to exceptional. Focus on techniques that enhance natural beauty while maintaining realistic skin tones and environmental colors.
Basic Adjustments
Start with fundamental corrections:
- Exposure adjustments to balance highlights and shadows
- White balance correction for accurate color representation
- Contrast enhancement to add visual impact
- Clarity and texture adjustments to enhance details
Advanced Techniques
Selective editing allows for targeted improvements:
- Skin smoothing while maintaining natural texture
- Eye enhancement to create engaging catchlights
- Background cleanup to remove distracting elements
- Color grading to create mood and atmosphere
Landscape integration techniques help blend subjects seamlessly with golf course environments:
- Graduated filters to balance sky and ground exposure
- Luminosity masking for precise exposure control
- Color harmony adjustments to create cohesive palettes
Maintaining Authenticity
While post-processing can improve images significantly, maintaining authenticity remains crucial. Avoid over-editing that creates unrealistic appearances or dramatically alters the natural golf course environment.
Focus on enhancing existing qualities rather than creating artificial effects. The goal is to present subjects at their best while maintaining the genuine character that makes golf photography appealing.
Common Mistakes to Avoid
Understanding frequent pitfalls helps photographers create consistently excellent golf images. These mistakes can undermine even technically proficient photography.
Posing Errors
Forced or unnatural positions create tension that’s visible in final images. Allow subjects to settle into poses naturally and provide gentle guidance rather than rigid direction.
Ignoring proper golf form can make images appear awkward to viewers familiar with the sport. Even if the subject isn’t a skilled golfer, basic posture principles should be maintained for authenticity.
Technical Mistakes
Poor timing during action shots results in unflattering positions where the golfer appears off-balance or awkward. Study golf swing mechanics to anticipate the most visually appealing moments.
Inadequate depth of field can leave important elements out of focus or fail to separate subjects from busy backgrounds. Test different aperture settings to find the optimal balance for each pose and environment.
Environmental Oversights
Distracting backgrounds can overwhelm subjects and create visual chaos. Scout locations carefully and use longer focal lengths to isolate subjects from potentially problematic elements.
Poor lighting choices can create unflattering shadows or harsh contrasts that detract from the subject’s appearance. Plan shooting times around optimal lighting conditions whenever possible.
Building a Golf Photography Portfolio
Creating a strong portfolio requires strategic planning and diverse image types that demonstrate versatility and skill. Focus on building a collection that showcases different aspects of golf photography.
Essential Portfolio Elements
Include variety in pose types:
- Action sequences showing swing mechanics
- Portrait-style images emphasizing personality
- Lifestyle shots capturing the social aspects of golf
- Detail images highlighting equipment and course features
Technical diversity demonstrates professional capability:
- Different lighting conditions and times of day
- Various focal lengths and compositional approaches
- Multiple golf course environments and settings
- Range of subject types (beginners to professionals)
Marketing Your Golf Photography
Target audience identification helps focus marketing efforts effectively. Potential clients include:
- Individual golfers seeking personal portraits
- Golf courses needing promotional imagery
- Corporate clients using golf for business entertainment
- Golf equipment manufacturers requiring product photography
Online presence remains crucial for business development:
- Professional website showcasing best work
- Social media engagement with golf communities
- SEO optimization for golf photography searches
- Client testimonials and case studies
Conclusion
Mastering The Photographer’s Guide: 8 Flattering Golf Photoshoot Poses opens doors to a specialized and rewarding photography niche. These carefully selected poses provide the foundation for creating stunning golf portraits that capture both the athletic excellence and personal character of subjects.
The key to success lies in understanding the unique requirements of golf photography: the sport’s emphasis on precision and elegance, the outdoor environmental challenges, and the diverse skill levels of potential subjects. By mastering these eight essential poses and applying the technical and artistic principles outlined in this guide, photographers can create images that stand out in a competitive market.
Practice and refinement remain essential for developing expertise. Start with willing friends or family members who golf, and gradually build experience and confidence. Study the work of established golf photographers and analyze what makes their images compelling.
Next steps for implementing this guide:
- Practice each pose in different lighting conditions and environments
- Build relationships with local golf courses and golfers
- Develop a consistent editing style that enhances your golf photography
- Create a portfolio showcasing your best work across all eight pose categories
- Market your services to potential clients in the golf community
Remember that great golf photography combines technical skill with artistic vision and genuine appreciation for the sport. The most successful images capture not just physical form but the passion and dedication that drive golfers to pursue excellence. With dedication and practice, these eight poses will become the foundation for a thriving golf photography business that creates lasting memories for clients while showcasing the timeless beauty of this beloved sport.