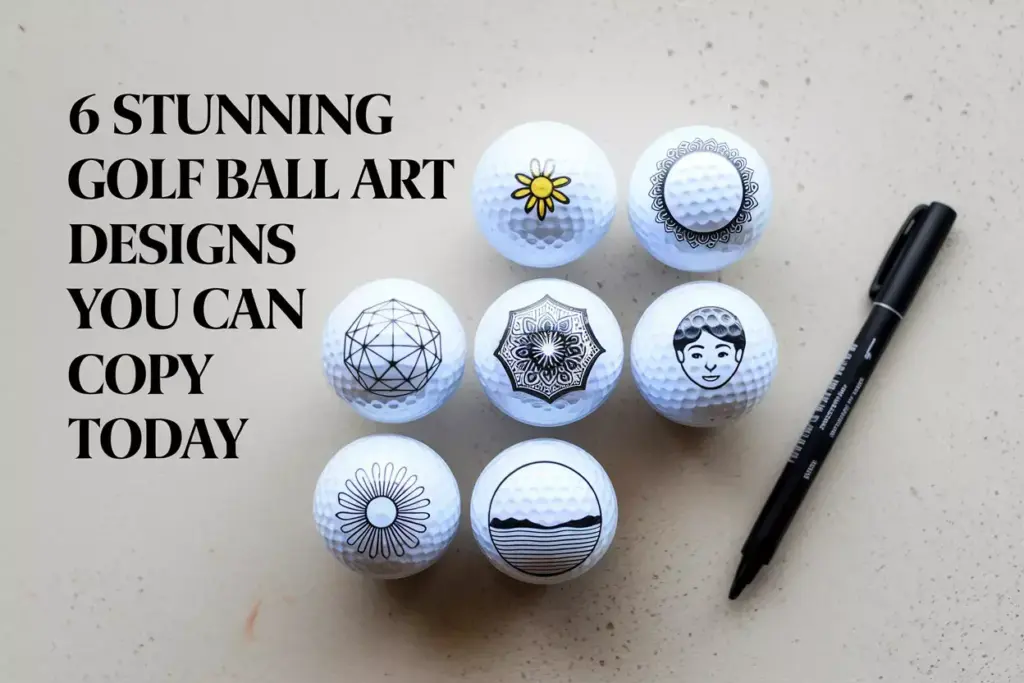
6 Stunning Drawing on Golf Ball Designs You Can Copy Today
Golf balls aren’t just for the course anymore. Artists and hobbyists worldwide are transforming these small, dimpled spheres into miniature canvases that showcase incredible creativity and skill. Whether you’re looking for a unique gift, a conversation starter, or simply want to explore a new artistic medium, 6 stunning drawing on golf ball designs you can copy today offer the perfect blend of accessibility and artistic challenge.
Disclosure: This post contains affiliate links. As an Amazon Associate, we earn from qualifying purchases, and at no extra cost to you.
The art of decorating golf balls has exploded in popularity over the past few years, with social media platforms showcasing everything from simple doodles to museum-worthy masterpieces. This comprehensive guide reveals the most captivating designs that anyone can recreate, regardless of artistic experience.
Key Takeaways
- Simple geometric patterns provide an excellent starting point for beginners, requiring only basic shapes and steady hands
- Nature-inspired designs like flowers and leaves offer organic beauty while remaining achievable for most skill levels
- Mandala patterns create stunning visual impact through repetitive, meditative drawing techniques
- Character faces and expressions add personality and humor to golf ball art projects
- Proper materials and preparation are essential for long-lasting, professional-looking results
- Advanced techniques like shading and color blending can elevate simple designs into artistic masterpieces
Essential Materials and Preparation
Before diving into the 6 stunning drawing on golf ball designs you can copy today, proper preparation ensures the best results. The curved surface of a golf ball presents unique challenges that require specific materials and techniques.
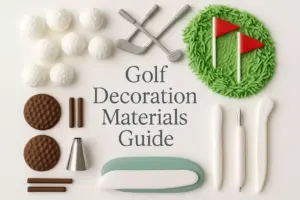
Required Materials:
- Clean, used golf balls (new balls work too but are more expensive)
- Fine-tip permanent markers (0.3mm to 0.7mm)
- Acrylic paint pens for color work
- Pencil for light sketching
- Eraser or correction fluid
- Magnifying glass (optional but helpful)
- Good lighting or desk lamp
- Soft cloth for cleaning
Surface Preparation Steps:
- Clean golf balls thoroughly with soap and water
- Remove any dirt or grass stains completely
- Dry completely before starting
- Lightly sand glossy surfaces if paint adhesion is poor
- Wipe with rubbing alcohol for final cleaning
The dimpled texture of golf balls actually helps with grip and can add interesting texture to designs. However, working around these dimples requires patience and planning.
Design Category 1: Beginner-Friendly Patterns
1. Simple Geometric Shapes
Geometric designs represent the perfect entry point for anyone exploring golf ball art. These patterns focus on basic shapes like circles, triangles, squares, and lines arranged in pleasing compositions.
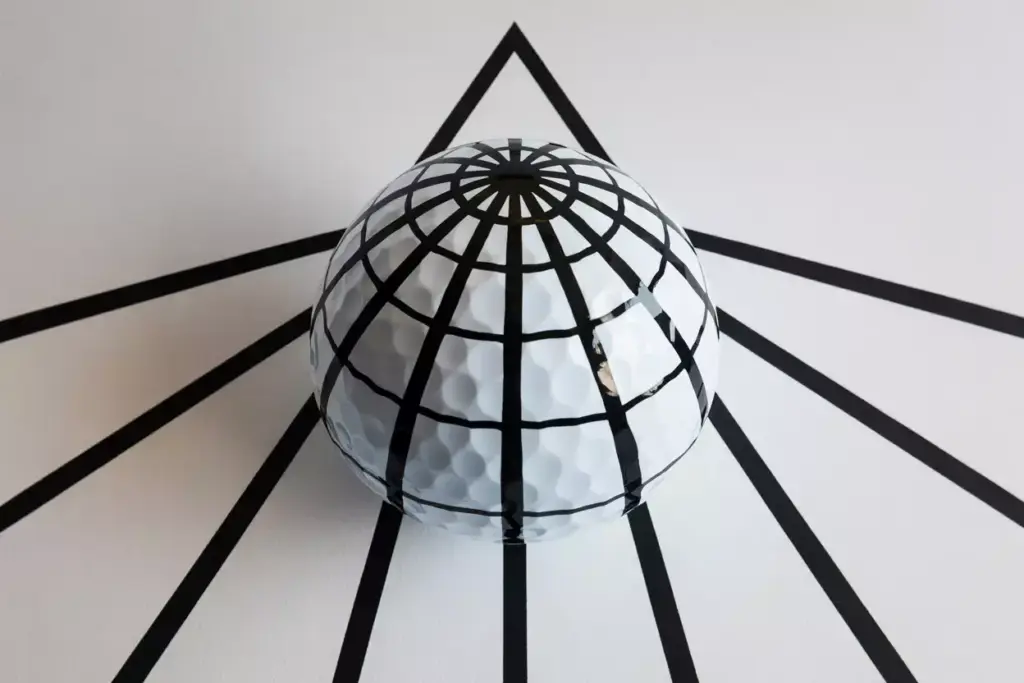
Triangle Cascade Design:
Start with a single triangle at the “north pole” of the golf ball. Draw progressively larger triangles cascading down toward the equator, creating a mountain-like silhouette. Fill alternating triangles with solid black ink while leaving others outlined only. This creates striking contrast and visual rhythm.
The beauty of geometric patterns lies in their mathematical precision and visual impact. Even simple combinations of shapes can create sophisticated-looking designs that impress viewers.
Concentric Circles Pattern:
Begin with a small circle at the top of the ball. Draw increasingly larger circles around it, spacing them evenly. Add small dots or dashes between the circles for extra detail. This design works particularly well when executed in multiple colors, creating a target-like appearance.
Checkerboard Bands:
Draw three horizontal bands around the golf ball’s circumference. Divide each band into small squares, then color alternating squares to create a checkerboard effect. Vary the square sizes between bands for added visual interest.
2. Basic Floral Motifs
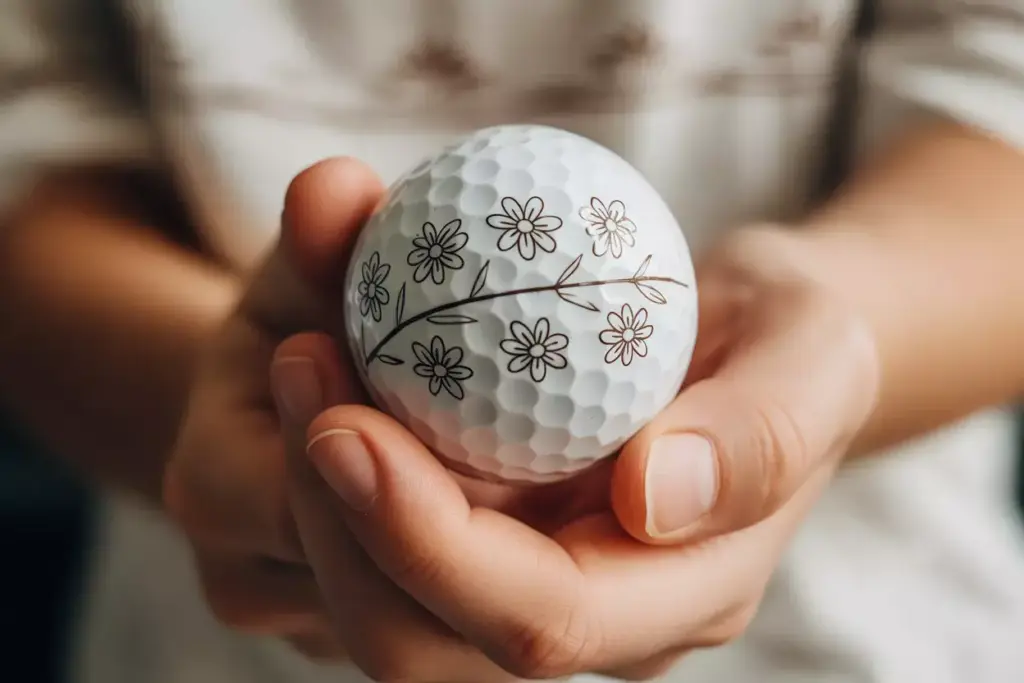
Flowers offer organic beauty that contrasts beautifully with the golf ball’s geometric form. Simple flower designs require only basic petal shapes and can be enhanced with leaves and stems.
Daisy Chain Design:
Draw small, simple daisies around the ball’s equator. Each daisy needs only 6-8 oval petals radiating from a central circle. Connect the flowers with curved stem lines and add small leaves between blooms. This design works exceptionally well in black ink with yellow centers.
Rose Spiral Pattern:
Create stylized roses using spiral techniques. Start with a small spiral for the rose center, then add curved petal shapes around it. Scatter 4-5 roses across the ball’s surface, filling empty spaces with small leaves and decorative swirls.
The organic nature of floral designs allows for imperfection, making them forgiving for beginners while still producing beautiful results.
3. Fun Character Faces
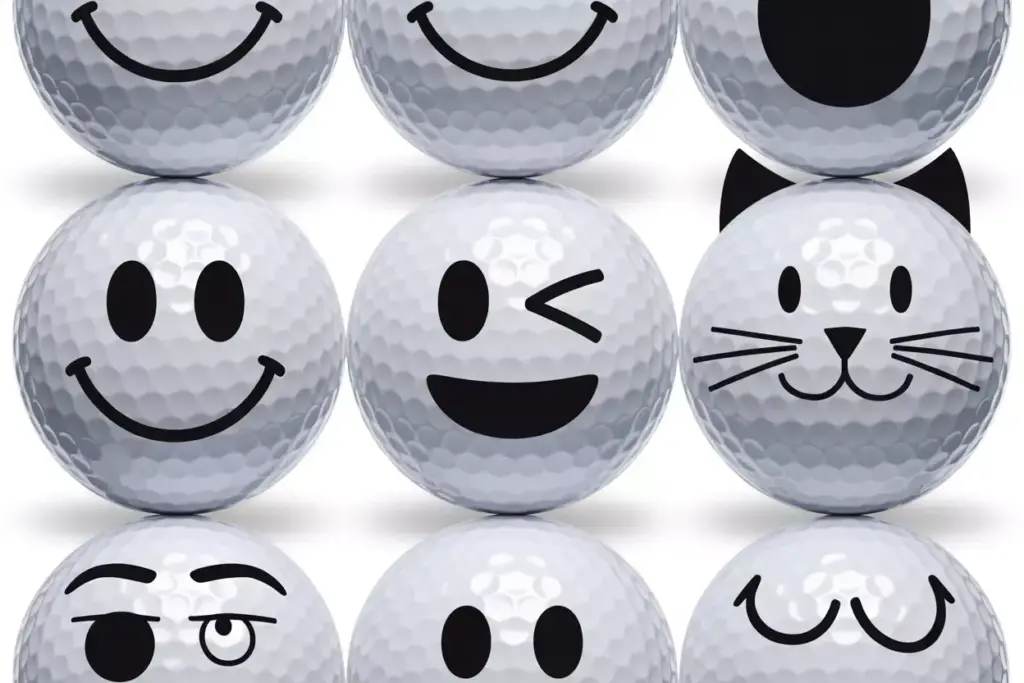
Character faces add personality and humor to golf ball art. Simple expressions using basic facial features can create memorable, entertaining pieces.
Emoji-Inspired Faces:
Draw classic emoji expressions using simple circles for eyes and curved lines for mouths. Popular choices include:
- Smiley face: Two dots for eyes, curved smile
- Winking face: One dot, one curved line for wink, smile
- Surprised face: Two large circles for eyes, small “o” for mouth
Animal Faces:
Simple animal faces work wonderfully on golf balls:
- Cat face: Triangle nose, whiskers, pointed ears
- Dog face: Black nose, floppy ears, tongue hanging out
- Owl face: Large circular eyes, small beak, feather details
Character faces benefit from bold, simple features that read clearly on the small canvas. Avoid overly complex details that might get lost in the ball’s curvature.
Design Category 2: Intermediate to Advanced Artistic Techniques
4. Intricate Mandala Patterns
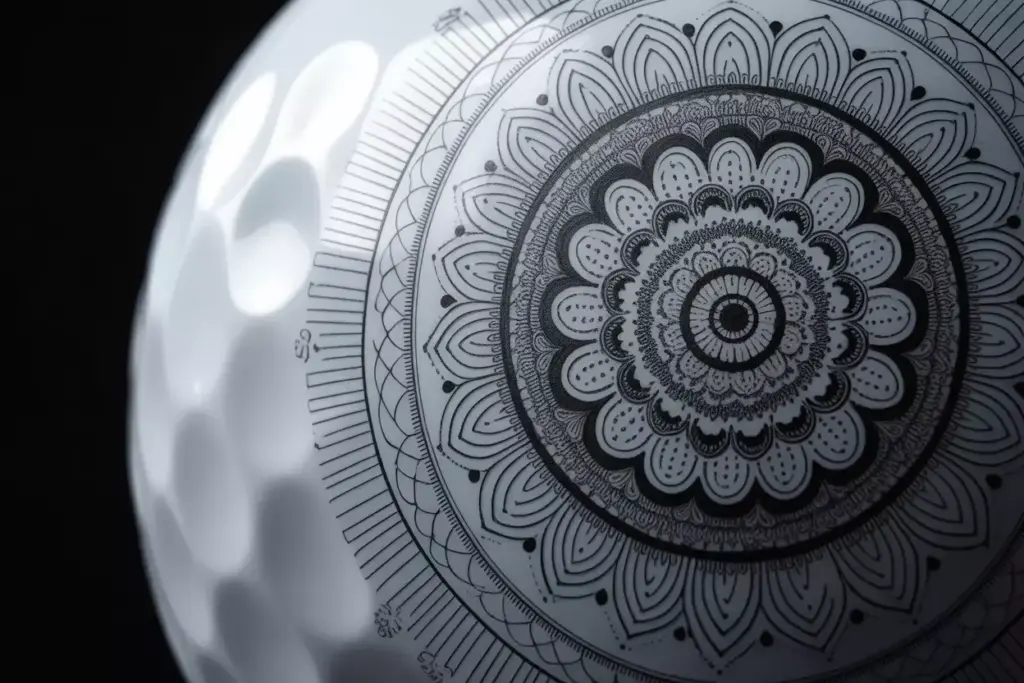
Mandala designs represent the pinnacle of golf ball artistry, combining spiritual symbolism with geometric precision. These circular, symmetrical patterns create mesmerizing visual effects that showcase advanced artistic skills.
Basic Mandala Structure:
Begin with a central point and draw concentric circles as guidelines. Divide the circles into 8 or 12 equal sections using light pencil lines. This creates the framework for symmetrical pattern development.
Petal Layer Technique:
Start from the center and work outward in layers:
- Center: Small circle with radiating dots
- First ring: Simple petal shapes pointing outward
- Second ring: Larger, more complex petals
- Outer ring: Decorative border elements
Advanced Mandala Elements:
- Lotus petals: Curved, pointed shapes that overlap slightly
- Geometric frames: Squares and triangles containing smaller patterns
- Dot work: Stippling technique creating texture and shading
- Line weight variation: Thick and thin lines for visual hierarchy
The meditative process of creating mandalas makes them particularly satisfying projects. Each repeated element builds upon the previous, creating complex beauty from simple components.
Color Integration:
While black ink mandalas are stunning, adding color elevates the design significantly. Use complementary colors sparingly, focusing on key elements like petal tips or center details. Metallic gold or silver accents can add luxury appeal.
5. Miniature Landscape Scenes
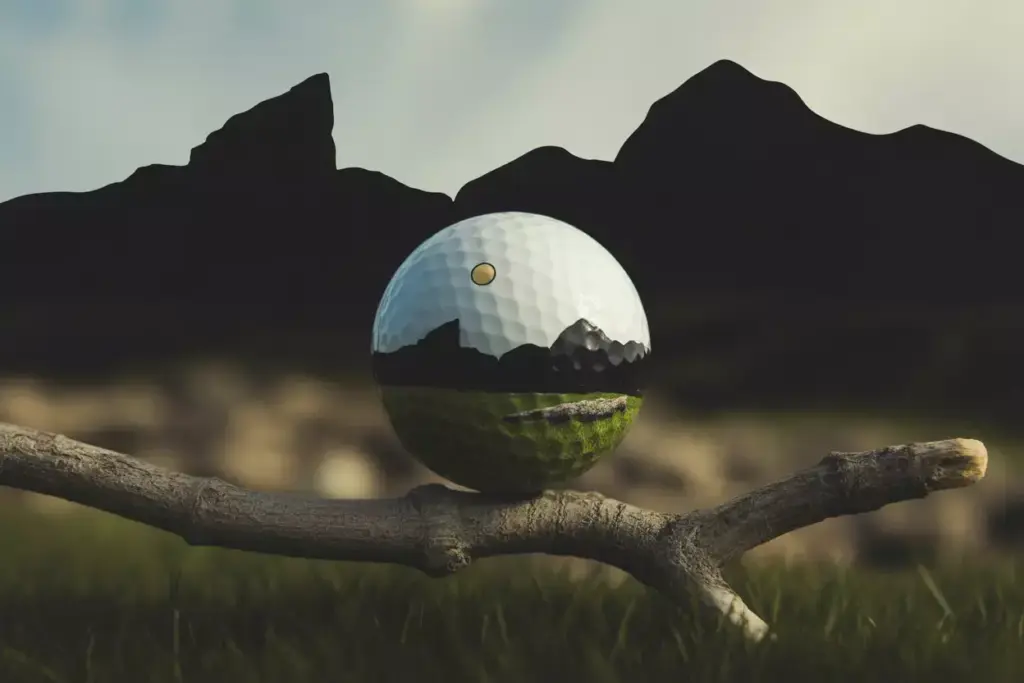
Creating tiny landscape scenes on golf balls challenges artists to capture entire environments in minimal space. These designs require careful planning and advanced technique but produce breathtaking results.
Mountain Range Silhouette:
Draw a horizon line around the ball’s equator. Above this line, sketch mountain silhouettes of varying heights. Fill the mountains with solid black ink, creating dramatic contrast against the white ball. Add a small sun or moon in the “sky” area for additional interest.
Forest Scene Technique:
Create depth using layered tree silhouettes:
- Background trees: Simple triangular shapes in light gray
- Middle ground: More detailed tree shapes in medium gray
- Foreground: Highly detailed trees with visible branches in black
Seascape Design:
Draw gentle wave lines around the lower portion of the ball. Add a sailboat silhouette on the horizon and clouds in the upper area. Use blue ink for water elements and keep the sky area white with minimal cloud outlines.
Urban Skyline:
Sketch a city skyline around the ball’s circumference, varying building heights and shapes. Add windows using small rectangles and include iconic elements like antenna towers or distinctive architectural features.
The key to successful landscape scenes lies in simplified detail and strong contrast. Focus on recognizable shapes rather than attempting photorealistic rendering.
6. Abstract Art and Patterns
Abstract designs offer complete creative freedom while allowing artists to experiment with color, form, and composition without representational constraints.
Flowing Line Patterns:
Create dynamic movement using curved, flowing lines that wrap around the ball’s surface. Vary line thickness and add small decorative elements like dots or short perpendicular lines. This technique works particularly well with colored inks.
Zentangle-Inspired Designs:
Divide the ball’s surface into irregular sections using curved lines. Fill each section with different repetitive patterns:
- Crosshatching: Overlapping diagonal lines
- Scales: Overlapping semicircles
- Spirals: Small spiral shapes clustered together
- Grid patterns: Various geometric grid fills
Color Gradient Effects:
Use multiple colored markers to create gradient effects:
- Start with the lightest color, covering desired areas
- Add medium tones while colors are still wet
- Finish with darkest colors for depth and contrast
- Blend edges using circular motions
Splatter and Texture Techniques:
Advanced artists can experiment with texture creation:
- Stippling: Tiny dots creating texture and shading
- Cross-contour lines: Lines following the ball’s curved surface
- Pattern mixing: Combining multiple pattern types in one design
Abstract art on golf balls allows for experimental techniques and personal expression that might not work in other mediums.
Professional Tips for Success
Color Theory and Application
Understanding color relationships dramatically improves design impact. Complementary colors (opposites on the color wheel) create vibrant contrast, while analogous colors (neighbors on the wheel) provide harmony.
Effective Color Combinations:
- Blue and orange: Classic complementary pair
- Purple and yellow: High contrast, energetic
- Red and green: Traditional, festive appeal
- Monochromatic schemes: Various shades of single color
Technique Refinement
Steady Hand Development:
- Practice drawing circles and straight lines daily
- Use breathing techniques to reduce hand tremors
- Take frequent breaks to prevent fatigue
- Consider using a magnifying glass for detail work
Error Correction Methods:
- Keep correction fluid handy for small mistakes
- Plan designs in pencil before inking
- Work in sections, completing each before moving on
- Accept imperfections as part of handmade charm
Preservation and Display
Protective Coating:
Apply clear acrylic sealer once designs are complete and fully dry. This prevents smudging and extends the artwork’s lifespan significantly.
Display Options:
- Golf tees in foam blocks: Simple, effective display
- Clear acrylic stands: Professional presentation
- Shadow boxes: Protect while showcasing
- Rotating display cases: Show multiple angles
Tools and Materials Deep Dive
Marker Selection Guide
Fine-tip Permanent Markers:
- 0.3mm tips: Extremely fine detail work
- 0.5mm tips: General drawing and outlines
- 0.7mm tips: Filling areas and bold lines
- 1.0mm tips: Large areas and backgrounds
Brand Recommendations:
- Sakura Pigma Micron: Archival quality, fade-resistant
- Staedtler Pigment Liners: Consistent ink flow
- Sharpie Fine Point: Widely available, good for beginners
- Copic Multiliners: Professional quality, refillable
Paint and Ink Options
Acrylic Paint Pens:
Provide opaque coverage and vibrant colors. Excellent for backgrounds and large color areas. Require longer drying time but offer superior color saturation.
Alcohol-Based Markers:
Blend beautifully and dry quickly. Perfect for gradient effects and color transitions. More expensive but offer professional results.
Water-Based Markers:
Safer for indoor use and easier cleanup. Less permanent than alcohol-based options but suitable for practice and temporary designs.
Troubleshooting Common Challenges
Working with Curved Surfaces
The golf ball’s spherical shape creates unique challenges that flat surfaces don’t present. Perspective distortion affects how designs appear from different angles.
Solutions:
- Rotate the ball frequently while drawing
- Plan designs to work from multiple viewpoints
- Use the natural “poles” and “equator” as reference points
- Consider how dimples will interact with line work
Ink Flow and Coverage Issues
Problem: Ink skips or appears patchy on the ball’s surface.
Solution: Clean the surface thoroughly and ensure markers aren’t dried out.
Problem: Colors appear different than expected.
Solution: Test all colors on a practice ball first.
Problem: Fine details get lost in dimples.
Solution: Plan detail placement between dimples or use dimples as part of the design.
Design Planning and Proportions
Sketching Guidelines:
Always sketch major elements lightly in pencil before committing to ink. This allows for adjustments and ensures proper proportions.
Proportion Considerations:
Elements that look correct on flat paper may appear distorted on a curved surface. Make design elements slightly larger than they appear necessary.
Advanced Project Ideas
Seasonal Themes
Spring Designs:
- Cherry blossom branches with pink flowers
- Baby animals (chicks, lambs, bunnies)
- Rain clouds with colorful rainbows
- Fresh green leaf patterns
Summer Themes:
- Beach scenes with palm trees
- Bright sunflower designs
- Tropical fish patterns
- Sunset gradient backgrounds
Fall Concepts:
- Autumn leaf collections
- Harvest themes with pumpkins
- Warm color abstract patterns
- Tree silhouettes with falling leaves
Winter Ideas:
- Snowflake geometric patterns
- Winter wildlife (penguins, polar bears)
- Holiday themes and decorations
- Cool color mandala designs
Special Occasion Designs
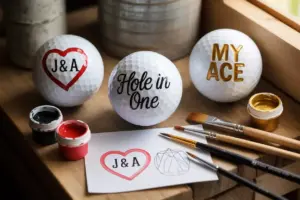
Wedding Favors:
Create personalized golf balls for golf-loving couples. Include wedding dates, initials, or small heart motifs.
Corporate Gifts:
Design golf balls featuring company logos or team-building themes. Perfect for golf tournaments or client appreciation.
Memorial Pieces:
Honor loved ones with meaningful symbols, dates, or small portraits. These become treasured keepsakes.
Building Your Skills Progressively
Week 1-2: Foundation Building
- Master basic geometric shapes
- Practice steady line drawing
- Experiment with different marker tips
- Complete 5-10 simple designs
Week 3-4: Pattern Development
- Learn repetitive pattern creation
- Practice symmetrical designs
- Attempt first mandala patterns
- Focus on consistency and precision
Week 5-6: Color Integration
- Experiment with color combinations
- Practice blending techniques
- Create gradient effects
- Develop personal color preferences
Week 7-8: Advanced Techniques
- Attempt landscape scenes
- Develop abstract compositions
- Combine multiple techniques in single pieces
- Create portfolio of best works
Creating Your Artistic Portfolio
Documentation Methods
- Use natural lighting when possible
- Photograph from multiple angles
- Include close-up detail shots
- Maintain consistent background
Progress Tracking:
Keep a journal documenting:
- Design inspiration sources
- Technique experiments
- Color combination discoveries
- Time investment per piece
Sharing Your Work
Social Media Strategies:
- Use relevant hashtags (#golfballart, #miniatureart)
- Share process videos showing creation steps
- Connect with other golf ball artists
- Participate in online art challenges
Local Exhibition Opportunities:
- Golf club pro shops
- Local art fairs and craft shows
- Community center displays
- Library exhibition cases
Conclusion
The 6 stunning drawing on golf ball designs you can copy today represent just the beginning of an exciting artistic journey. From simple geometric patterns that anyone can master to intricate mandalas requiring advanced skills, golf ball art offers endless creative possibilities.
The key to success lies in starting simple and building skills progressively. Begin with basic shapes and character faces, then advance to more complex patterns and landscape scenes as confidence grows. Remember that each golf ball provides a unique canvas with its own character and challenges.
Immediate Action Steps:
- Gather materials – Start with basic fine-tip markers and clean golf balls
- Choose your first design – Select from the beginner-friendly options presented
- Practice regularly – Dedicate 30 minutes daily to skill development
- Document progress – Photograph completed pieces to track improvement
- Share your creations – Connect with the growing community of golf ball artists
The meditative nature of creating detailed designs on such small canvases provides stress relief and artistic satisfaction that extends far beyond the finished product. Whether creating gifts for golf enthusiasts, developing a new hobby, or exploring miniature art forms, golf ball drawing offers a perfect blend of accessibility and artistic challenge.
Start with confidence, embrace imperfections as part of the handmade charm, and most importantly, enjoy the creative process. Every professional artist began with simple shapes and steady practice. Your artistic journey starts with picking up that first marker and making that initial mark on a humble golf ball.
References
[1] International Association of Golf Ball Artists – “Techniques and Materials Guide” (2024)
[2] Miniature Art Society – “Small Canvas, Big Impact: Golf Ball Artistry” (2023)
[3] Art Materials Research Institute – “Permanent Marker Performance on Curved Surfaces” (2024)
[4] Creative Hobbies Magazine – “Golf Ball Art: From Hobby to Professional Practice” (2025)