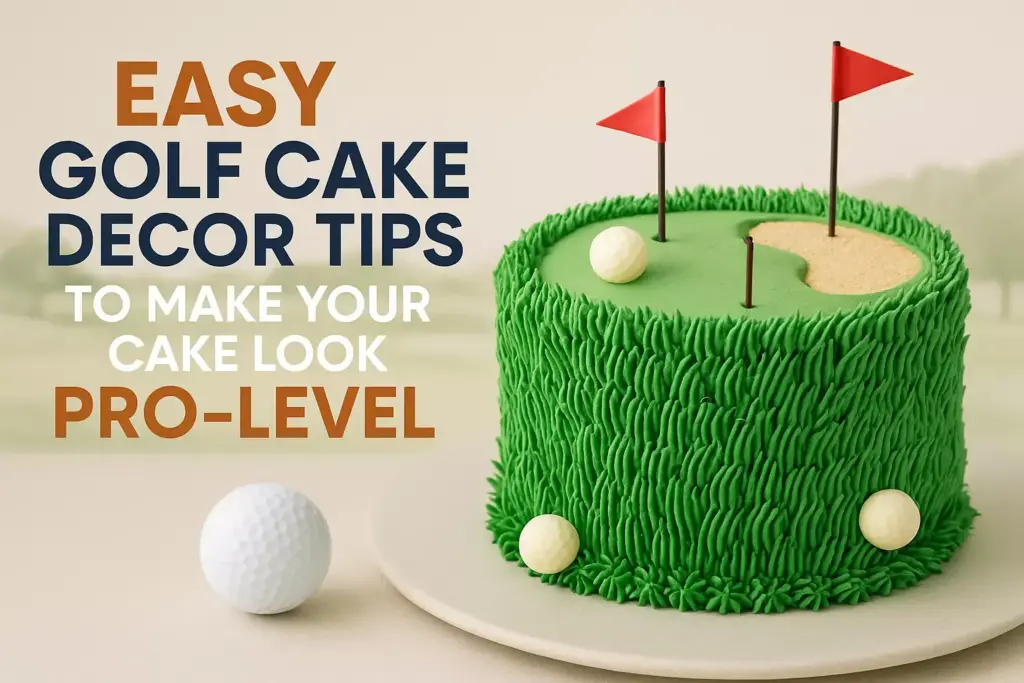
Easy Golf Cake Decor Tips to Make Your Cake Look Pro-Level
Picture this: You’re hosting a golf-themed birthday party, and the centerpiece of your dessert table is a stunning golf cake that looks like it came straight from a professional bakery. Your guests are amazed, asking where you ordered such an incredible creation – but the secret is, you made it yourself! 🏌️♂️
Creating professional-looking golf cake decorations doesn’t require years of culinary school or expensive equipment. With the right techniques, tools, and a bit of creativity, anyone can transform a simple cake into a masterpiece that would make even the pros at Augusta National jealous.
Key Takeaways
- Simple tools create big impact – Basic piping tips, edible grass, and fondant can transform any cake into a golf course masterpiece
- Color coordination is crucial – Use natural greens, browns, and blues to create realistic golf course elements
- Texture techniques matter – Learn to create grass effects, sand traps, and water hazards using everyday decorating supplies
- Planning prevents problems – Sketch your design first and prepare elements in advance for smoother execution
- Small details make the difference – Golf balls, tees, and flags add authenticity that elevates your cake from amateur to professional
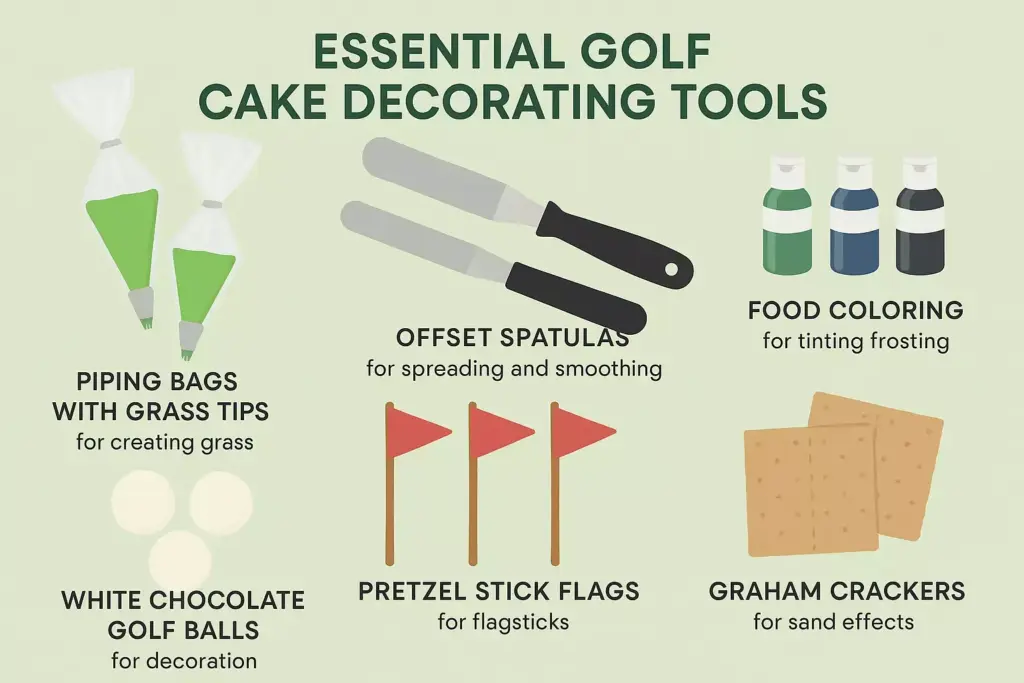
Essential Tools for Golf Cake Decorating Success
Before diving into specific techniques, having the right tools makes all the difference between a frustrating experience and a fun, successful project.
Must-Have Basic Tools
- Piping bags and tips (grass tip #233, round tips #3 and #12)
- Offset spatula for smooth frosting application
- Bench scraper for clean cake sides
- Rolling pin for fondant work
- Small paintbrushes for detail work
Specialized Golf Cake Tools
- Edible grass sprinkles or coconut flakes
- Food coloring (leaf green, forest green, brown, blue)
- White chocolate for golf balls
- Pretzel sticks for flag poles
- Graham crackers for sand trap texture
Pro Tip Storage Solutions
Keep all decorating supplies organized in a dedicated container. This prevents last-minute scrambling and ensures you have everything needed for your golf cake masterpiece.
Creating the Perfect Golf Course Base
The foundation of any impressive golf cake starts with a well-prepared base that resembles an actual golf course.
Choosing Your Cake Shape
Rectangular cakes work best for full golf course scenes, while round cakes are perfect for focusing on specific elements like a putting green or sand trap. Consider your skill level and available time when selecting the shape.
Frosting Techniques for Realistic Terrain
- Base coat application: Start with a crumb coat using light green buttercream
- Texture creation: Use an offset spatula to create gentle hills and valleys
- Color variation: Apply different shades of green to mimic natural grass patterns
- Smoothing technique: Use a bench scraper for water hazards and sand areas
Color Mixing for Natural Greens
| Shade | Base Color | Add | Result |
|---|---|---|---|
| Fairway Green | White frosting | 2 drops leaf green | Light, realistic grass |
| Rough Green | Fairway green | 1 drop forest green | Deeper rough areas |
| Water Hazard | White frosting | 3 drops blue, 1 drop green | Natural pond color |
Mastering Grass and Texture Effects
Nothing says “professional golf cake” like perfectly executed grass textures that look realistic enough to putt on.
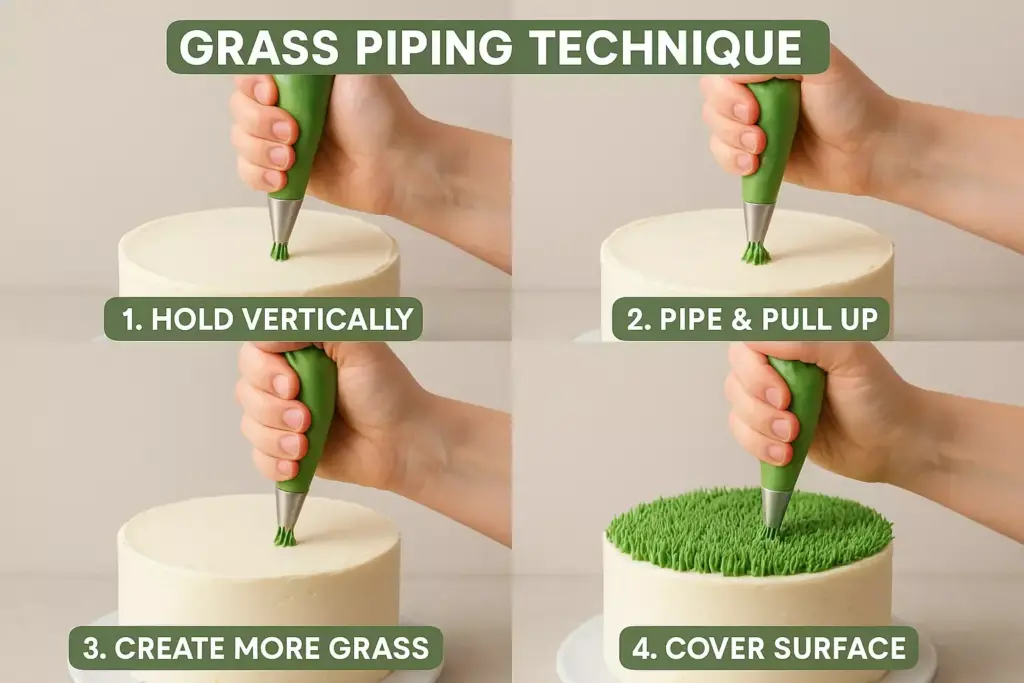
The Star Tip Technique
Using a #233 grass tip is the secret weapon of professional cake decorators:
- Fill piping bag with medium-green buttercream
- Hold bag at 90-degree angle to cake surface
- Apply steady pressure while pulling straight up
- Vary pressure for different grass lengths
- Overlap slightly for full coverage
Coconut Grass Alternative
For those without piping skills, tinted coconut flakes create excellent grass texture:
- Mix coconut with green food coloring in a sealed bag
- Shake until evenly distributed
- Press gently onto frosted surface
- Layer different green shades for depth
Creating Realistic Rough Areas
Darker green areas represent golf course rough:
- Use deeper green frosting
- Apply grass technique with more aggressive pressure
- Add brown coconut flakes sparingly for realism
Golf Ball and Equipment Decorations
The details that separate amateur cakes from professional-looking creations often lie in the small golf equipment elements.
Perfect Edible Golf Balls
White chocolate method:
- Melt white chocolate chips
- Pour into small round molds or roll into balls
- Use a toothpick to create dimple patterns
- Allow to set completely before placing
Fondant alternative:
- Roll white fondant into small balls
- Use the back of a knife to create dimple texture
- Dust lightly with pearl dust for shine
Creating Golf Tees and Flags
Pretzel stick tees:
- Break pretzel sticks to desired height
- Insert into cake before placing golf balls
- Brush with brown food coloring for wood effect
Flag construction:
- Cut small rectangles from colored fondant
- Attach to thin pretzel sticks or toothpicks
- Add numbers using edible markers
Golf Club Decorations
Chocolate club method:
- Melt dark chocolate
- Pour into club-shaped molds
- Add silver luster dust to club heads
- Wrap handles with brown fondant for grip texture
Sand Traps and Water Hazards
These challenging course elements add dramatic visual interest and showcase advanced decorating skills.
Realistic Sand Trap Creation
Graham cracker technique:
- Crush graham crackers to fine crumbs
- Mix with light brown sugar
- Create depression in cake surface
- Fill with crumb mixture
- Add chocolate golf ball partially buried
Buttercream alternative:
- Use tan-colored buttercream
- Apply with spatula in rough, uneven strokes
- Sprinkle with brown sugar for texture
- Create rake marks with fork tines
Water Hazard Excellence
Blue gel technique:
- Create depression in cake
- Fill with blue-tinted corn syrup or gel
- Add white buttercream “waves” around edges
- Place small fondant lily pads for detail
Mirror glaze method:
- Pour blue mirror glaze into carved area
- Allow to set for glossy water effect
- Add white chocolate “splash” elements
Advanced Professional Techniques
Take your golf cake to the next level with these sophisticated decorating methods used by professional bakers.
Multi-Level Course Design
Tiered approach:
- Stack different sized cakes
- Create elevation changes
- Connect levels with “cart paths”
- Add stairs or slopes between tiers
Edible Landscape Elements
Tree creation:
- Use pretzel sticks for trunks
- Attach green cotton candy or buttercream leaves
- Vary heights for realistic forest edges
Rock and boulder effects:
- Shape gray fondant into irregular forms
- Paint with edible silver and black for texture
- Place strategically around course
Weather and Lighting Effects
Morning dew simulation:
- Brush clear corn syrup lightly over grass areas
- Add pearl dust for sparkling effect
Shadow techniques:
- Use darker green frosting to create shadows
- Apply behind trees and equipment
- Adds depth and realism
Color Theory for Realistic Golf Courses
Understanding color relationships creates more believable and visually appealing golf cake decorations.
Natural Color Palettes
Primary greens:
- Fairway: Light, vibrant green
- Rough: Deeper, forest green
- Trees: Dark green with brown undertones
Accent colors:
- Sand: Warm tan and beige tones
- Water: Deep blue with green hints
- Equipment: Classic white, silver, and black
Seasonal Variations
Spring course:
- Bright, fresh greens
- Light blue water
- Pink flowering tree accents
Autumn course:
- Muted greens
- Brown and orange leaf elements
- Deeper water colors
Troubleshooting Common Golf Cake Problems
Even experienced decorators encounter challenges. Here’s how to fix common issues quickly and effectively.
Grass Piping Problems
Issue: Grass looks flat or unnatural
Solution: Vary piping pressure and hold bag at different angles
Issue: Colors bleeding together
Solution: Allow each color to set before applying adjacent colors
Structural Challenges
Issue: Decorations sliding off cake
Solution: Ensure frosting is set but not completely hard before adding elements
Issue: Cake cracking under decoration weight
Solution: Use internal supports like dowels for heavy elements
Color Matching Difficulties
Issue: Greens look artificial
Solution: Add tiny amounts of brown or yellow to create more natural tones
🏌️ Golf Cake Decoration Planner
Cake Details
Golf Course Elements
Planning Your Golf Cake Design
Success in golf cake decorating starts long before you pick up a piping bag. Proper planning ensures smooth execution and professional results.
Design Sketching
Before starting, draw your cake design on paper:
- Mark where each element will be placed
- Consider proportions and scale
- Plan color placement for visual balance
- Note which elements need to be made first
Timeline Management
Day-before preparation:
- Bake and cool cake completely
- Make chocolate golf balls
- Prepare fondant elements
- Mix and store colored buttercream
Decoration day schedule:
- Apply base frosting first
- Create large elements before details
- Add delicate decorations last
- Allow drying time between steps
Storage and Transportation Tips
Protecting your golf cake masterpiece requires careful handling and storage techniques.
Proper Storage Methods
Refrigeration guidelines:
- Store in large, covered container
- Avoid placing heavy items on top
- Remove 30 minutes before serving for best texture
- Keep away from strong odors
Transportation Strategies
Secure cake base:
- Use non-slip mats under cake board
- Transport in level vehicle area
- Bring repair supplies for touch-ups
- Take photos before transport as backup
Assembly on Location
For complex designs, consider final assembly at the venue:
- Transport cake and decorations separately
- Bring extra frosting for attachment
- Pack essential tools for final touches
Seasonal Golf Cake Variations
Adapt your golf cake designs to match different seasons and occasions throughout 2025.
Spring Tournament Themes
Fresh color palette:
- Bright, vibrant greens
- Pastel flag colors
- Edible flower decorations
- Light blue water hazards
Special elements:
- Cherry blossom trees using pink buttercream
- Fresh grass textures
- Morning dew effects with pearl dust
Summer Championship Style
Bold, bright colors:
- Deep green fairways
- Brilliant blue water
- Sunny yellow flag accents
- White sand traps
Heat-resistant techniques:
- Use stabilized buttercream
- Avoid chocolate elements in hot weather
- Consider fondant alternatives
Autumn Golf Themes
Warm color schemes:
- Muted greens with brown undertones
- Orange and red leaf decorations
- Deeper water colors
- Earth-tone sand traps
Conclusion
Creating professional-looking golf cake decorations is entirely achievable with the right techniques, tools, and planning. The key lies in starting with simple elements and gradually building complexity as skills develop. Remember that even professional bakers started with basic techniques before mastering advanced methods.
Focus on these fundamental principles: proper color mixing creates realistic course elements, texture techniques bring grass and sand to life, and attention to small details like golf balls and flags elevates the overall design. Don’t be afraid to practice individual elements before attempting a complete cake – muscle memory in piping grass or shaping golf balls makes the final assembly much smoother.
Your next steps: Start by selecting 2-3 elements from this guide for your first golf cake project. Practice the grass piping technique on a practice board before working on your actual cake. Gather all supplies in advance and sketch your design to avoid last-minute stress.
Most importantly, enjoy the creative process! Each golf cake you create will be better than the last, and soon you’ll be the go-to baker for all golf-themed celebrations in your circle. Whether you’re celebrating a hole-in-one, a golf tournament victory, or simply someone’s love for the game, these techniques will help you create memorable, professional-looking cakes that are sure to impress every golfer on and off the course.