Golf Simulator Shed Plans: How to Design the Perfect Outdoor Practice Space
Picture this: It’s 6 AM on a rainy Tuesday, and while most golfers are stuck indoors, you’re already working on your swing in your custom-built golf simulator shed. No more weather delays, no more crowded driving ranges, and no more excuses for missing practice sessions. Building a dedicated golf simulator shed transforms your backyard into a year-round training facility that rivals professional golf academies.
Key Takeaways
- Minimum dimensions: 12′ wide × 16′ deep × 10′ high for comfortable swing clearance and ball flight tracking
- Essential features: Proper ventilation, climate control, electrical systems, and impact-resistant materials
- Budget planning: Expect $15,000-$50,000 total investment including shed construction and simulator equipment
- Foundation requirements: Level concrete pad or reinforced pier system to support equipment and reduce vibration
- Permits needed: Most areas require building permits for structures over 120 square feet
Understanding Golf Simulator Shed Requirements
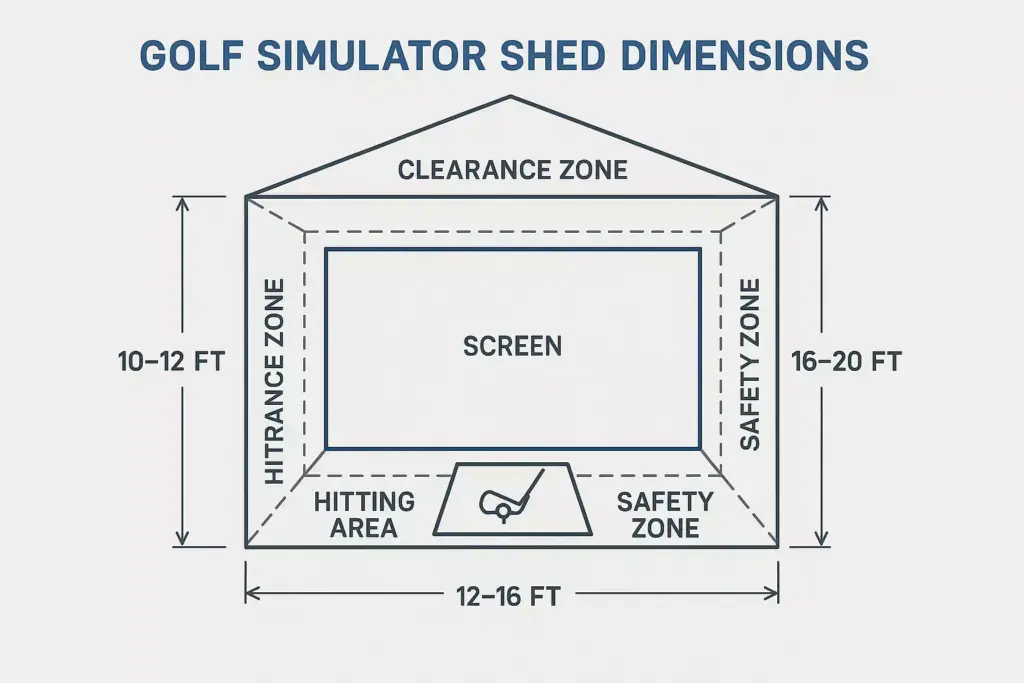
Space Dimensions and Clearances
The foundation of any successful golf simulator shed starts with proper spatial planning. Unlike a standard storage shed, golf simulator structures must accommodate full golf swings, ball flight paths, and sophisticated tracking equipment.
Minimum clearance requirements include:
- Ceiling height: 10-12 feet minimum (11 feet recommended)
- Width: 12-14 feet for right-handed golfers, 14-16 feet for left-handed or ambidextrous setups
- Depth: 16-20 feet to accommodate ball flight and screen distance
- Behind golfer: 6-8 feet for backswing clearance
- Side clearance: 4-5 feet on each side of hitting position
Structural Considerations
Golf simulator sheds endure unique stresses that standard garden sheds aren’t designed to handle. Repeated ball impacts, vibration from swing platforms, and heavy equipment loads require reinforced construction methods.
Key structural elements include:
- Reinforced framing: 2×6 or 2×8 wall studs instead of standard 2×4
- Impact zones: Double-wall construction behind impact screens
- Floor reinforcement: Concrete slab or engineered subfloor system
- Roof trusses: Engineered to support ceiling-mounted equipment
Essential Design Elements
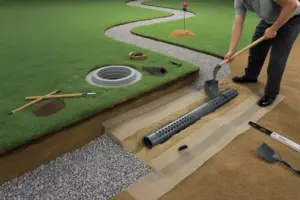
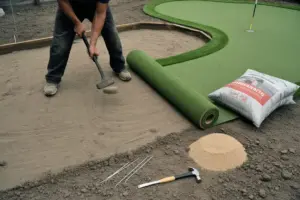
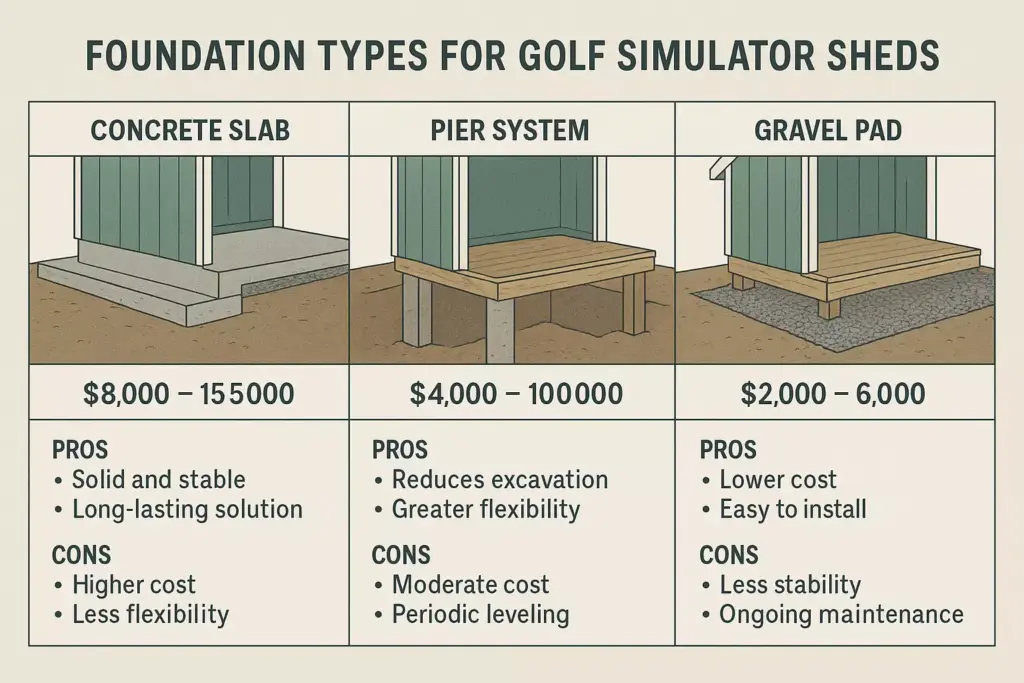
Foundation and Flooring Systems
The foundation serves as the cornerstone of your golf simulator shed, literally and figuratively. Poor foundation choices lead to equipment misalignment, vibration issues, and structural problems that can cost thousands to remedy.
Foundation options ranked by performance:
| Foundation Type | Cost Range | Durability | Installation Time | Best For |
|---|---|---|---|---|
| Concrete Slab | $3-8/sq ft | Excellent | 1-2 weeks | Permanent installations |
| Pier System | $2-5/sq ft | Very Good | 3-5 days | Level lots, quick setup |
| Gravel Pad | $1-3/sq ft | Good | 1-2 days | Temporary/budget builds |
Electrical and Technology Infrastructure
Modern golf simulators demand robust electrical systems to power multiple components simultaneously. Planning electrical needs during the design phase prevents costly retrofits and ensures optimal performance.
Essential electrical requirements:
- Main power: 200-amp service recommended for climate control and equipment
- Dedicated circuits: Separate 20-amp circuits for simulator, lighting, and HVAC
- Network infrastructure: Hardwired ethernet for stable internet connectivity
- USB charging stations: Built-in charging for mobile devices and accessories
- Emergency lighting: Battery backup systems for safety
Climate Control and Ventilation
Temperature and humidity control directly impact both equipment longevity and user comfort. Golf simulators generate heat from projectors and computers while players generate moisture through physical activity.
Effective climate control strategies:
- HVAC sizing: 1.5-2 tons capacity for typical 200-300 sq ft spaces
- Ventilation: Minimum 6 air changes per hour
- Humidity control: Maintain 30-50% relative humidity
- Air circulation: Ceiling fans to prevent hot spots and improve comfort
Construction Planning and Permits
Building Code Compliance
Most municipalities classify golf simulator sheds as accessory structures subject to specific zoning and building requirements. Understanding local codes prevents project delays and potential legal issues.
Common permit requirements:
- Size thresholds: Permits typically required for structures over 120-200 sq ft
- Setback requirements: Minimum distances from property lines (usually 5-10 feet)
- Height restrictions: Maximum height limits (often 15-20 feet)
- Electrical permits: Separate permits for electrical work over basic lighting
Professional vs. DIY Construction
The complexity of golf simulator sheds places them at the intersection of basic construction and specialized installation. Successful DIY projects require intermediate carpentry skills and careful planning.
DIY-friendly components:
- Basic framing and roofing
- Interior finishing
- Simple electrical (with permits)
- Ventilation installation
Professional-recommended elements:
- Foundation work
- Complex electrical systems
- HVAC installation
- Structural engineering
Interior Layout and Design
Hitting Area Configuration
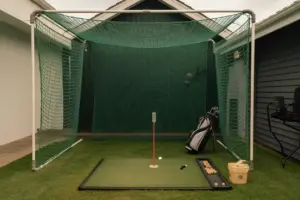
The hitting area represents the heart of your golf simulator shed, where precise positioning and safety considerations merge with performance optimization. Every element from mat placement to ceiling height affects shot accuracy and user safety.
Optimal hitting area specifications:
- Mat position: 12-15 feet from impact screen
- Tee line marking: Permanent markers for consistent setup
- Safety zones: Clearly marked areas for observers
- Storage integration: Built-in club storage within arm’s reach
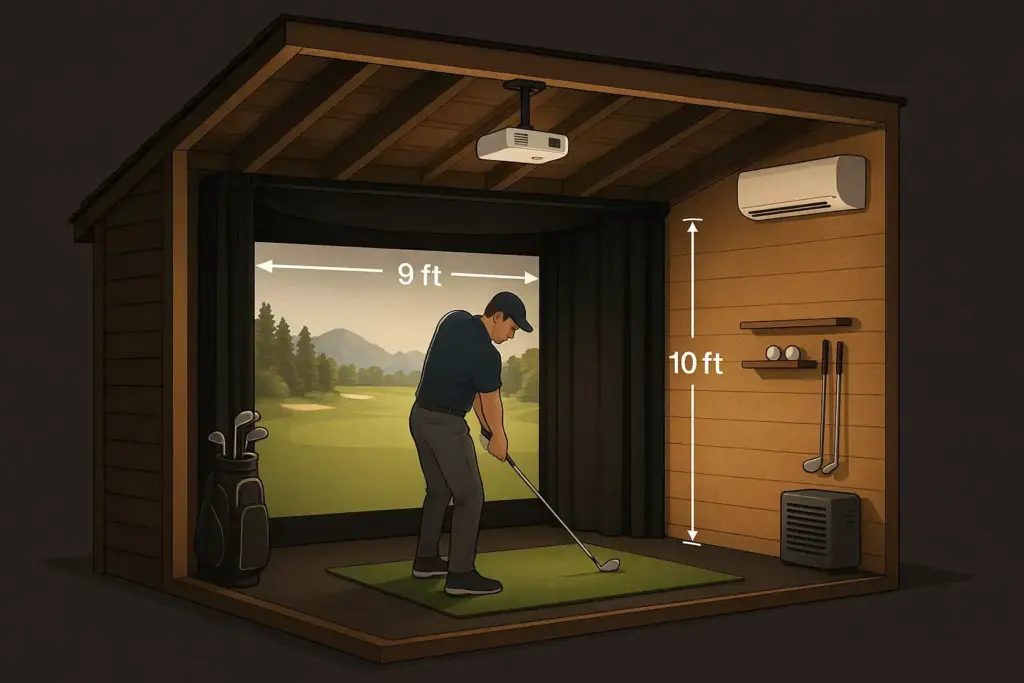
Screen and Projection Setup
Impact screen selection and positioning dramatically influence both visual quality and system durability. The screen serves dual purposes: displaying realistic course visuals and safely stopping golf balls traveling at high speeds.
Screen positioning guidelines:
- Distance from tee: 8-12 feet for accurate ball tracking
- Screen angle: Slight forward tilt (5-10 degrees) for optimal projection
- Mounting system: Ceiling-mounted tracks for easy screen replacement
- Backstop protection: Additional padding behind screens for ball containment
Storage and Organization Solutions
Efficient storage systems keep equipment organized while maximizing usable space for golf activities. Well-planned storage prevents clutter and protects valuable equipment from damage.
Built-in storage recommendations:
- Club storage: Wall-mounted racks for multiple sets
- Ball dispensers: Automated systems for practice balls
- Equipment cabinets: Lockable storage for electronics and accessories
- Seating storage: Benches with internal storage compartments
Technology Integration
Simulator System Selection
Choosing the right simulator system balances performance capabilities with budget constraints while ensuring compatibility with your shed design. Modern systems range from basic swing analyzers to full-course simulation platforms.
Popular simulator categories:
- Launch monitors: $2,000-$20,000 (TrackMan, FlightScope, SkyTrak)
- All-in-one systems: $15,000-$75,000 (Full Swing, TruGolf, AboutGolf)
- Software platforms: $200-$2,000 annually (E6 Connect, TGC 2019, GSPro)
Audio and Visual Enhancements
Immersive audio-visual systems transform practice sessions into engaging experiences that motivate consistent training. Strategic placement of speakers and displays enhances realism without interfering with swing mechanics.
Audio-visual components:
- Surround sound: 5.1 or 7.1 systems for course ambiance
- Secondary displays: Swing analysis and statistics screens
- Ambient lighting: LED strips for mood setting and visibility
- Camera systems: Multiple angles for swing recording and analysis
Budget Planning and Cost Breakdown
Construction Cost Estimates
Understanding total project costs prevents budget overruns and enables informed decision-making throughout the planning process. Costs vary significantly based on size, features, and regional labor rates.
Typical cost breakdown for 12×16 shed:
| Component | Budget Range | Mid-Range | Premium |
|---|---|---|---|
| Foundation | $1,500-$3,000 | $4,000-$6,000 | $7,000-$10,000 |
| Structure | $3,000-$6,000 | $8,000-$12,000 | $15,000-$25,000 |
| Electrical | $1,000-$2,500 | $3,000-$5,000 | $6,000-$10,000 |
| HVAC | $2,000-$4,000 | $5,000-$8,000 | $10,000-$15,000 |
| Interior | $1,500-$3,500 | $4,000-$7,000 | $8,000-$15,000 |
Equipment Investment Strategy
Phased equipment purchases allow for immediate use while spreading costs over time. Starting with essential components enables early enjoyment while budgeting for premium upgrades.
Phase 1 (Essential): $5,000-$15,000
- Basic launch monitor
- Impact screen and projector
- Hitting mat and net system
Phase 2 (Enhanced): $10,000-$25,000
- Premium launch monitor
- Course simulation software
- Audio system and lighting
Phase 3 (Professional): $20,000-$50,000
- Commercial-grade equipment
- Multiple camera systems
- Custom software integration
Maintenance and Longevity
Preventive Maintenance Schedules
Regular maintenance extends equipment life and ensures consistent performance while preventing costly repairs. Establishing maintenance routines protects your investment and maintains optimal playing conditions.
Monthly maintenance tasks:
- Clean impact screens and check for damage
- Calibrate launch monitor systems
- Inspect electrical connections
- Test climate control systems
Seasonal maintenance requirements:
- Deep clean all surfaces and equipment
- Update software and firmware
- Inspect structural components
- Service HVAC systems
Weatherproofing and Protection
Proper weatherproofing protects sensitive electronics while maintaining structural integrity through seasonal temperature and humidity changes. Inadequate protection leads to equipment failure and costly replacements.
Critical weatherproofing elements:
- Moisture barriers: Vapor barriers in walls and ceiling
- Insulation: R-19 minimum in walls, R-30 in ceiling
- Sealing: Weather stripping around doors and windows
- Drainage: Proper grading and gutter systems
Common Design Mistakes to Avoid
Undersized Dimensions
The most common and costly mistake involves building too small. Once constructed, expanding shed dimensions requires significant reconstruction and expense. Always err on the side of larger dimensions when budget allows.
Dimension pitfalls:
- Insufficient ceiling height for tall golfers
- Inadequate width for left-handed golfers
- Limited depth affecting ball flight tracking
- Poor clearance behind hitting position
Inadequate Power Planning
Electrical shortcomings become apparent only after equipment installation when insufficient power causes performance issues or safety concerns. Planning for future equipment additions prevents costly electrical upgrades.
Power planning oversights:
- Undersized electrical service
- Insufficient outlet placement
- Missing dedicated circuits
- Poor network infrastructure
Poor Ventilation Design
Inadequate ventilation leads to equipment overheating, moisture problems, and uncomfortable playing conditions. Proper air circulation maintains optimal temperature and humidity while extending equipment life.
Ventilation mistakes:
- Insufficient air exchange rates
- Poor air circulation patterns
- Missing humidity control
- Inadequate equipment cooling
Professional Installation vs. DIY Considerations
Skill Assessment and Project Scope
Honest evaluation of construction skills and available time determines the optimal balance between DIY work and professional installation. Some aspects require specialized knowledge while others suit motivated DIYers.
DIY-suitable tasks:
- Basic framing and siding
- Interior finishing work
- Simple storage solutions
- Equipment setup and calibration
Professional-recommended tasks:
- Electrical system installation
- HVAC design and installation
- Foundation work
- Structural engineering
Timeline and Project Management
Realistic timeline planning prevents rushed decisions and ensures quality results. Professional contractors often complete projects faster due to experience and specialized tools.
Typical project timelines:
- DIY construction: 3-6 months (weekends and evenings)
- Professional build: 4-8 weeks (weather dependent)
- Hybrid approach: 6-12 weeks (mixed DIY and professional work)
🏌️ Golf Simulator Shed Planning Calculator
Conclusion
Building the perfect golf simulator shed represents a significant investment in both your golf game and property value. Success depends on careful planning, realistic budgeting, and attention to technical details that differentiate simulator sheds from standard outbuildings.
The key to a successful project lies in avoiding common sizing mistakes, planning adequate electrical and climate systems, and choosing quality construction methods that support sophisticated equipment. Whether pursuing a DIY approach or hiring professionals, understanding these fundamentals ensures your investment delivers years of reliable performance.
Take action today by:
- Measuring your available space and confirming local building requirements
- Using the cost calculator above to establish a realistic budget
- Consulting with local contractors for quotes on foundation and electrical work
- Researching simulator equipment options to inform your space planning decisions
Your perfect golf simulator shed awaits – start planning today and transform your backyard into a year-round golf training facility that rivals any professional academy.