8 Effective Steps on How to Clean Old Golf Clubs and Restore Their Shine
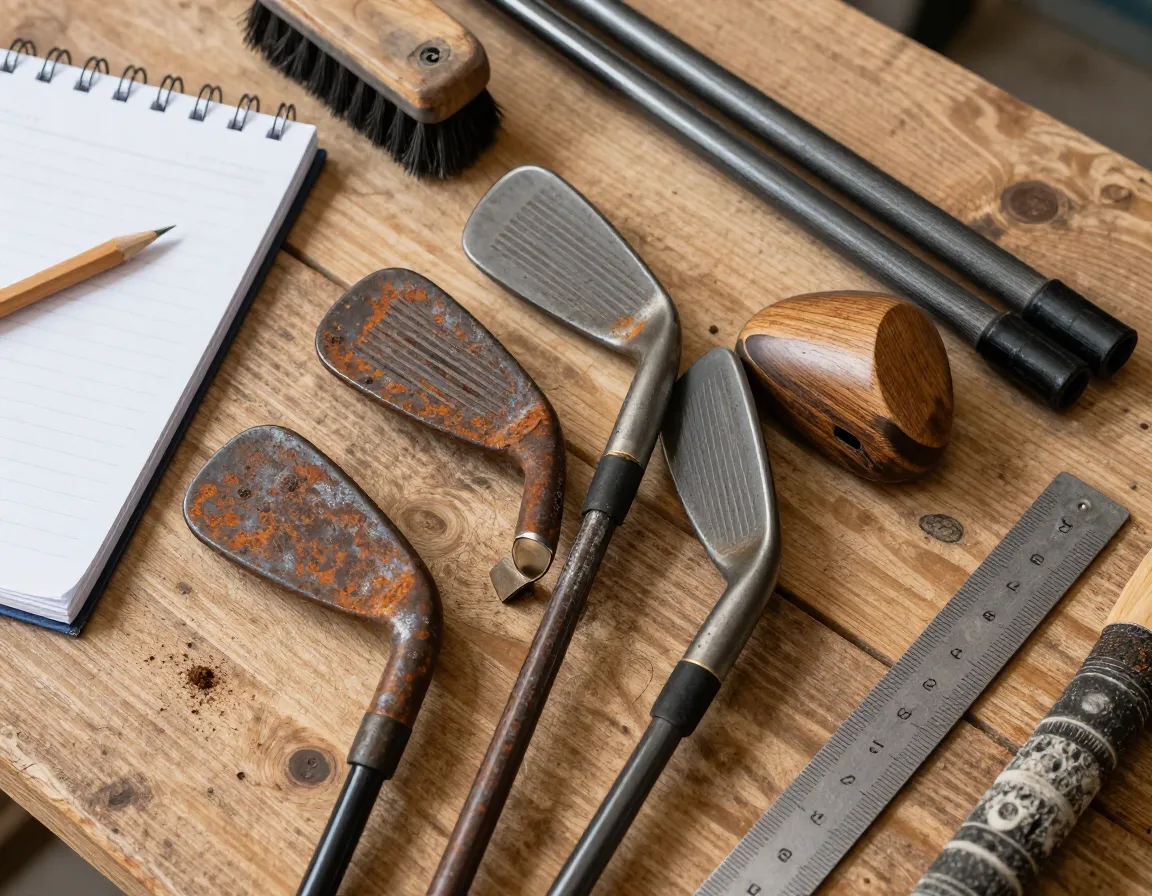
Picture this: you’re standing over a crucial approach shot, but your trusty 7-iron looks like it’s been buried in a bunker for months. The grooves are packed with dirt, rust spots dot the clubface, and the once-gleaming finish has lost its luster. Sound familiar? Don’t worry – even the most neglected golf clubs can be brought back to life with the right approach.
Disclosure: This post contains affiliate links. As an Amazon Associate, we earn from qualifying purchases, and at no extra cost to you.

Whether you’ve inherited a set of vintage clubs, found a bargain at a garage sale, or simply let your own equipment fall into disrepair, learning the 8 Effective Steps on How to Clean Old Golf Clubs and Restore Their Shine can save you hundreds of dollars and give your game a serious boost. I’ve restored countless sets over the years, and I’m excited to share these proven techniques that will have your clubs looking and performing like new.
Key Takeaways
- Start with gentle cleaning methods using mild dish soap and warm water before attempting more aggressive restoration techniques
- Never soak wooden clubs or graphite shafts – these materials require special care to prevent permanent damage
- Focus on groove cleaning as dirty grooves significantly reduce spin rates and shot accuracy
- Use household items like vinegar and lemon juice for effective rust removal without expensive specialty products
- Proper drying and polishing prevents future rust formation and maintains that professional shine
Understanding Your Golf Club Materials Before Starting the 8 Effective Steps
Before diving into the 8 Effective Steps on How to Clean Old Golf Clubs and Restore Their Shine, it’s crucial to identify what you’re working with. Different materials require different approaches, and using the wrong technique can cause permanent damage.
Iron clubheads are typically made from stainless steel or carbon steel and can handle more aggressive cleaning methods. Wooden clubs and graphite shafts, however, are much more delicate and must never be soaked in water [1][4]. The key is matching your cleaning approach to your equipment.
Here’s a quick material identification guide:
| Club Type | Material | Soaking Safe? | Special Considerations |
|---|---|---|---|
| Modern Irons | Stainless Steel | ✅ Yes | Can handle most cleaning methods |
| Vintage Irons | Carbon Steel | ✅ Yes | More prone to rust |
| Drivers/Woods | Titanium/Composite | ❌ No | Wipe only with damp cloth |
| Shafts | Graphite | ❌ No | Extremely fragile when wet |
| Shafts | Steel | ✅ Yes | Durable but check grip attachment |
Essential Supplies for the 8 Effective Steps on How to Clean Old Golf Clubs
Gathering the right tools makes all the difference in your restoration success. Here’s what you’ll need:
Basic Cleaning Arsenal:
- Mild dish soap (Dawn works excellently)
- Warm water
- Soft-bristled brushes (old toothbrushes work great)
- Microfiber cloths
- Plastic tub or bucket
Rust Removal Specialists:
- White vinegar
- Fresh lemon juice
- Fine-grade steel wool (0000 grade)
- Specialized rust remover (for severe cases)
Finishing Touches:
- Metal polish (for chrome or stainless steel)
- Car wax (for long-term protection)
- Cotton swabs for detail work
💡 Pro Tip: Start with the gentlest methods first. You can always escalate to stronger solutions, but you can’t undo damage from being too aggressive initially.
Step-by-Step Guide: 8 Effective Steps on How to Clean Old Golf Clubs and Restore Their Shine
1. Initial Assessment and Preparation
Begin by examining each club carefully. Look for rust spots, deep scratches, and areas where the finish has worn away. Take photos if you’re working on a valuable vintage set – this helps track your progress and ensures you don’t miss any problem areas.
Remove any loose dirt and debris with a dry brush. This prevents scratching during the wet cleaning process and gives you a clearer view of what you’re dealing with [1].
2. Create Your Cleaning Solution
Fill a plastic tub with warm water and add a few drops of mild dish soap. The water should be comfortably warm to the touch but not hot enough to damage any adhesives or finishes [1][2]. Avoid harsh chemicals or degreasers at this stage – they can strip protective coatings and cause more harm than good.
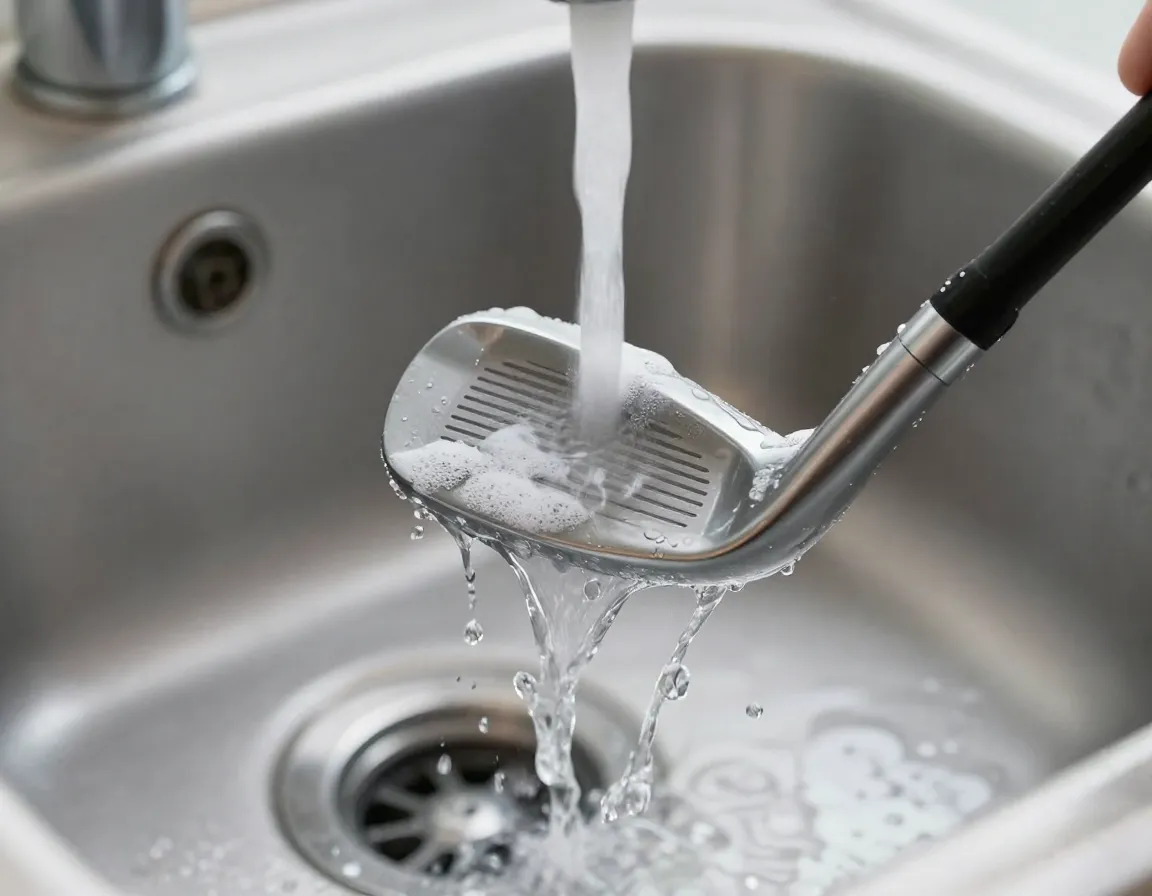
3. Soak Iron Clubheads (5-10 Minutes)
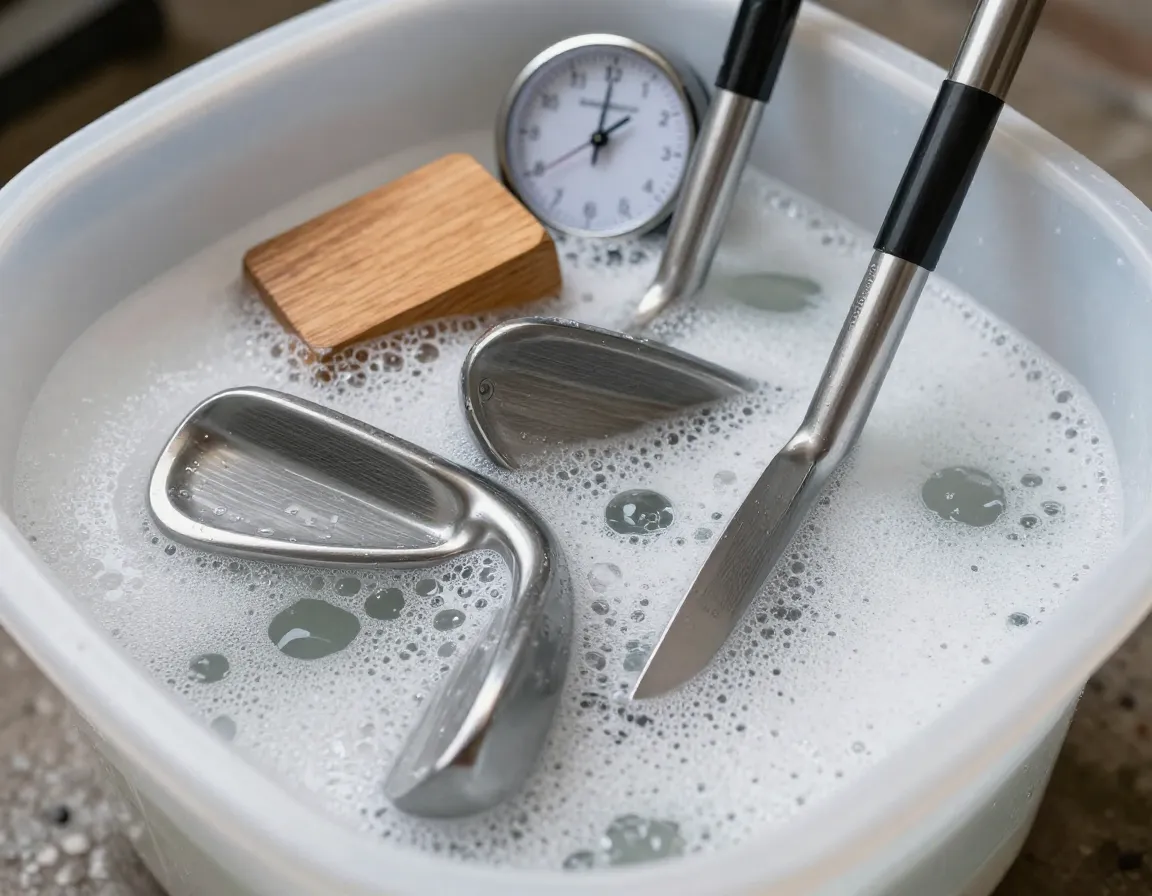
For iron clubs only, submerge the clubheads in your soapy water solution for 5-10 minutes [1][4]. This soaking time allows the warm water to penetrate and loosen stubborn dirt and grime that’s built up in the grooves and on the clubface.
⚠️ Warning: Never soak wooden clubs, putters with special inserts, or any clubs with graphite shafts. These materials can be permanently damaged by water exposure [1][4].
4. Scrub with Soft-Bristled Brushes
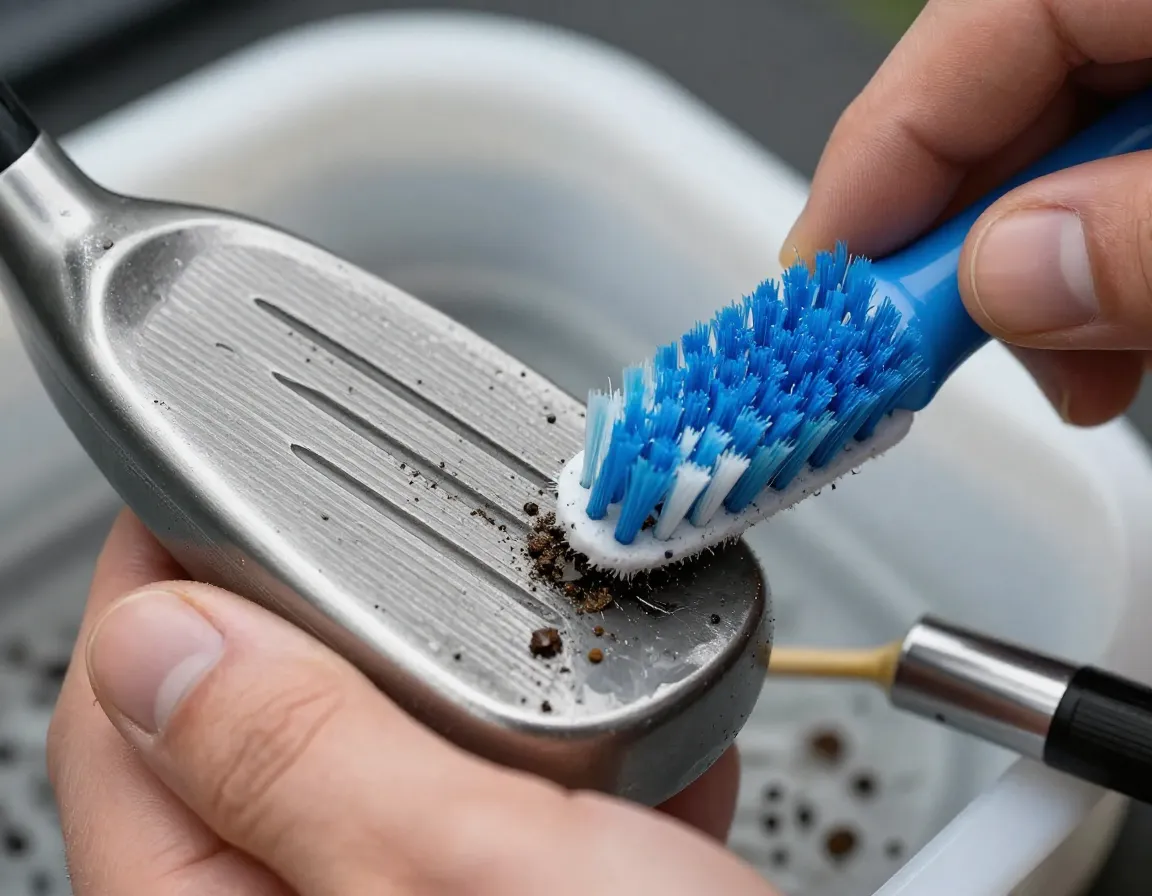
Using your soft-bristled brush, gently scrub the clubface, paying special attention to the grooves. Work systematically from heel to toe, ensuring you clean each groove thoroughly [1][2]. Dirty grooves reduce spin rates and accuracy, making this step crucial for both appearance and performance [7].
For stubborn dirt in the grooves, use a golf tee or plastic brush to carefully remove debris without scratching the metal surface.
5. Target Rust with Natural Acids
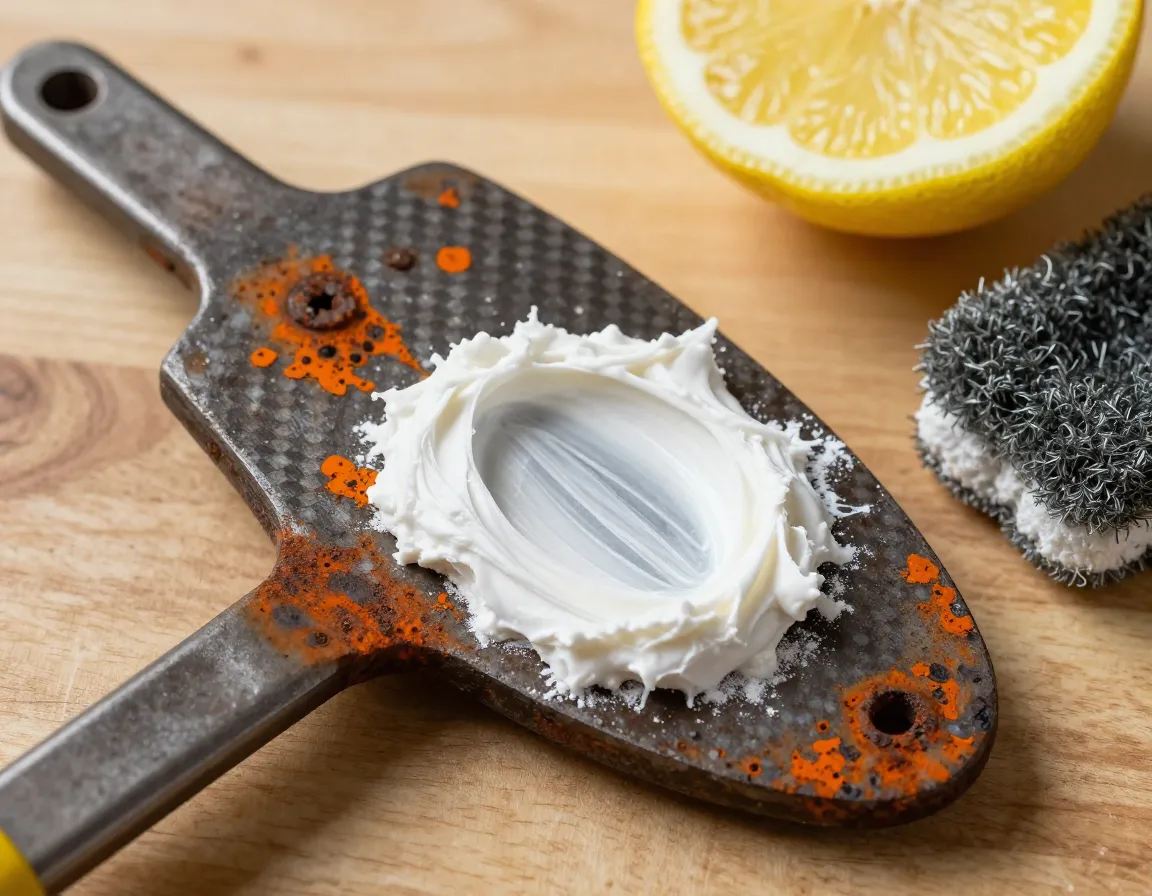
For rust spots, create a paste using lemon juice or white vinegar mixed with a small amount of baking soda. Apply this mixture directly to rusted areas and let it sit for 10-15 minutes [1][6]. The natural acids break down surface rust effectively without harsh chemicals.
After the treatment time, gently scrub with fine-grade steel wool (0000 grade) in small circular motions. Steel wool should be used gently to buff out remaining corrosion without scratching the clubface [5].
6. Rinse and Inspect
Thoroughly rinse each club with clean water to remove all soap residue and cleaning solutions. Inspect your work carefully – you may need to repeat the rust treatment process for heavily corroded areas.
For severe rust cases, specialized rust removers exist, though household solutions often suffice for light to moderate rust [1][4].
7. Complete Drying Process
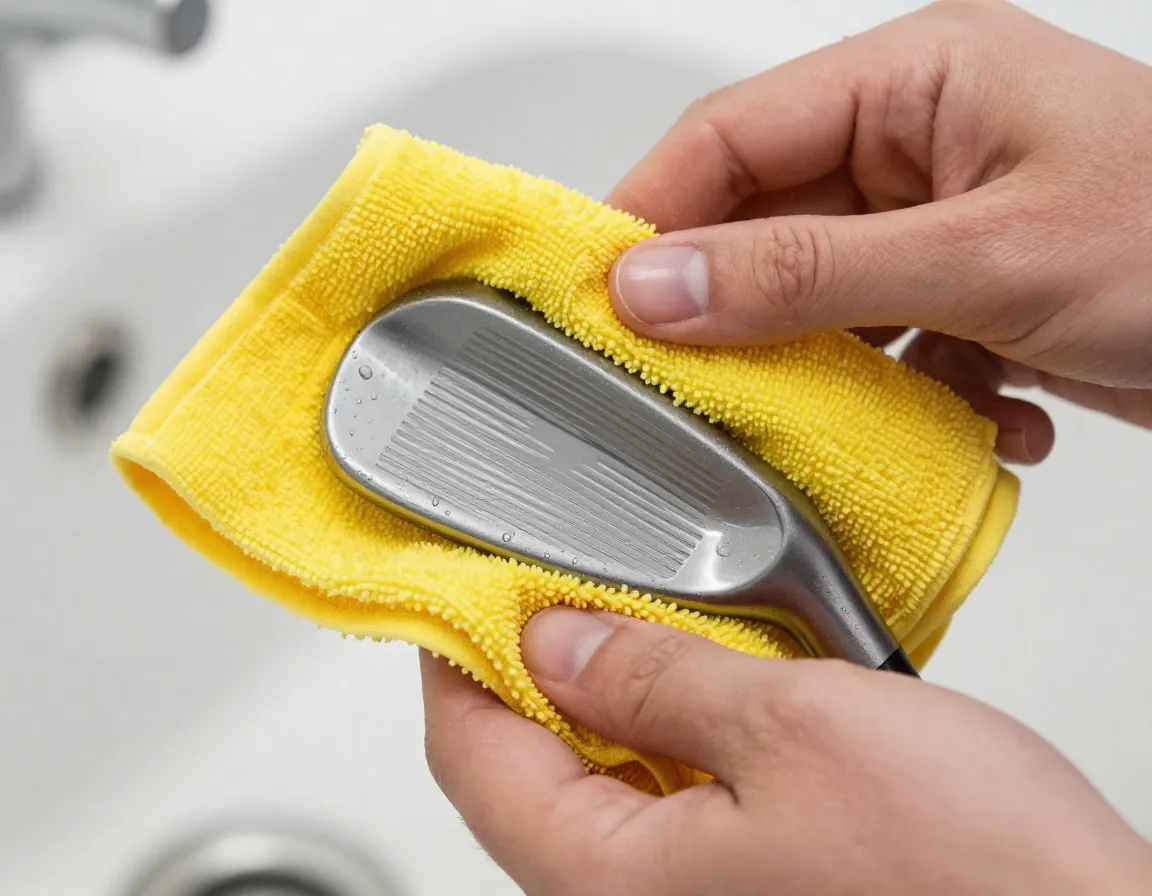
This step is absolutely critical. Complete drying with microfiber cloth is essential to prevent new rust formation and water spots [2][3]. Pay special attention to the grooves and any crevices where water might hide.
Allow clubs to air dry completely before moving to the final polishing step. Any remaining moisture can lead to new rust spots, undoing all your hard work.
8. Polish and Protect
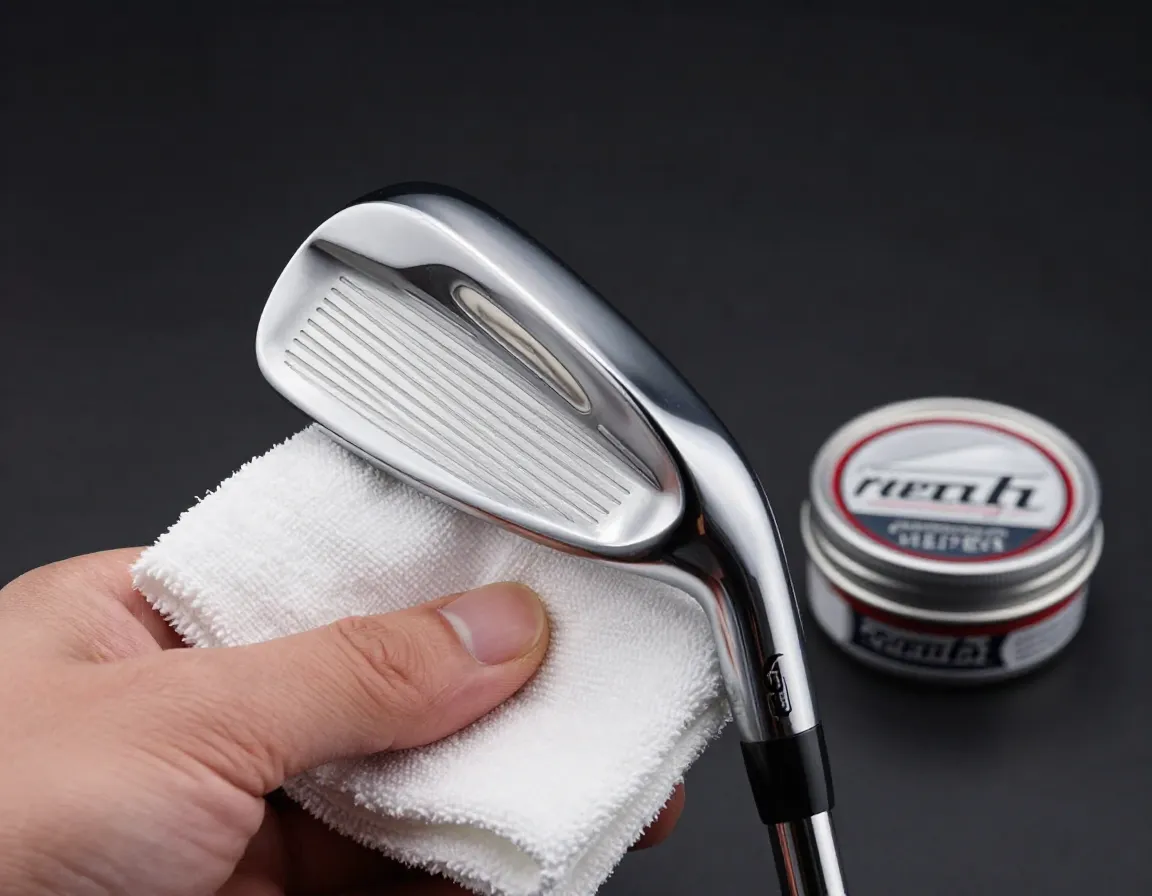
Apply a small amount of metal polish to chrome or stainless steel clubheads using a clean microfiber cloth [3]. Work in small sections, buffing to a high shine. For long-term protection, consider applying a thin coat of car wax after polishing.
This final step not only restores the visual appeal but also provides a protective barrier against future corrosion and wear.
Maintenance Tips to Prevent Future Restoration Needs
Regular maintenance prevents extensive restoration needs [1]. Here are my top tips for keeping your clubs in pristine condition:
After Every Round:
- Wipe clubs clean with a damp towel
- Use the course’s club washers properly
- Dry thoroughly before storing
Weekly Maintenance:
- Quick soap and water cleaning
- Inspect for early rust formation
- Clean and condition grips
Monthly Deep Clean:
- Follow steps 1-4 of the restoration process
- Apply protective wax coating
- Check for loose ferrules or grip issues
Conclusion
Mastering the 8 Effective Steps on How to Clean Old Golf Clubs and Restore Their Shine is a valuable skill that can save you money and improve your game. From the initial gentle cleaning with mild dish soap to the final polishing that brings back that showroom shine, each step plays a crucial role in the restoration process.
Remember that patience and the right technique matter more than expensive products. Start with gentle methods, respect the materials you’re working with, and never rush the drying process. With these proven techniques, even the most neglected clubs can be transformed into performance-ready equipment that looks professional and plays beautifully.
Your next steps: Gather your supplies, assess your clubs’ condition, and start with the least damaged club to build your confidence. Take before and after photos to track your progress, and don’t be afraid to repeat steps for heavily damaged areas. Your restored clubs will not only look fantastic but will also perform better, giving you the confidence to tackle any shot on the course.
References
[1] Golf Club Restoration – https://www.tourqualitygolf.com/2025/01/27/golf-club-restoration/
[2] How To Clean Golf Clubs – https://www.birdieball.com/blogs/news/how-to-clean-golf-clubs
[3] How To Refurbish Golf Clubs – https://vovexgolf.com/blogs/golf/how-to-refurbish-golf-clubs
[4] How To Refurbish Golf Clubs – https://golfhireireland.com/blog/how-to-refurbish-golf-clubs/
[5] How To Clean Golf Clubs – https://embersgolf.com/blog/how-to-clean-golf-clubs/
[6] How To Restore And Clean Used Golf Clubs – https://www.hagginoaks.com/blog/how-to-restore-and-clean-used-golf-clubs/
[7] Watch – https://www.youtube.com/watch?v=ZxF3FQYis9k