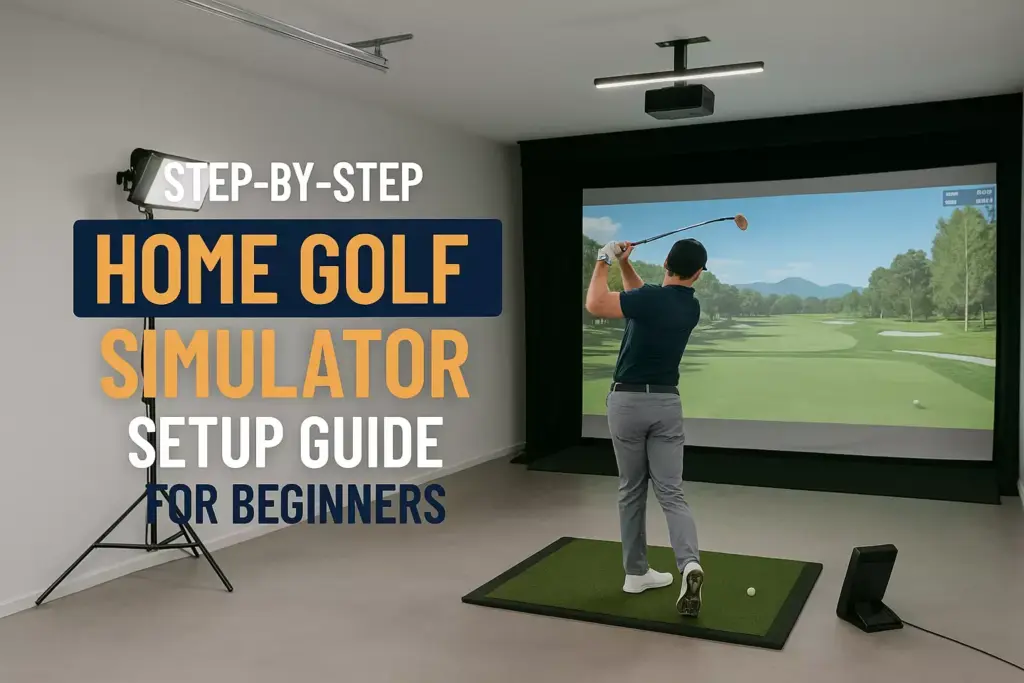
Step-by-Step Home Golf Simulator Setup Guide for Beginners
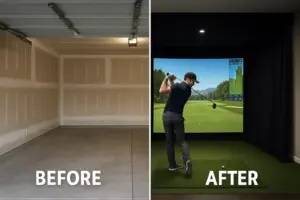
Imagine stepping into your garage, basement, or spare room and instantly transporting yourself to Pebble Beach, Augusta National, or St. Andrews—all without leaving your home. Home golf simulators have revolutionized how golf enthusiasts practice and play, offering year-round access to world-class courses and professional-grade swing analysis. With the global golf simulator market projected to reach $2.8 billion by 2025, more golfers than ever are discovering the incredible benefits of bringing the fairway indoors.
Setting up a home golf simulator might seem overwhelming at first, but with the right guidance and planning, anyone can create their own personal golf paradise. Whether you’re looking to improve your handicap, entertain guests, or simply enjoy golf regardless of weather conditions, this comprehensive guide will walk you through every step of the process.
Key Takeaways
- Space requirements: Most home golf simulators need a minimum of 10 feet wide, 12 feet deep, and 9 feet high to accommodate proper swing mechanics
- Budget planning: Entry-level setups start around $3,000-$5,000, while premium systems can exceed $30,000
- Essential components: Launch monitor, projector, impact screen, hitting mat, and simulation software form the core of any system
- Installation timeline: Most DIY installations take 2-4 weekends to complete, depending on complexity and customization
- ROI benefits: Home simulators typically pay for themselves within 2-3 years compared to regular golf course fees and lessons
Understanding Golf Simulator Components
Before diving into the setup process, it’s crucial to understand the core components that make a golf simulator function effectively. Each element plays a vital role in creating an authentic and accurate golf experience.
Launch Monitor Technology 🎯
The launch monitor serves as the brain of your golf simulator, capturing critical data about your swing and ball flight. Modern launch monitors use either camera-based systems, radar technology, or infrared sensors to track:
- Ball speed and club head speed
- Launch angle and spin rate
- Carry distance and total distance
- Club path and face angle
Popular options include the SkyTrak (camera-based, $2,000), FlightScope Mevo+ (radar-based, $2,000), and Foresight GCQuad (camera-based, $14,000+).
Projection Systems
Your projector creates the visual golf course experience. Key specifications to consider:
- Brightness: Minimum 3,000 lumens for adequate visibility
- Resolution: 1080p minimum, 4K preferred for crisp graphics
- Throw ratio: Short-throw projectors work best in confined spaces
- Lamp life: LED projectors offer longer lifespan than traditional bulbs
Impact Screens and Enclosures
The impact screen safely stops golf balls while displaying the projected image. Quality screens feature:
- Durable materials like vinyl or polyester blend
- Proper tensioning to prevent ball bounce-back
- Seamless surface for clear image projection
- Easy installation with grommets or mounting systems
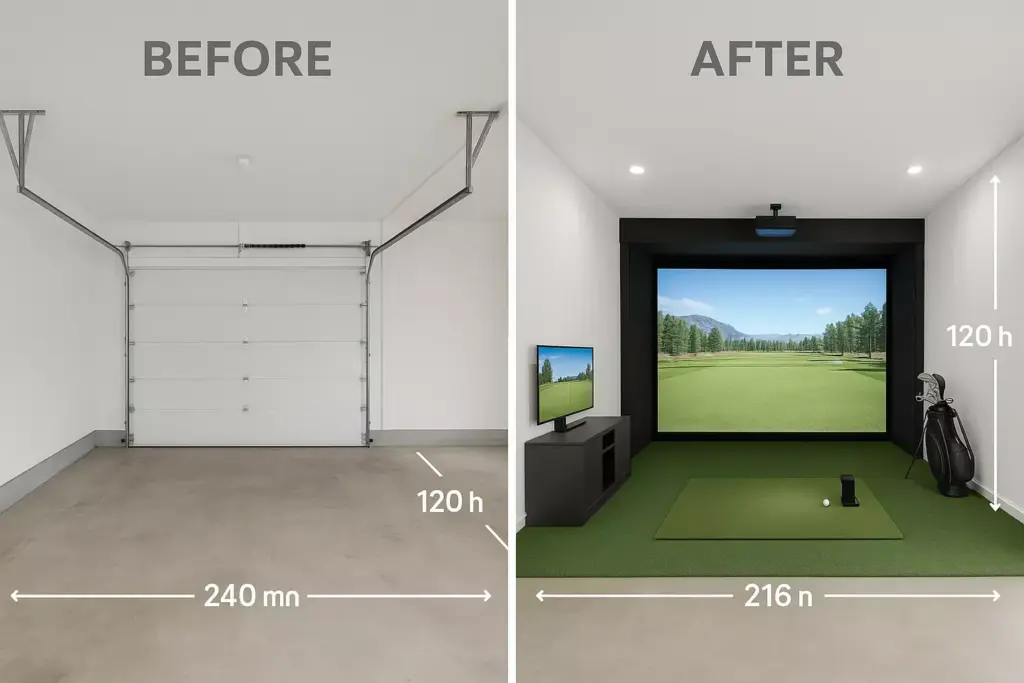
Space Planning and Requirements
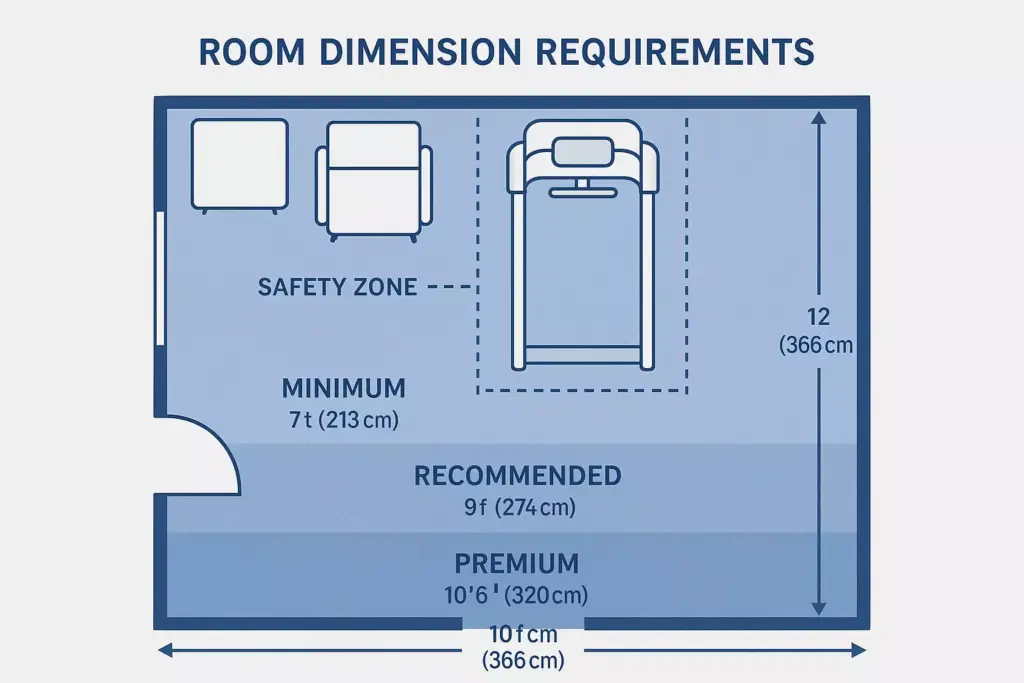
Minimum Space Dimensions 📏
Creating an effective golf simulator requires careful space planning. Here are the essential measurements:
| Dimension | Minimum | Recommended | Premium |
|---|---|---|---|
| Width | 10 feet | 12 feet | 15+ feet |
| Depth | 12 feet | 15 feet | 18+ feet |
| Height | 9 feet | 10 feet | 12+ feet |
Room Selection Considerations
Basement setups offer several advantages:
- ✅ Naturally isolated from household noise
- ✅ Consistent temperature control
- ✅ Minimal ceiling height restrictions
- ❌ Potential humidity issues
- ❌ Limited natural lighting
Garage conversions provide:
- ✅ Ample space for larger setups
- ✅ Easy equipment access
- ✅ Concrete flooring for stability
- ❌ Temperature fluctuations
- ❌ Insulation requirements
Electrical and Networking Needs
Plan for adequate electrical infrastructure:
- Dedicated 20-amp circuit for projector and electronics
- Multiple outlets positioned strategically
- Ethernet connection for stable internet (Wi-Fi can cause lag)
- Proper grounding for sensitive electronics
Budget Planning Guide

Entry-Level Setup ($3,000-$7,000) 💰
Perfect for beginners wanting to experience golf simulation:
- Launch monitor: SkyTrak or Garmin Approach R10 ($2,000)
- Projector: Optoma HD146X ($500)
- Impact screen: Carl’s Place DIY kit ($400)
- Hitting mat: TrueStrike or Fiberbuilt ($300-800)
- Software: E6 Connect or TGC 2019 ($200-400)
Mid-Range Setup ($7,000-$15,000)
Offers enhanced accuracy and features:
- Launch monitor: FlightScope Mevo+ or Uneekor EYE XO ($2,000-4,000)
- Projector: Epson or BenQ short-throw ($1,200)
- Premium screen: Rain or Shine Golf ($800-1,200)
- Professional mat: TrueStrike or Country Club Elite ($800-1,500)
- Enclosure: Complete netting system ($1,000-2,000)
Premium Setup ($15,000+)
Professional-grade systems with commercial accuracy:
- Launch monitor: Foresight GCQuad or Trackman ($14,000+)
- 4K projector: Sony or Epson laser projector ($3,000+)
- Custom enclosure: Professional installation ($3,000-5,000)
- Advanced software: Multiple course packages ($1,000+)
Step-by-Step Installation Process
Phase 1: Room Preparation 🔨
Week 1-2: Foundation Work
- Clear and clean the designated space completely
- Measure and mark equipment positions using painter’s tape
- Install electrical outlets in planned locations
- Run ethernet cable to launch monitor position
- Address flooring – level concrete or install subflooring
- Insulate and drywall if necessary (garages)
Pro Tip: Take photos during electrical work for future reference when troubleshooting or making modifications.
Phase 2: Mounting Systems
Week 3: Ceiling and Wall Mounts
- Locate ceiling joists using a stud finder
- Install projector mount ensuring proper alignment
- Mount impact screen with appropriate tensioning
- Set up side netting for ball containment
- Install lighting controls for optimal visibility
Critical measurements:
- Projector distance: 12-14 feet from screen
- Screen height: Bottom edge 6-8 inches from floor
- Hitting position: 8-10 feet from screen
Phase 3: Equipment Installation
Week 4: Technology Setup
- Position launch monitor according to manufacturer specs
- Connect projector and test image alignment
- Install simulation software on dedicated computer
- Calibrate launch monitor following setup procedures
- Test all connections and troubleshoot issues
Phase 4: Fine-Tuning and Calibration
Week 5-6: Optimization
- Adjust projector settings for optimal brightness and color
- Fine-tune launch monitor positioning and calibration
- Test various clubs to ensure accurate readings
- Optimize software settings for personal preferences
- Create user profiles and save configurations
Software Selection and Setup
Popular Simulation Software Options
E6 Connect 🎮
- Strengths: Realistic graphics, extensive course library
- Pricing: $99/month or $899/year
- Best for: Serious golfers wanting premium courses
TGC 2019 (The Golf Club)
- Strengths: User-generated courses, one-time purchase
- Pricing: $40-60 one-time fee
- Best for: Budget-conscious users, course designers
GSPro
- Strengths: Professional-grade accuracy, tournament play
- Pricing: $250/year
- Best for: Competitive players, golf professionals
Software Installation Tips
- Dedicate a computer exclusively to golf simulation
- Install on SSD for faster loading times
- Update graphics drivers before installation
- Configure network settings for optimal performance
- Create system backup after successful setup
Common Setup Challenges and Solutions
Launch Monitor Issues 🔧
Problem: Inconsistent ball tracking
Solutions:
- Verify proper height and distance positioning
- Clean launch monitor lenses regularly
- Ensure adequate lighting conditions
- Check for interference from other electronics
Problem: Club data not registering
Solutions:
- Apply impact tape to club faces
- Adjust swing plane to stay within sensor range
- Calibrate club settings in software
- Update launch monitor firmware
Projection Problems
Problem: Image appears distorted or keystone
Solutions:
- Use projector’s built-in keystone correction
- Adjust mounting angle and distance
- Ensure screen is properly tensioned and flat
- Check projector lens for dust or damage
Problem: Poor image brightness
Solutions:
- Increase projector brightness settings
- Install blackout curtains or lighting control
- Clean projector filter and lens
- Consider upgrading to higher-lumen projector
Software and Connectivity Issues
Problem: Lag or delayed response
Solutions:
- Use wired ethernet instead of Wi-Fi
- Close unnecessary background programs
- Increase computer RAM if needed
- Update graphics card drivers
Maintenance and Optimization
Regular Maintenance Schedule 📅
Weekly Tasks:
- Clean launch monitor lenses
- Vacuum hitting mat and surrounding area
- Check screen tension and alignment
- Wipe down equipment surfaces
Monthly Tasks:
- Clean projector filter
- Update software and firmware
- Inspect electrical connections
- Test backup systems
Quarterly Tasks:
- Deep clean all equipment
- Recalibrate launch monitor
- Check and tighten all mounts
- Review and optimize settings
Performance Optimization
Maximize accuracy by:
- Maintaining consistent setup conditions
- Using quality golf balls (avoid range balls)
- Keeping equipment clean and calibrated
- Regular software updates
Enhance experience through:
- Adding surround sound system
- Installing RGB lighting for ambiance
- Creating comfortable seating area
- Adding mini-fridge and storage
Advanced Features and Upgrades
Swing Analysis Tools 📊
Modern golf simulators offer sophisticated swing analysis capabilities:
- 3D swing visualization showing club path and plane
- Pressure plate technology analyzing weight transfer
- High-speed cameras capturing impact position
- Biomechanical feedback for swing improvement
Multi-Sport Capabilities
Many systems support additional sports:
- Baseball/softball hitting practice
- Cricket batting simulation
- Soccer penalty kicks
- Football field goal practice
Smart Home Integration
Connect your simulator to smart home systems:
- Voice control for software navigation
- Automated lighting scenes for different conditions
- Climate control integration for comfort
- Security system integration for equipment protection
Troubleshooting Common Issues
Hardware Troubleshooting
Projector won’t turn on:
- Check power connections and outlet
- Verify remote battery charge
- Inspect power cable for damage
- Test with different power source
Launch monitor not connecting:
- Restart device and software
- Check USB/network connections
- Update device drivers
- Reset network settings
Software Problems
Game crashes or freezes:
- Close and restart application
- Check system requirements
- Update graphics drivers
- Reinstall software if necessary
Courses won’t load:
- Verify internet connection
- Check subscription status
- Clear software cache
- Contact software support
🏌️ Golf Simulator Budget Calculator
Return on Investment Analysis
Cost Comparison: Home Simulator vs. Golf Course
Annual golf course expenses for an average golfer:
- Green fees: $3,000-6,000 annually
- Cart rentals: $800-1,200 annually
- Range balls: $400-600 annually
- Travel costs: $500-1,000 annually
- Total: $4,700-8,800 annually
Home simulator costs:
- Initial investment: $5,000-15,000
- Annual software: $200-900
- Maintenance: $200-500 annually
Most home simulators pay for themselves within 2-3 years, while providing unlimited access and practice opportunities.
Additional Value Benefits 📈
Convenience factors:
- No tee time reservations required
- Weather-independent golf access
- Immediate feedback and analysis
- Family entertainment value
Skill improvement:
- Consistent practice conditions
- Detailed swing analytics
- Video replay capabilities
- Professional lesson integration
Future-Proofing Your Setup
Technology Trends to Consider
Artificial Intelligence integration:
- AI-powered swing coaching
- Predictive performance analytics
- Personalized training programs
- Automated course recommendations
Virtual Reality enhancements:
- Immersive course experiences
- 360-degree environments
- Haptic feedback systems
- Social VR golf tournaments
Expandability Planning
Design your setup with future upgrades in mind:
- Allocate extra space for equipment additions
- Install additional electrical circuits
- Plan cable management for new devices
- Consider modular enclosure systems
Conclusion
Creating your own home golf simulator represents one of the most rewarding investments any golf enthusiast can make. From the initial planning stages through the final calibration, each step brings you closer to having unlimited access to world-class golf courses and professional-grade practice facilities.
The key to success lies in careful planning, realistic budgeting, and attention to detail during installation. Whether you choose an entry-level setup to get started or invest in a premium system from the beginning, the benefits of year-round golf access, detailed swing analysis, and family entertainment will provide value for years to come.
Remember that your first installation doesn’t have to be your last. Many golf simulator enthusiasts start with basic components and gradually upgrade their systems as their needs evolve and budgets allow. The modular nature of most simulator setups makes this progression both practical and cost-effective.
Next Steps 🎯
- Measure your available space and create a detailed floor plan
- Set a realistic budget using the calculator above
- Research local electrical requirements and obtain necessary permits
- Order your core components starting with launch monitor and projector
- Schedule installation time allowing 2-4 weekends for completion
- Connect with online communities for ongoing support and tips
Your journey into home golf simulation starts with a single swing. Take that first step today, and soon you’ll be enjoying unlimited golf from the comfort of your own home, regardless of weather, time of day, or season. The fairways await—right in your own space.